

 Jackson Lane
A domain transfer is the process of switching a domain’s registration from one registrar to another. In contrast, website migration involves a complex process of transferring core files and the server environment.
Transferring a domain without downtime or data loss is an art to master so visitors won’t experience downtime during the process. The guide walks through the complete steps of transferring a domain, so you navigate registrars confidently without breaking the website or email in the process.
Table of Content
When Should You Transfer a Domain?

1. Save Money with Better Pricing and Renewals
Cost is one of the most common reasons to transfer a domain. Many domain registrars offer the cheap first-year deal but raise renewal prices significantly. Other reseller-focused registrars charge volume-based markups on every year of registration, meaning you have to hit a particular volume or revenue threshold to get access to better pricing. By moving to a provider with fair and transparent pricing, you can cut costs over the long term.
Also Read: Myths and Facts about Transferring a Domain Name
2. Consolidate Multiple Domains Under One Provider
If you are managing domains across different domain name providers, it is easy to lose track. You may miss renewal reminders, overlook DNS changes, or struggle keeping records updated. Consolidation is a simple reason to transfer your domain names. It truly makes everything easier.
3. Access Better Customer Support and Tools
Another strong reason to transfer the domain is support. Not all registrars offer timely, expert help. Others lack the specific expertise that resellers and those who manage domains in bulk need.
Also Read: Top .net Domain Name Providers
Steps to Transfer a Domain
1. Confirm the 60-Day Eligibility Window
Before doing anything else, check whether the domain is actually eligible to transfer. ICANN rules need a domain to be at least 60 days past its initial registration, and there’s also a 60-day lock that kicks in after changes. If you skip this check, you may spend an hour preparing everything else only to find that your transfer request is rejected outright, so it is worth confirming the domain’s eligibility before investing time in the rest of the checklist.
2. Unlock the Domain
Most registrars lock domains by default to prevent unauthorized transfers, which is a good security feature right up until you are the one trying to move it. Log into the current registrar’s dashboard and look for a domain lock or transfer lock setting; it is usually sitting right in the domain management panel. Disable it, and allow it a few minutes to take effect before moving to the next step, since many registrars don’t apply the change instantly.
3. Update and Verify Your WHOIS Registrant Email
Your transfer approval email goes to whatever address is listed as the registrant contact in WHOIS, so if that email is outdated, an old work address, or a domain you no longer check, the whole process stalls before it starts. Take a minute to log in and confirm the registrant email is current and something you can actually access. This one gets overlooked more often than you’d expect, especially on domains that haven’t been touched in a year or two.
4. Disable Privacy Protection Temporarily
WHOIS domain privacy protection is excellent for keeping the personal information private. However, masking the registrant’s email can prevent them from receiving the transfer approval link. If your registrar’s privacy service doesn’t forward transfer-related email properly, temporarily disable it just long enough to complete the transfer, then turn it back on afterwards once everything is settled at the new registrar.
5. Get the Authorisation Code
The authorisation code, also known as the EPP (Extensible Provisioning Protocol) code, is essentially the password that authorises moving the domain to another registrar. You will find it in the current registrar’s domain settings, sometimes requiring an extra verification step or a short waiting period before it’s issued. Use this code at the new registrar to initiate the transfer.
6. Check for Pending Changes or Disputes
Any recent modification to your domain, a registrant info change, a recent transfer, or an active dispute puts a hold on the ability to transfer for a set period. Before starting, double-check your domain’s status in the registrar dashboard for anything that looks like a pending change or unresolved flag. Catching these early saves you from submitting a transfer request that just sits there unresolved.
7. Note Your Current Expiry Date
Finally, note down the domain’s current expiration date before you start. Most transfers add a year to your registration automatically, but it is still worth having the original date on hand so you confirm the new registrar applied things correctly once the transfer completes. It’s a small step, but it gives you an easy way to catch a billing or renewal error before it becomes a bigger headache later.
Also Read: Best .in Domain Name Providers
Common Mistakes That Delay or Fail Transfers
1. Forgetting to Unlock the Domain
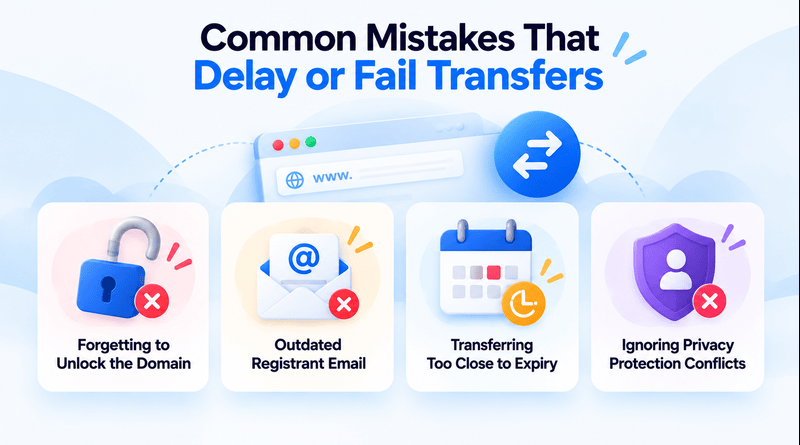
It is probably the single most common reason a transfer request fails outright. Registrars lock domains by default as a security measure, and if the lock is active while submitting a transfer request, it gets rejected. Since this step is hidden in the domain settings rather than being prominently displayed, it’s simple to overlook, so it’s worth double-checking before submitting anything.
2. Outdated Registrant Email
Your transfer approval email goes to whatever address is on file as the registrant contact, and if that email is obsolete, the entire domain transfer process is stalled. The request may remain pending indefinitely while waiting for approval, without displaying an error message. This can be confusing if you are unaware of the approval requirement. Verify that the address is up to date before proceeding.
3. Transferring Too Close to Expiry
Attempting a domain transfer when it’s close to its expiration date creates complications. Some registrars restrict transfers within a certain window before expiry to prevent disputes or accidental lapses. If your domain is within a few weeks of expiring, it is often safer to renew first and then transfer, rather than risk the transfer process interfering with your renewal schedule.
4. Ignoring Privacy Protection Conflicts
WHOIS privacy protection is designed to shield your personal contact information. It can inadvertently block the transfer approval email from reaching you if the privacy service doesn’t forward it properly. It is an easy one to miss since privacy protection is usually something you set up once and forget about; it is worth checking whether it needs to be temporarily disabled before initiating the transfer process.
Conclusion
Most failed or delayed domain transfers are triggered due to overlooked steps. A good thing is that every failed outcome is easy to resolve in advance, as long as you verify for them before you submit the request instead of after it stalls.
Review the checklist prior to planning your transfer. Confirm domain eligibility, unlock the domain, and verify WHOIS email privacy features before initiating the transfer process. Glitches and technical disruptions are inevitable if done manually and without technical expertise. Instead, MilesWeb is the right domain transfer provider to streamline the process without downtime, all backed by seasoned experts.
FAQs
1. How do I check if my domain is unlocked?
Login to your registrar’s dashboard and check the “Domain Lock” toggle on your domain settings. Another option would be to use a public WHOIS lookup service and look up the domain in the list; if you can’t find it, it means that it’s locked.
2. Where do I find my domain’s registration date?
Check your domain name on a legitimate WHOIS database (such as the one at lookup.icann.org). To find out exactly when it was registered, go to the results to find the ‘Created Date’ (or ‘Registration Date’) field.
3. Can I transfer a domain with privacy protection turned on?
It is possible (but not recommended) to transfer it. If it’s not cleared, the new registrar will see the contact information and most likely reject the verification or not register it for later.
4. What email address receives the transfer approval request?
The transfer authorisation request goes straight to the administrative contact email address found in your WHOIS information. If the privacy masking feature is enabled, make sure that the mail from your masked address is properly handled on your account’s end by your registrar to deliver it to the correct inbox address.