Planning to start a WordPress blog?
But… how to start a blog with WordPress? You might have read so much out there on the web, and your blogger friends might be telling you to do different things. Whom to listen? Where to start from?
Oh God, maybe you should just forget it – it’s too puzzling!
It’s a fact many beginners do not know how to start a blog in WordPress? It can be a tough especially when you are new. But wait. You aren’t alone now. We are here to help you.
With this free guide, you can make a blog with WordPress even if you are a beginner. So, may you be 8 or 88 years, you can easily create your own blog in very less time.
Let me tell you my experience of blogging. When I was learning for the first time to build a blog, I had made a ton of mistakes. This experience of mine will surely benefit you so that you don’t repeat these same mistakes while developing your own blog.
I promise building your blog will be simple, relatively easy, and definitely easy to understand. Sounds good?
Okay, let’s move on.
Reasons to Start a Blog
Make money from home:
Your blog can be rewarding, if it is set correctly. No doubt there are several top bloggers that earn good, but even a part-time blogger can expect to earn good profit if things are done right. The best part about earning money is that it is a form of passive income because investing just a few hours in a week writing a blog post can help you make money continuously after the blog post is written.
Share your story:
With a blog, you can have a voice and can be heard by the audience. Your story can be shared with the entire world through the blog. Blogs are commonly used as a diary where the blogger writes about his/her daily experiences so that his/her friends, family and others can be a part of their lives.
Recognition for yourself or your business:
Your latest blog post won’t have paparazzi following you. However, it’s for sure that a successful blog brings your idea into a reality and can increase your recognition in your respective field. Several bloggers are known as experts simply because of their blogs and some have even got book and movie deals depending on their blogs.
Find a community:
Blogging is actually interactive. How? Because people comment on your blog post. You will find it a great way to connect with people who share the same interest as you. With blogging, you can educate people based on your experience and you get the opportunity to learn from your readers too.
Know about MilesWeb’s Hosting for Bloggers Plans.
Things Required When You Create a Blog Page in WordPress
Check below the three things you need to create a WordPress blog:
- A domain name idea (It is the name of your blog i.e milesweb.co.uk/blog).
- A web hosting account (It is the place where your website lives on the internet).
- Your complete attention for 30 minutes.
That’s right! It is possible to start a blog from scratch in 30 minutes and I will take you through the complete process, step by step.
In this tutorial, I will cover:
Ready? Let’s start.
Step 1. Register a Domain Name and Select the Best Web Hosting
Selecting the wrong blogging platform while you create a blog post on WordPress is the biggest mistake beginners make when developing their blog.
Fortunately, you won’t be making that mistake as you are here.
Around 95% users use WordPress.org which is also known as self-hosted WordPress. What’s the reason?
This is because it is free to use and you can install plugins, customize your blog design and significantly make money from your blog without any restrictions.
Additionally, it is the number one platform used by all successful blogs. Note that 34% of all websites on the internet are based on WordPress.
Wondering why is WordPress free? Is there any hidden issue?
Not at all. WordPress is free as you are the one responsible for its setup and hosting.
It means you need a domain and web hosting.
People type the domain name to browse your website. It’s the address of your website on the internet.
Web hosting is basically a place where your website files live. So, every website needs web hosting.
Since the cost of domain name and web hosting is too high, beginners need to spend too much.
Fortunately, MilesWeb offers the domain name for free and 70% OFF on cheap hosting.
Being in the industry since 2012, MilesWeb has always aimed at offering the best services to cater the requirements of their customers. They currently serve over 16000 websites.
Moreover, MilesWeb team participates in all the WordCamp events held in India.
Let’s go ahead and purchase your domain + hosting from MilesWeb.
- Go to milesweb.co.uk in a new window.
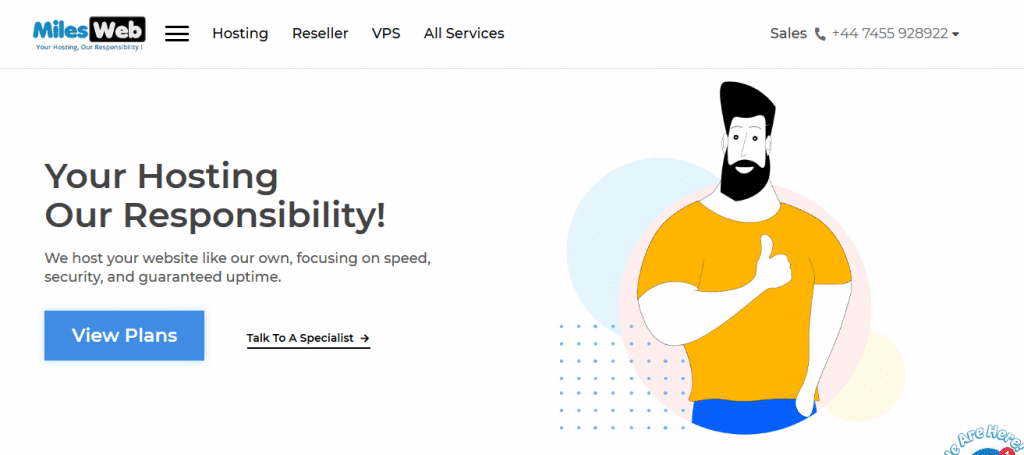
- You will find two options: View Plans and Talk To A Specialist.
- But if you are firm with your decision click on View Plans? option.
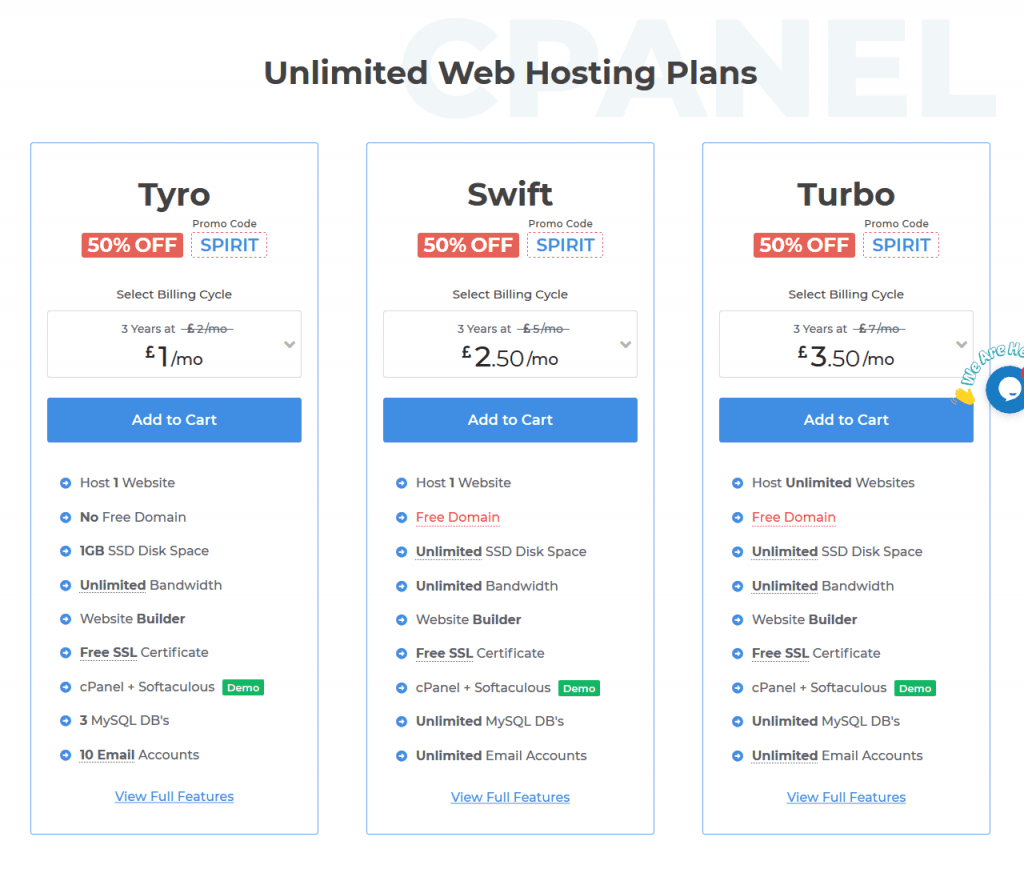
- Now select the plan that you want to buy and click on Add to Cart.
- On the next page, select your billing cycle.
- Below that under Register a New Domain, enter your domain name and check if it is available to buy.
- You will get a message of “Congratulations” if the domain is available. Click on Add to Cart.
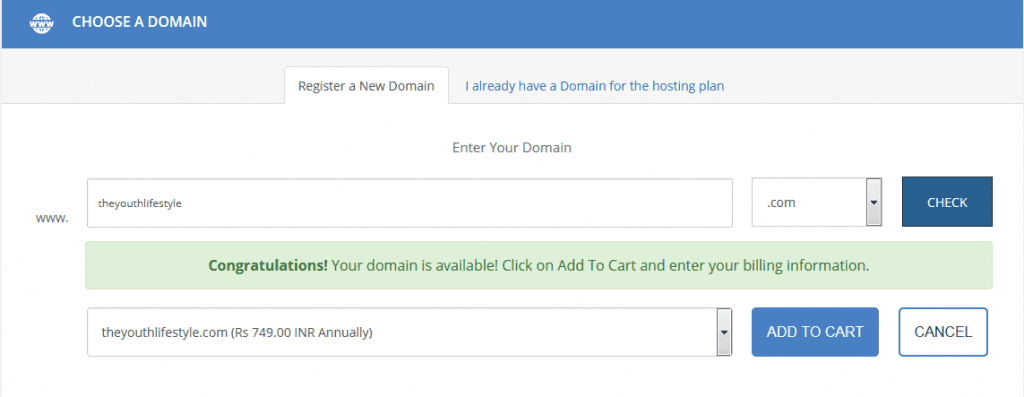
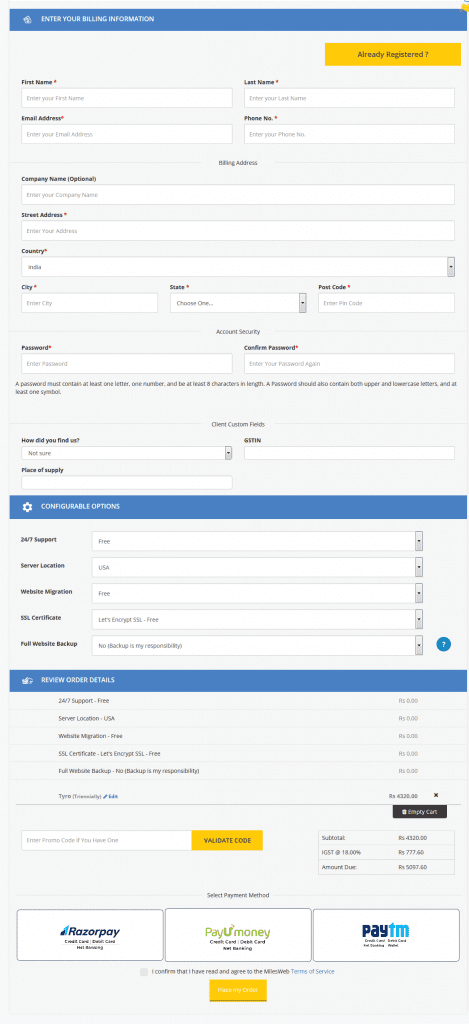
- Under Enter Your Billing Information fill in your personal details, billing address, password, configurable options and at last check the I confirm that I have read and agree to the MilesWeb Terms of Service box.
- Then click on Place my Order.
Step 2. Install and Setup WordPress Blog
You can easily install WordPress with the 1-click installer, Softaculous. Let’s check the steps to install WordPress below:
- Login to your cPanel account.
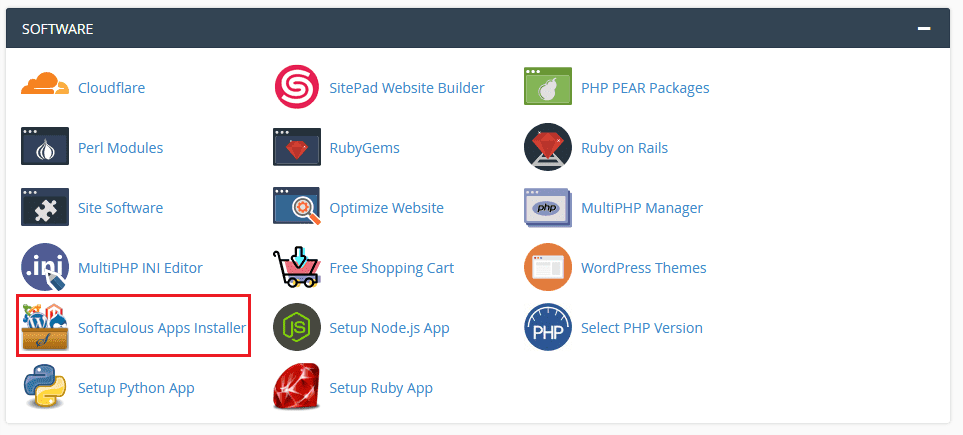
- Under the Software section, click on Softaculous App Installer.
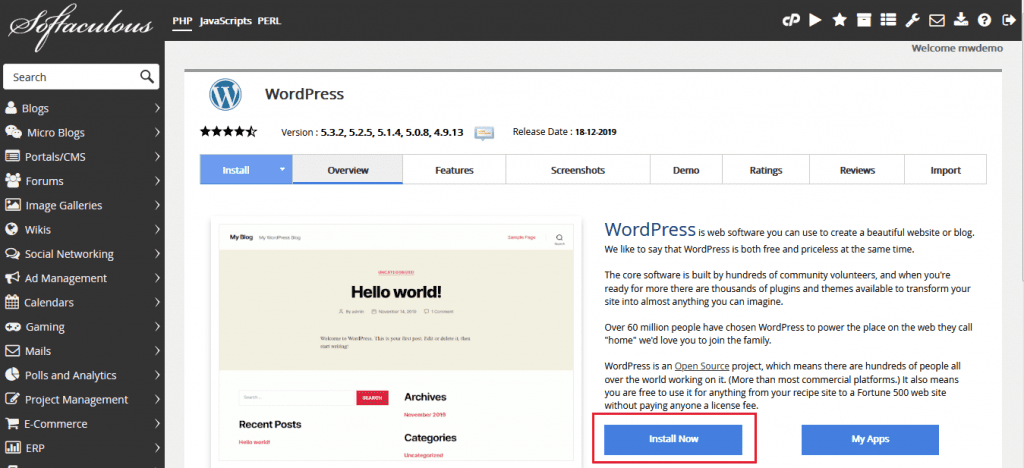
- Then click on the WordPress logo and Install Now button.
- Now you can select the options as per your preference such as WordPress version, installation URL, your site name, site description, username, password, email, language, plugins, etc.
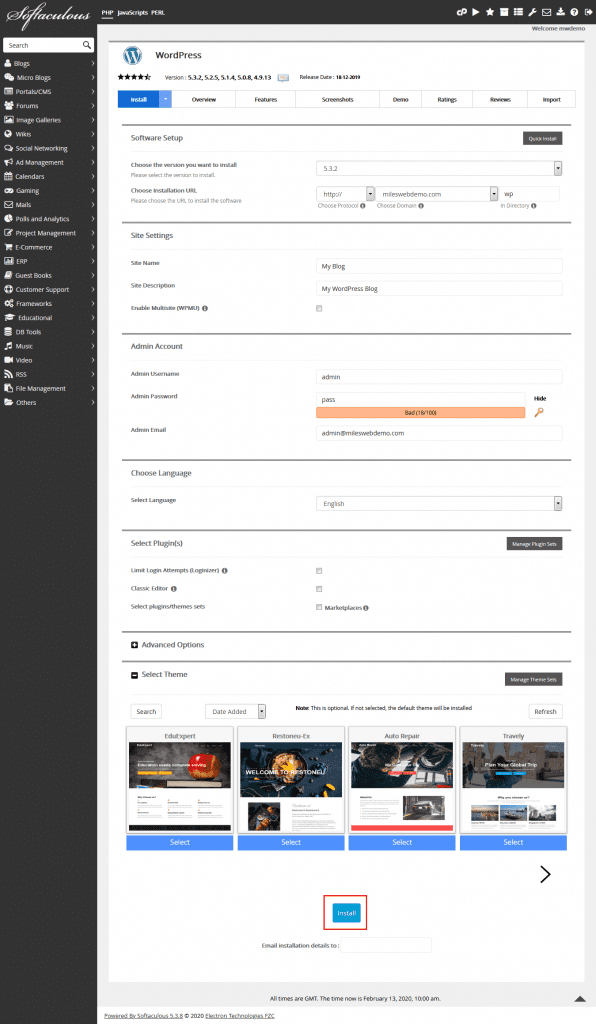
- Next click on the Install button at the bottom.
Your WordPress blog will be ready in just a few minutes.
Step 3. Steps to Change Your Blog Design Template
Themes play a key role while you create a blog using WordPress. When you visit your blog for the first time after installation, it appears as below:
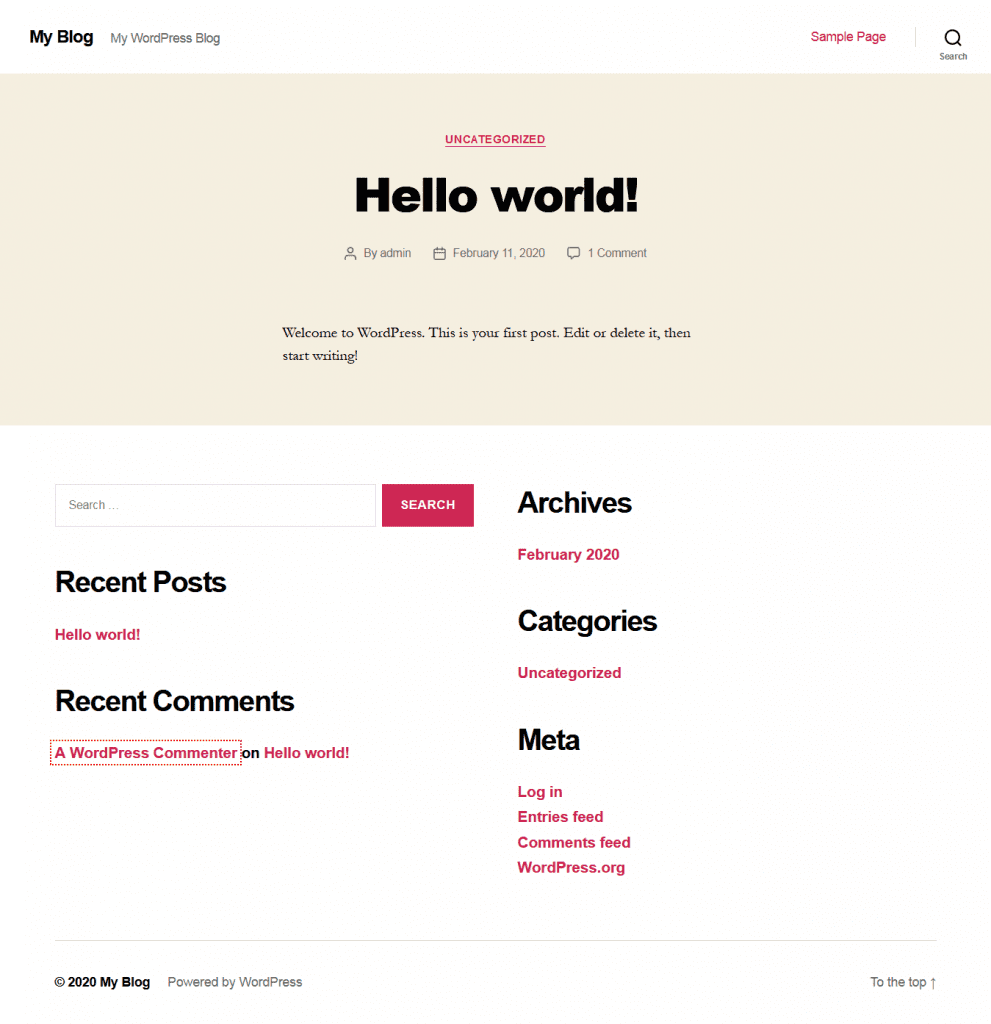
Does it really look good? Not at all.
Until you don’t put up some content and images on it, no one would get engaged.
It means you will need to customize your blog now. It is one of the exciting and rewarding parts in the journey of creating your WordPress blog.
You will get thousands of pre-made WordPress themes that can be installed on your website. These are free as well as paid.
For changing the theme, go to your WordPress dashboard and click on Appearance >> Themes.

Next click on Add New button.
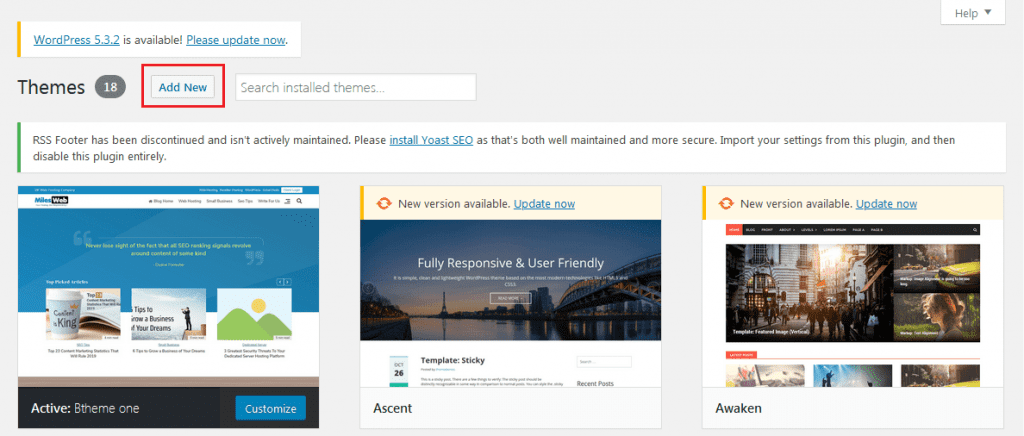
A window containing thousands of themes will get displayed from which you can select your favorite theme. These are the themes available in the official WordPress.org themes directory. You can sort the themes with latest, popular, featured, and so on.
You can also check the preview of the theme by clicking on the Preview button.

Though your theme won’t appear similar to that in preview, you can customize and set up it later. Just look for the design, colors, typography and other elements in the preview and select one. For maximum productivity in graphics, you can create a blog page in WordPress with Elementor. It is the plugin for visual editing.
While selecting your WordPress theme, check the simplicity in the design. This will keep the things clean and clear and give your visitors a good experience.
When you find your favorite theme, just click on the Install button and wait for it to install. To activate the theme, click on the Activate button.
After activating the theme, you can customize it by clicking on the Customize link under Appearance menu.
Related: A Definite WordPress Themes Guide For Beginners
After selecting the WordPress theme, you can now create your first blog post.
Step 4. Write Your First Blog Post
To create your blog post, click on Posts >> Add New in your WordPress dashboard.
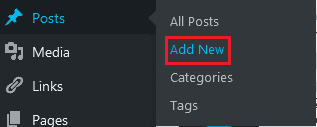
In the editor area, you can write the content for your first blog post.
A block-based editor is used by WordPress where each element is called as a block. You can create engaging content layouts for your blog posts.
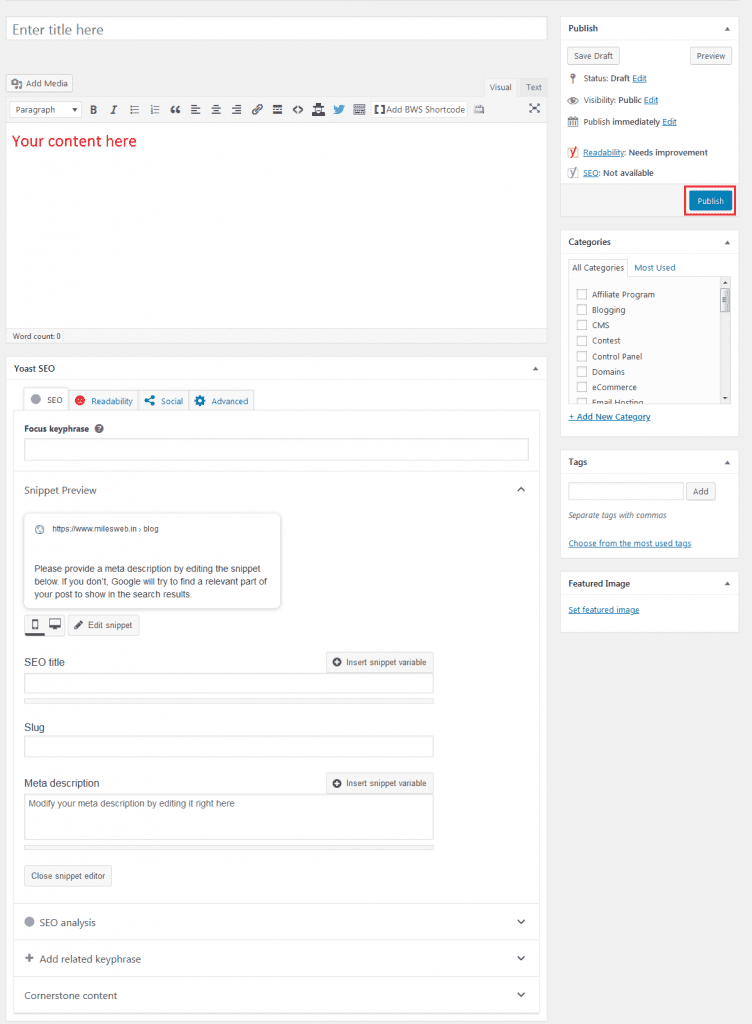
Once you finish writing the content, just add the title, description, meta tags, focus keyword, create a category, upload the featured image and click on Publish. This will make a blog page WordPress live publicly.
Step 5. Customize WordPress Blog with Plugins
After posting the first blog post, you can start adding usual elements on your website such as galleries, contact forms, sliders, newsletter subscription form, etc.
You can add these features using plugins.
Basically, WordPress plugins are apps that enable you to add new features to your website (without playing with the code).
There are more than 55,000 WordPress plugins present in the WordPress plugins directory alone and all of them are free. It means you will surely find a plugin for anything you want to do.
Let’s now head towards use of plugins to add some essential features to your WordPress blog.
Step 6. Add a Contact Form
A website is incomplete without a contact form. This is because it allows visitors to contact you directly.
Unfortunately, WordPress doesn’t by default come with a contact form and so, you will need to install a WordPress form builder plugin for adding the contact form to your website.
It is suggested to use WPForms Lite plugin which is the best contact form plugin for WordPress. This version is available for free.
Mentioning about its popularity, it is used by more than 3 million websites.
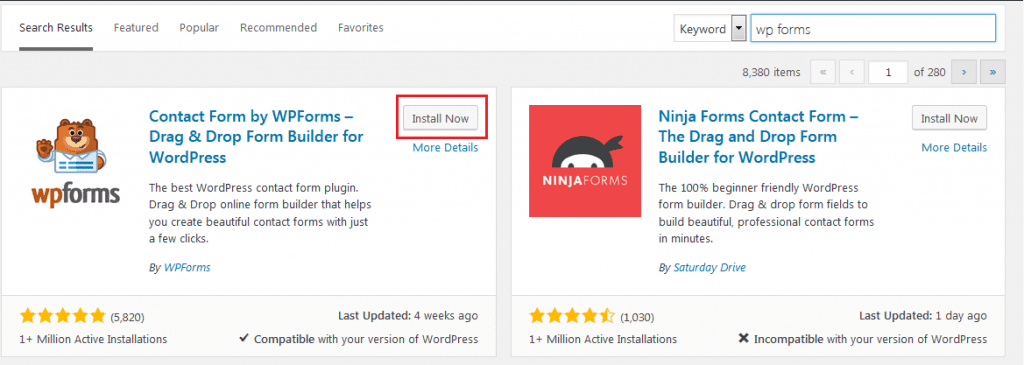
For installing this plugin, go to Plugins >> Add New and type WPForms in the search box.

Then click on Install and then Activate. When the plugin gets activated, head to WPForms >> Add New to create your first contact form.
With this, the WPForms builder interface will get displayed.
Here, enter a name of your contact form and click on ‘Simple Contact Form’ template.
After this, a simple contact form will be created with all the required fields. In order to change a field, you just need to click on it or you can even add a new field from the left column.
Once you complete modifying the contact form, click on the Save button at the top right corner and the exit the form builder.
You can also create a page in WordPress from the Pages >> Add New and name it as ‘Contact’. Then you need to enter the WPForms block into the editor.

Now select the form created from the drop down menu and it will load a live preview of the form in the editor.
Just save and publish the page. In order to see if it is working well, check it in your browser.
Step 7. Setup Google Analytics Tracking
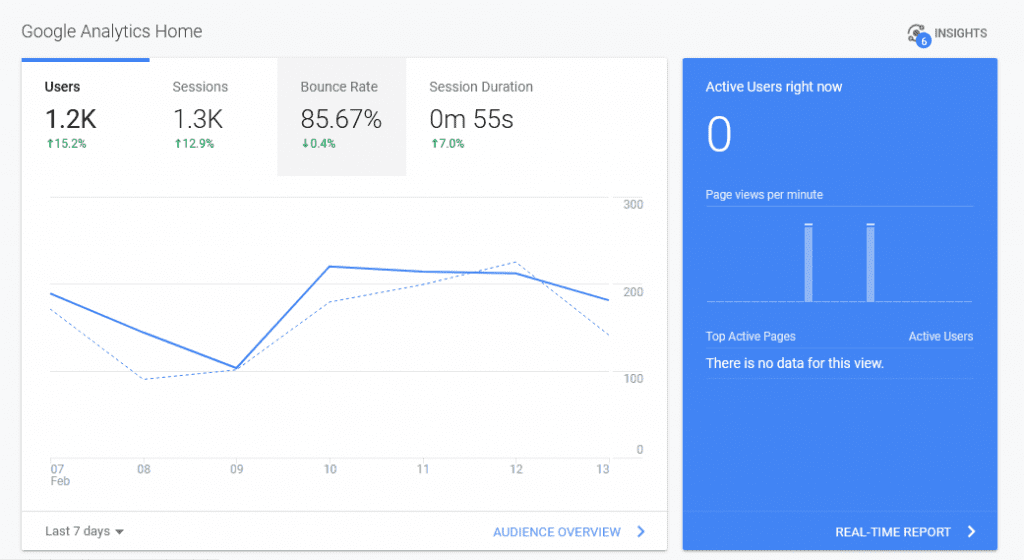
Google Analytics displays the number of people visiting your blog, their location and the action taken by them on your blog.
Therefore, you should install Google Analytics while starting your blog. This will help you to know the growth of your blog.
For this, visit Google Analytics website and sign in with your Gmail account.
Then sign up for a free Google Analytics account.
It will prompt you for your information and website URL. Then you will receive your Google Analytics tracking code.
Don’t go further from here as we will use a plugin for automatic fetching and then add this code to your blog with proper WordPress tracking.
Hover to your WordPress admin area to install and activate the MonsterInsights plugin. We are using this, as it is a free version of the best Google Analytics plugin for WordPress. Also, it makes the process of adding Google Analytics on your site easy.
After activating it, go to Insights >> Settings to customize the plugin settings.
Here, click on the ‘Connect MonsterInsights’ button to connect Google Analytics to your WordPress site.
Then follow the instructions given to complete the setup. After this, you will see your website analytics report directly from your WordPress dashboard under the MonsterInsights tab.
Step 8. Optimize Your Website for SEO
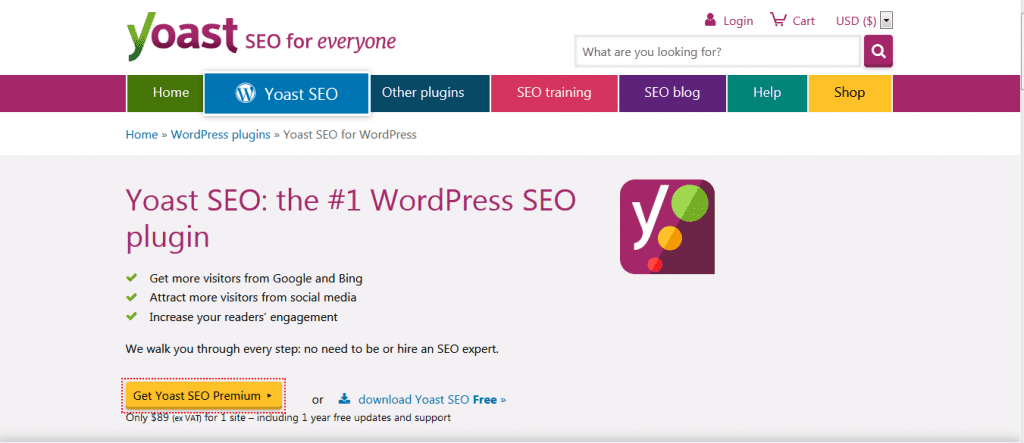
Many of you don’t optimize for SEO while creating a blog. With SEO or search engine optimization, users can find your blog in search engines. For more traffic, it is important to optimize your blog for SEO from the start.
At first, install and activate the Yoast SEO plugin. It is a complete WordPress SEO plugin that will help you in your blog optimization.
Once the plugin is activated, you will see a new menu item labeled ‘SEO’. When you click on it, you will land on the plugins’ settings page.
It will display a quick configuration wizard for moving through the setup.
Step 9. Make Money From Your Blog
So, you understood how to create a blog post in WordPress and customize it as per your preference successfully. Next what? Wondering how to make money from it?
You will find various ways to monetize your blog successfully. But there isn’t a shortcut or quick way for it.
Like you don’t get fooled looking at the pictures of expensive cars and mansions, similarly don’t get tricked with several “make money online” articles.
If you’re willing to work hard and take efforts, you will surely be successful. Remember, you can’t achieve success in a shortcut way.
Check below some of the best ways to make money from your blog:
1. Google AdSense
You can earn money by displaying ads on your blog. For this, Google AdSense is the best way.
It is used by several bloggers and publishers to make money. Google acts as a middleman between you and the advertiser by allowing advertisers to bid for keywords that match your content. With this, you get the best rates possible for the ads.
2. Affiliate Marketing
The second most common monetization strategy used by bloggers is affiliate marketing. In this, you recommend your favorite products / services to your visitors and when they purchase that, you get a referral commission.
In affiliate marketing, you should recommend high-quality products and services that you are using and have trust in. For WordPress, you will get plenty of affiliate marketing plugins and tools that can help you earn more by promoting affiliate products.
Related: A Complete Guide to MilesWeb Affiliate Program
3. Online Store
Bloggers also make money by selling things directly from their blog. These might include physical products, digital downloads such as ebooks, music, artwork and more. Even consulting services are offered by some bloggers.
You can use WooCommerce for selling things directly as it is the most popular eCommerce plugin for WordPress.
Apart from the above 3 methods, you can do many things with your WordPress blog. You can make WordPress blogs with specific niche such as fashion, reviews, food, and more. You will get unique opportunities to make money with each of these blogs.
Additionally, you can create a membership site and offer premium content and courses.
That’s the end! I hope that this simple guide on ‘how to start a blog?’ will clear all your doubts and help in successfully setting up your blog. If you still need help, you can comment below or contact our support team for queries related to web hosting.

