The PrestaShop engine can be installed within five minutes, once you collect all files on your web server. It will help to configure your shop in no time.
Before Installation :
1) Make sure you have all the required software and hardware available such as server space from hosting provider, domain name, FTP client and text editor.
2) Download the PrestaShop engine
3) Use a zip tool (WinZip for Windows OS or Stuffit Expander for MAC OS) to extract the archive on your computer.
4) Zip all the content of the prestashop_1.6.x/prestashop folder into an archive.
5) Using FTP or cPanel File Manager upload the new zipped file.
6) Now extract the file on your hosting server.
7) Once the files are uploaded, start the PrestaShop engine installation. On your web browser type the ‘domain name/path to your PrestaShop directory’ in the address bar, and then reload the current page. A welcome screen will appear.
Installation process :
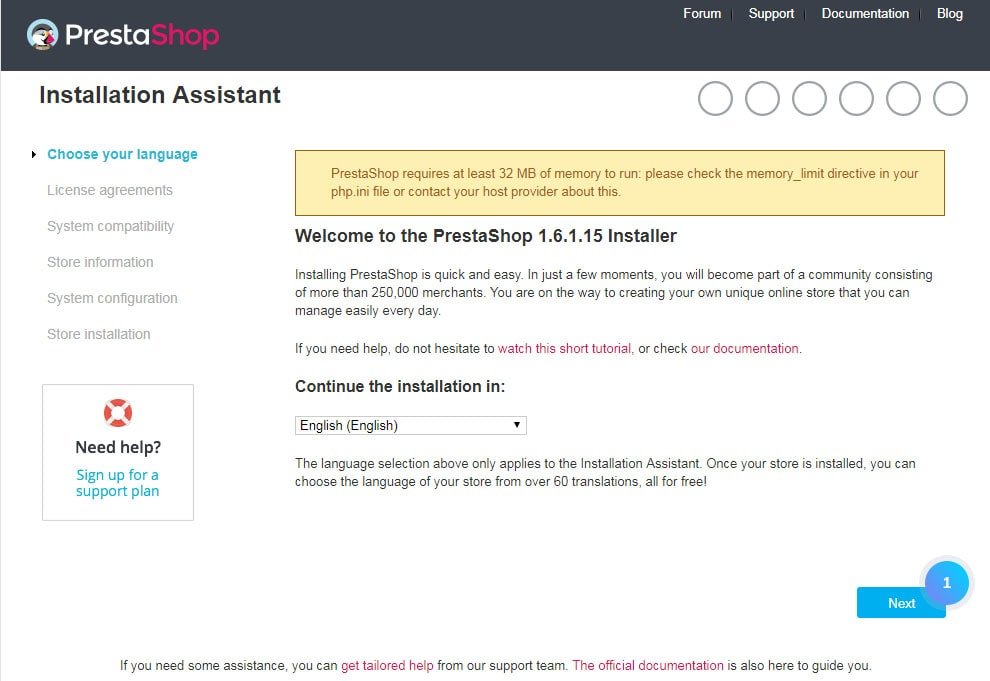
1) After performing the above steps, you will see a Welcome page. There’s a brief introduction to the installation process. Here you will be allowed to select a language for the installer. After that, click on the Next button.
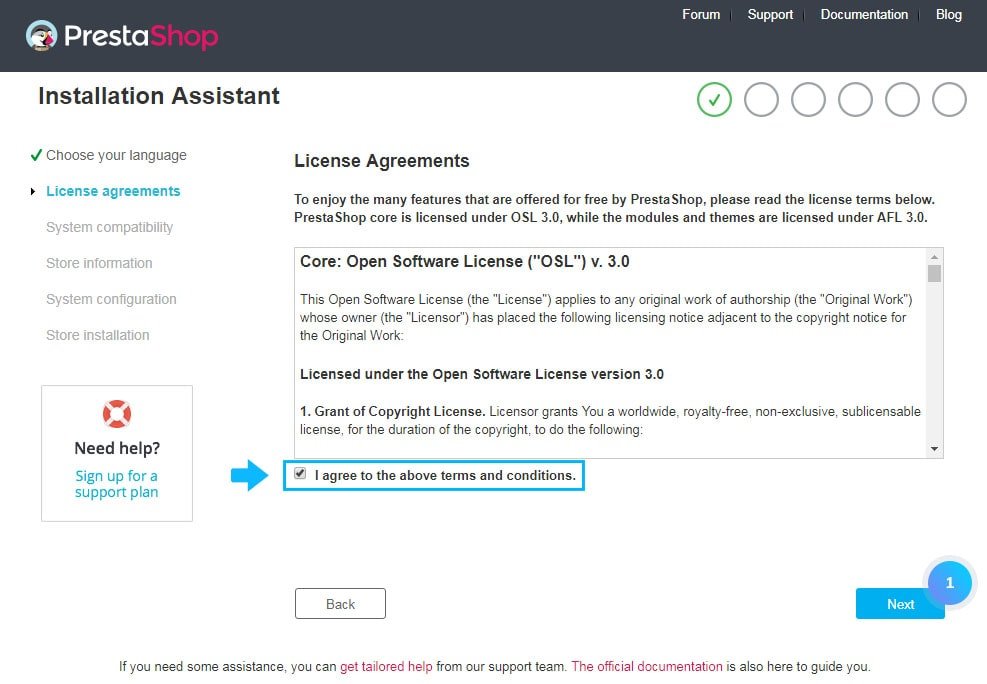
2) Licenses for PrestaShop. PrestaShop is a free and open-source license. To use this software click on the checkbox for “I agree to the above terms and conditions”, and then click on the Next button.
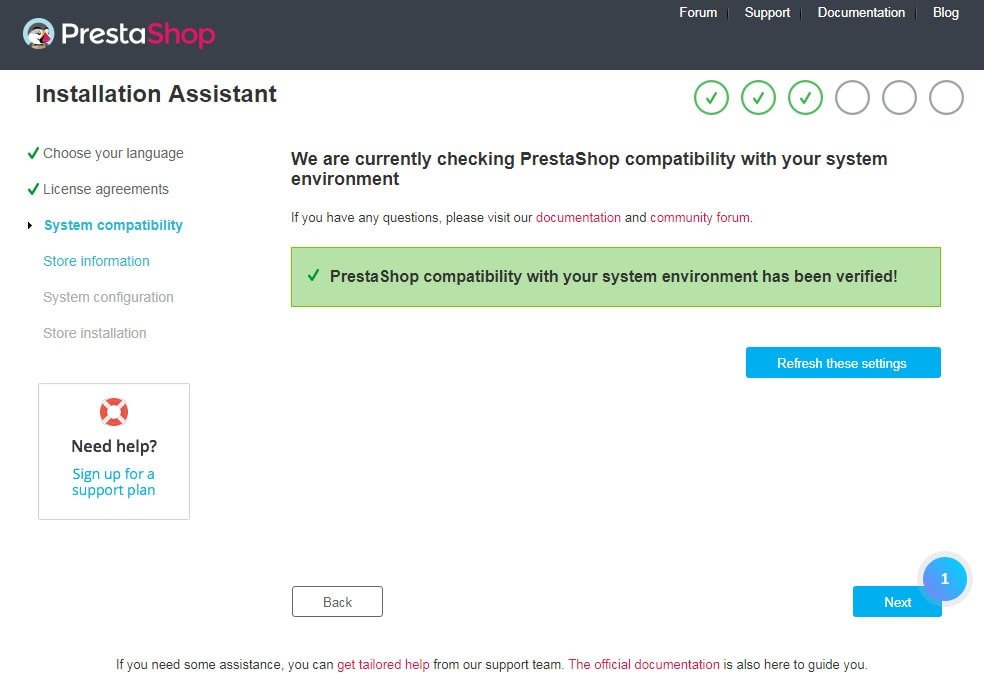
3) In the next step, there will be a quick check for all parameters on your host to ensure the system compatibility. If everything’s right, click on Next.
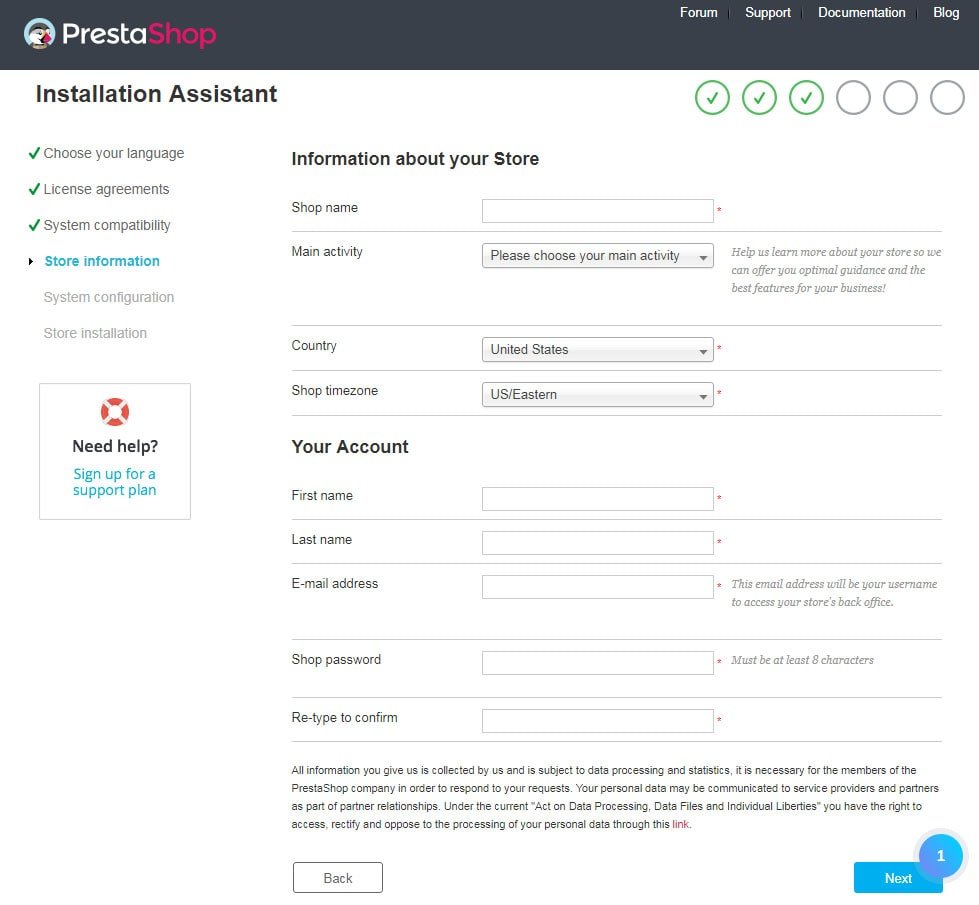
4) Information about the store. This page allows you to customize your store. Mention the shop name, its main activities, and shop owner’s personal information.
5) Configuring the system. In the step fill in all the information asked for with the information about database connection.

In case of any database, difficulties get help from your hosting provider.
Click on “Test your database connection now!” button to ensure that you have used correct server information.
After that click on the Next button to start configuring your store.
6) Once the installation is completed, open the PrestaShop directory and delete or rename the Install folder. It will help in improving your PrestaShop store security.
7) Now you will be able to log into your PrestaShop back-office by accessing your newly renamed “admin” folder to start modification in your store. It also allows you to install new themes.
That’s it. Hope this tutorial will be helpful to you.
Also Read :
How To Install PrestaShop Through Softaculous?


