This article guides you about the installation of the LiteSpeed Cache WordPress plugin on MilesWeb hosting account.
# Installing Plugin
Perform the following steps to install the plugin :
1. Log in to your WordPress using admin access.
2. Go to Plugins to the left side of the dashboard and then click on the Add New link.
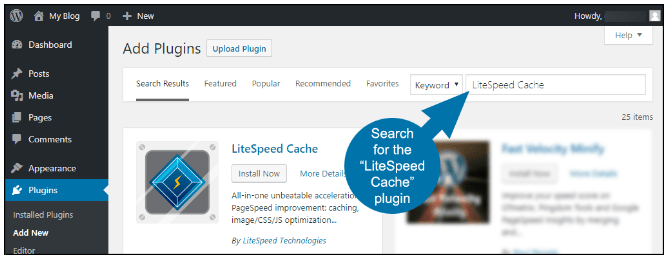
3. In the search box beside Keyword, type “LiteSpeed Cache”.
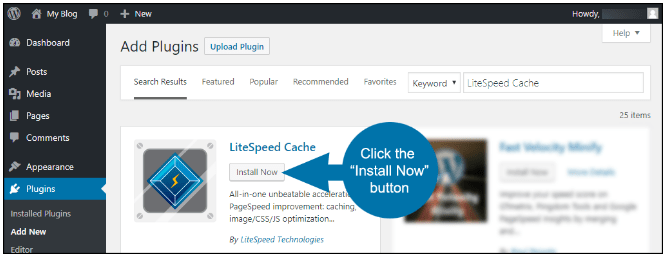
4. After locating the plugin, click on the Install Now button.
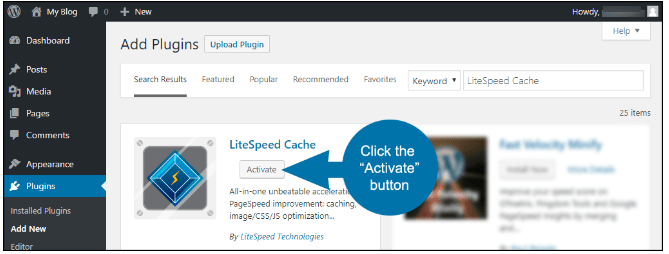
5. Once the plugin installation process gets finished, click on the “Activate” button.
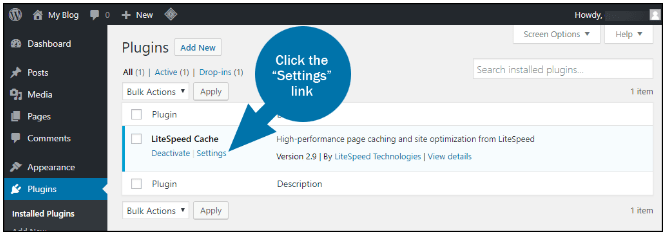
6. In the plugin list, go to LiteSpeed Cache section, and click on the Settings link.
# Configuring LiteSpeed Cache
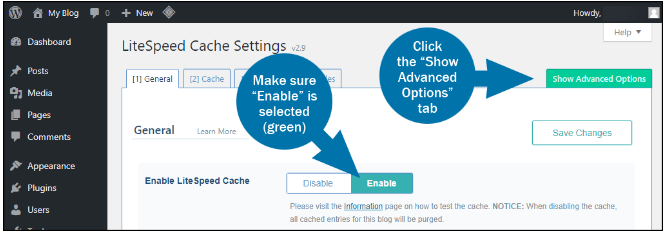
Make sure the Enable LiteSpeed Cache option is set to Enable (background should be in green color).
Now click on the Show Advanced Options tab.
There are some advanced options available in LiteSpeed. It is not mandatory to make changes in the advanced options. This is because, as soon as the LiteSpeed is enabled, it begins working and improves your website speed. The advanced options can be used to adjust the default settings further.
Misconfiguration of some of the options can cause your website, so be careful with your experiences.
After making changes to settings, click on Save Changes button.

Here are some advanced options explained :
[1] General – TTL (time-to-live) setting controls the duration of how long certain content types are saved in the cache.
[2] Cache – This setting controls cache for special content types, such as REST API calls and login pages.
[3] Purge – It is a setting for purging content from the cache. By default, the LiteSpeed Cache plugin is supposed to purge the cache when plugins, themes, or the WordPress core is updated.
[4] Excludes – This setting defines the type of content that you do not want to cache.
[5] Optimize – This is CSS and JavaScript setting. After making changes through this setting, make sure to test your website, if it still works correctly. Misconfiguration in this section can damage the site’s functionality.
[8] CDN – These are Content Delivery Network settings.
[9] ESI – Edge Side Includes settings. It is an advanced caching technique for caching portions of pages.
[A] Advanced – If you make any changes in advanced settings, check your site again to verify that it is performing correctly.
[D] Debug – Debugging settings help to troubleshoot problems.
Also Read :


