Of course Joomla is a fantastic Content Management System (CMS), but some of you might still be comfortable with WordPress. The problem is that you don’t know how to migrate Joomla to WordPress.
When you migrate a website it is a quite challenging and time-consuming task.
Fortunately, there is a simple plugin that will help you to migrate Joomla to WordPress with less efforts.
In this article, check the three important steps to migrate Joomla to WordPress with one plugin. But prior to starting let’s check some basis.
Things to consider before the migration:
Prior to migrating Joomla to WordPress, it is essential to have adequate hosting, a domain and WordPress up and running.
Are you looking for WordPress hosting? Take a glimpse at our Managed WordPress Hosting.
Now, let’s start with the website migration process.
Migrate Your Joomla Website to WordPress (in 3 simple steps)
As we stated earlier, migrating Joomla to WordPress shouldn’t be particularly challenging. However, if you run into any hiccups during the process, we recommend that you check out the below plugin’s Frequently Asked Questions (FAQ) section.
Step 1: Installing the Plugin FG Joomla to WordPress
With WordPress, you can import content from multiple other platforms. But, Joomla isn’t among the list of CMSs that is directly supported by it. Don’t worry, you can easily add Joomla support to WordPress with the use of right plugin. The plugin’s name is FG Joomla to WordPress.
First access your WordPress dashboard and go to the Plugins > Add New tab. Then type in FG Joomla to WordPress in the right side search bar to find the plugin:
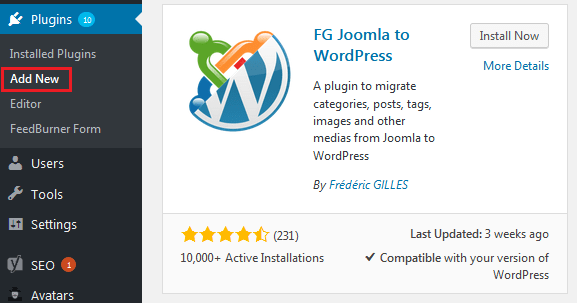
Further click on the Install Now button besides the plugin’s name. All will be set up by WordPress, and when it’s done, a new Activate button will appear in the same place. Click on that for the plugin to get activated.
Prior to actually using the plugin, you will need to have some credentials so that WordPress will be able to pull in your Joomla content. Let’s check how to do that.
Step 2: Finding Your Joomla Database Parameters
Now, here you will need your Joomla database credentials. With this, the WordPress plugin will be able to import your Joomla content. The platform won’t allow the plugin to copy your files without the credentials.
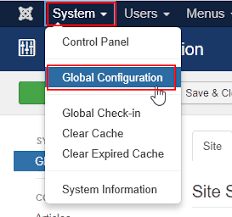
So, go to Joomla control panel and select the System tab at the top of the screen.
Select the Global Configuration option and search for the Server tab on the next screen:
On the right side, check for the section called Database Settings. The fields that you should look for are Host, Database Username, Database Name, and Database Tables Prefix:
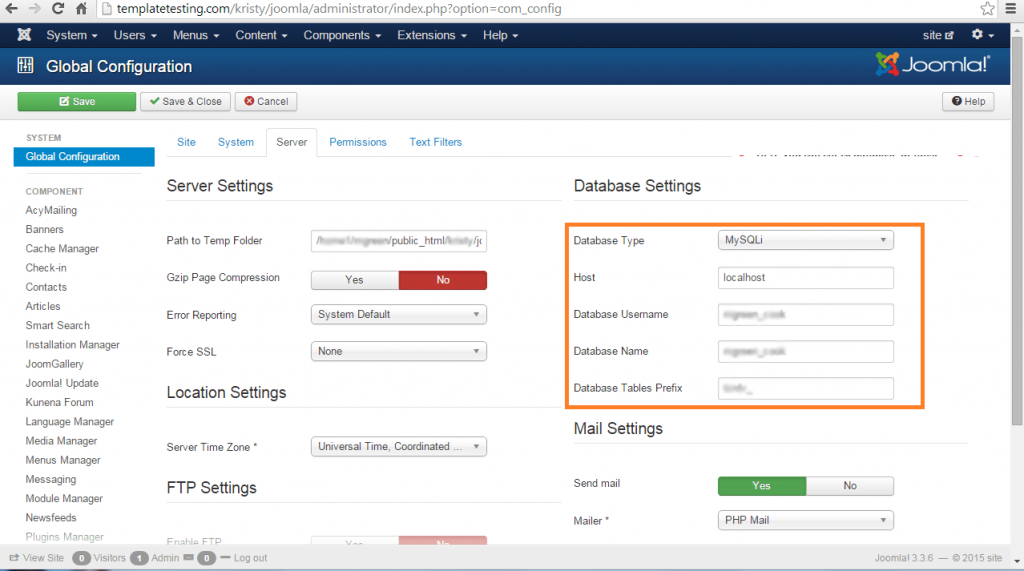
In case your Joomla database is located on a different server or web host instead of the WordPress site, you might need to use the Remote MySQL hostname. One easy way is to take a backup of your Joomla database, upload it to the current hosting account and use it instead of the original one while migration.
Step 3: Migrating Your Joomla Content to WordPress
After this, you have all the things required for the migration. Now, let the FG Joomla to WordPress plugin do its work. Go to your WordPress dashboard, Tools > Import tab. Within the tab, you will see multiple options so, search for Joomla (FG). Then click on the Run Importer link below it:

On the next screen, you will configure how the plugin will handle the content it imports. Here, first select if you want WordPress to merge your Joomla content with your existing posts, or set everything up as a new site. It is recommended to go second option, even if your WordPress website is brand-new:
![]()
Now, go down to the Joomla website parameters section. Here you will need to enter the URL of your current Joomla website. In this way, the plugin will understand from where it needs to pull the media files which are needed:

Go to Joomla database parameters section where you will use the credentials you have found in the previous step. Then, paste the values from Joomla to their respective fields here, leaving the Port and Database options as they are:
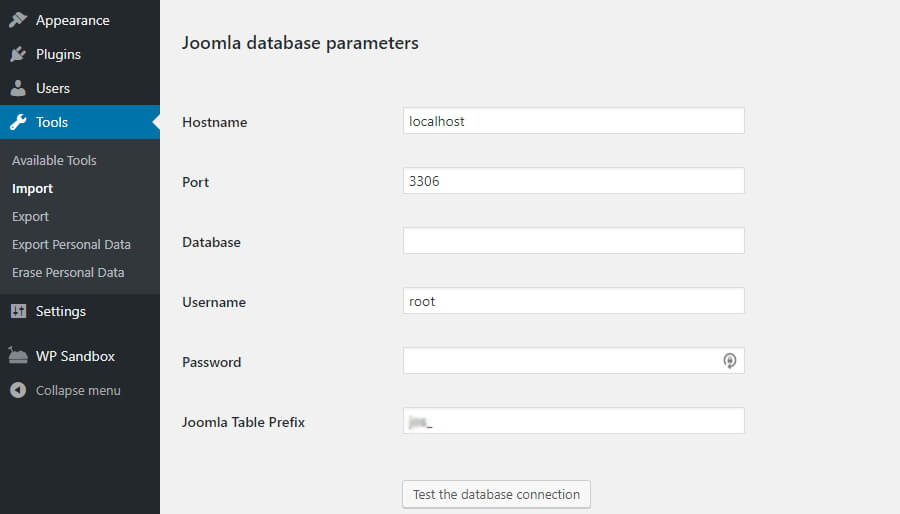
Then click on the Test the database connection button for the plugin to be able to check if the database parameters are working properly.
Still there are a few settings left to configure. If you scroll down, check for the section called Behavior. Select if you want to import archived posts, select which media files the plugin should pull from Joomla and decide what to with your content’s meta keywords:
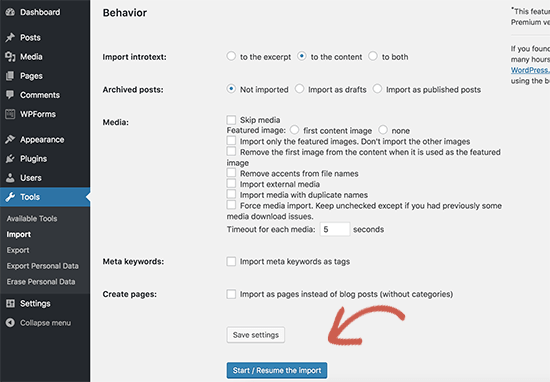
There is also an option to import your Joomla content in the form of pages rather than posts. The selection of this option completely depends on the type of website you were running on Joomla. For instance, your site is a blog, you will want to keep this option turned off.
At last, you can now proceed further and click on the Start / Resume the import button and wait for the plugin to do its work. It will take some time based on the size of your Joomla website.
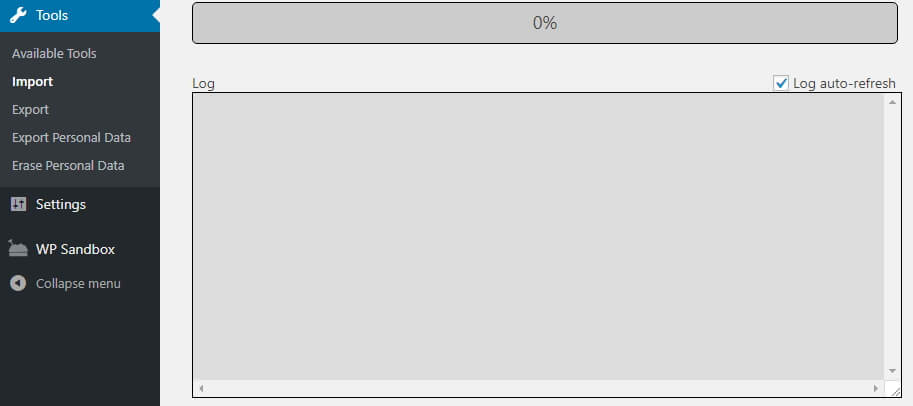
To check the progress of the process, monitor the log section, within this page. You will see a handy progress bar that displays how long it will take to complete:
Usually, the migration process continues without any hassle. But sometimes WordPress might find it difficult to import some of the Joomla content based on your web host. In case you are using a basic plan, chances are that the plugin may ‘time out’ when trying to import your Joomla content and this can result into errors.
Note that this doesn’t happen commonly. But, this shows the importance of selecting a good web hosting provider. In case you face this issue, just restart the process and let it continue.
Once the migration gets completed, a success message will be displayed within the log section. So, proceed further and check your WordPress site’s new pages as well as posts. Make sure that all your content is imported from Joomla to WordPress successfully.
No, if you click on the internal link within WordPress, it won’t work as desired. This is because these links are still pointing towards your Joomla website. Let’s check how to fix this.
Step 4: Replacing Your Internal Links in WordPress
Thankfully, there is tool in the FG Joomla to WordPress pluginthat helps to fix your internal links. So, go to Tools > Import tab and click on the Run Importer button below the Joomla option once again.
The importer screen will get displayed as it did earlier. Don’t do any settings you did earlier and just scroll down to the bottom. Check the section called After the migration that includes the button Modify internal links. Click on that button:
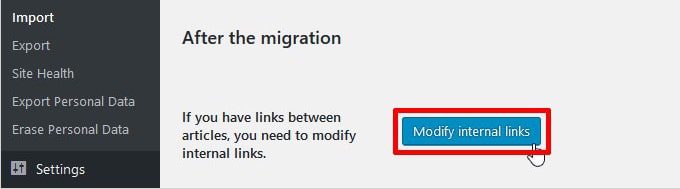
With this all the internal links within your WordPress content will be detected and fixed so that they don’t point to Joomla anymore. After the process gets completed the plugin will inform you the number of links it modified.
Finally, your new WordPress website is about to be ready! Just one details is left – take care of your domain.
Step 5: Point Your Domain Towards WordPress
We assume that you have already registered your domain name pointing towards your Joomla site. But after the migration you will want to ensure that your domain is taking visitors to the right destination.
You can register a new domain to use with WordPress. But it isn’t recommended to change domains if your website has been live already. You can easily change the site your existing domain points towards.
You can do this in two ways either by switching its name servers and using A records.
Remember after pointing your domain towards WordPress, it might take a while for the changes to take effect so, don’t worry if your domain still leads to your Joomla site right after making a switch. It make take a few hours or days for the change.
You can also delete your Joomla site if you want to.
Conclusion
It is a big decision to move from Joomla to WordPress but yes it’s a simple process. If you are still waiting thinking that it would be difficult, just go through this guide and you will be glad to know that it requires just few steps to be taken.
If you still have any questions about the Joomla to WordPress migration process? Comment below or contact our support team.
Also Read:
How To Secure Joomla Or WordPress Admin Page?
Changes Made To WordPress Website Are Not Showing


