Node.js is one of the most popular open-source server environments. Based on JavaScript, it is versatile and compatible with various platforms (Windows, Linux, Unix, Mac OS X, etc.)
To Setup Node.js from DirectAdmin:
1. Log in to your DirectAdmin account.
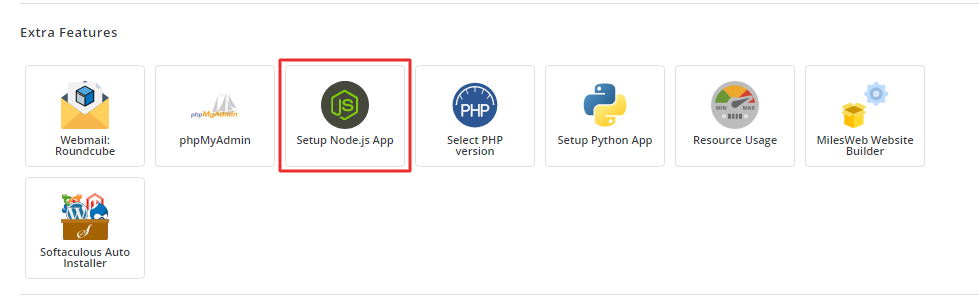
2. Go to the Extra Features section and click on Setup Node.js App.
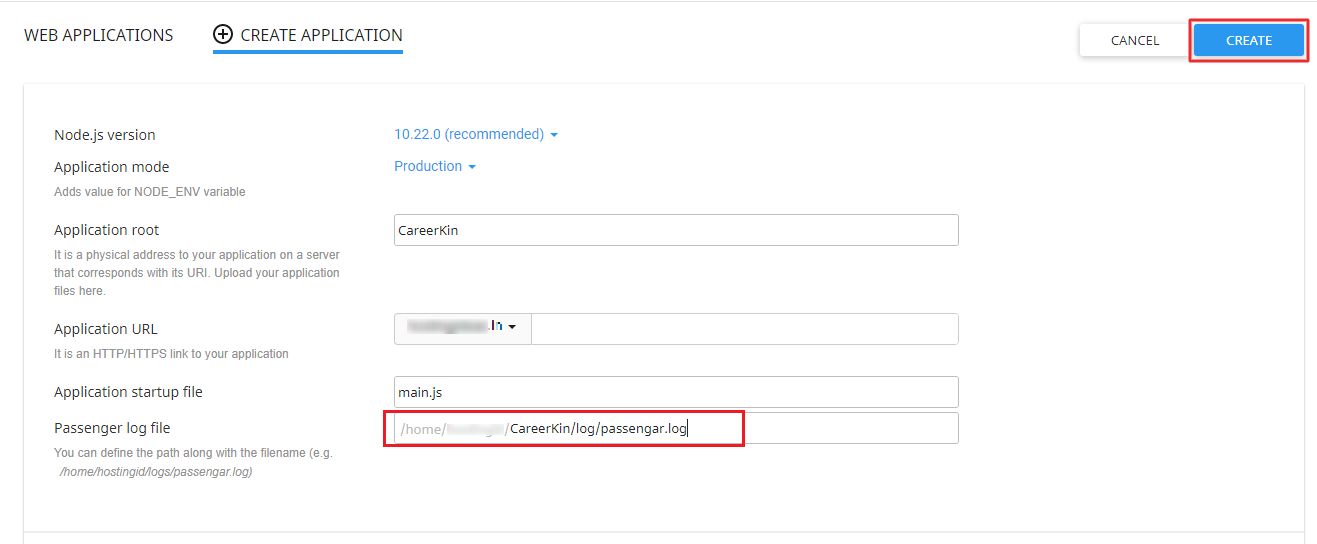
3. Click on CREATE APPLICATION.

4. You have to set/enter the details for the application you wish to create in the following fields:
- Node.js version: Select the appropriate Node.js version for your application. DirectAdmin recommends 10.22.0 version.
- Application mode: Set the value for the NODE_ENV variable to Development or Production.
- Application root: It is addressed to the user’s application directory where you upload application files.
- Application URL: It is an HTTP/HTTPS link that points to your application URL.
- Application startup file: Enter an appropriate startup file for your application. For example, we have entered ‘main.js‘ for our application.
- Passenger log file: You have to define a path for your log filename, as shown in the screenshot.
Once you are done filling in all the details, click on SAVE.
Note: You can also add new environment variables for your applications. Click on Add Variable and enter a name and a value.
Pick A NodeJs Hosting Plans for Better Deployment!
To Manage a Node.js Application:
Stop Node.js
- Click on the Stop icon as shown in the screenshot.

- The Stop icon will change to the Start icon indicating the application has stopped.
Start Node.js
- Click on the Start icon in the stopped application row as shown below.

- The Start icon will change back to the Stop icon.
The rest of the functions are explained as shown in the screenshot of a running application:

Restart
- Click on the Restart icon in the application that is already started.
- Restarting unblocks the blocked applications.
Edit
- Click the Pencil icon.
- The application tab opens where you can edit the fields and set new values for the application.
Remove
- Click the Bin icon.
- The confirmation pop-up to start the removal will appear.
- Click on Agree.
The application is removed from the Web Applications table and, a confirmation message will be displayed.


