Apache is a popular web server that is freely available to all Linux-based systems with an “open source” license. As you know, the primary function of any web server is to accept and process the requests sent by clients (visitors). Apache is unique as it deploys advanced functions to its software like MPM(multi-processing modes) or mod_ssl for enabling SSL v3 and TLS support. The only thing is, you need to optimize the Apache web server. Otherwise, it becomes too restrictive in its functioning.
To Optimize Apache Web Server
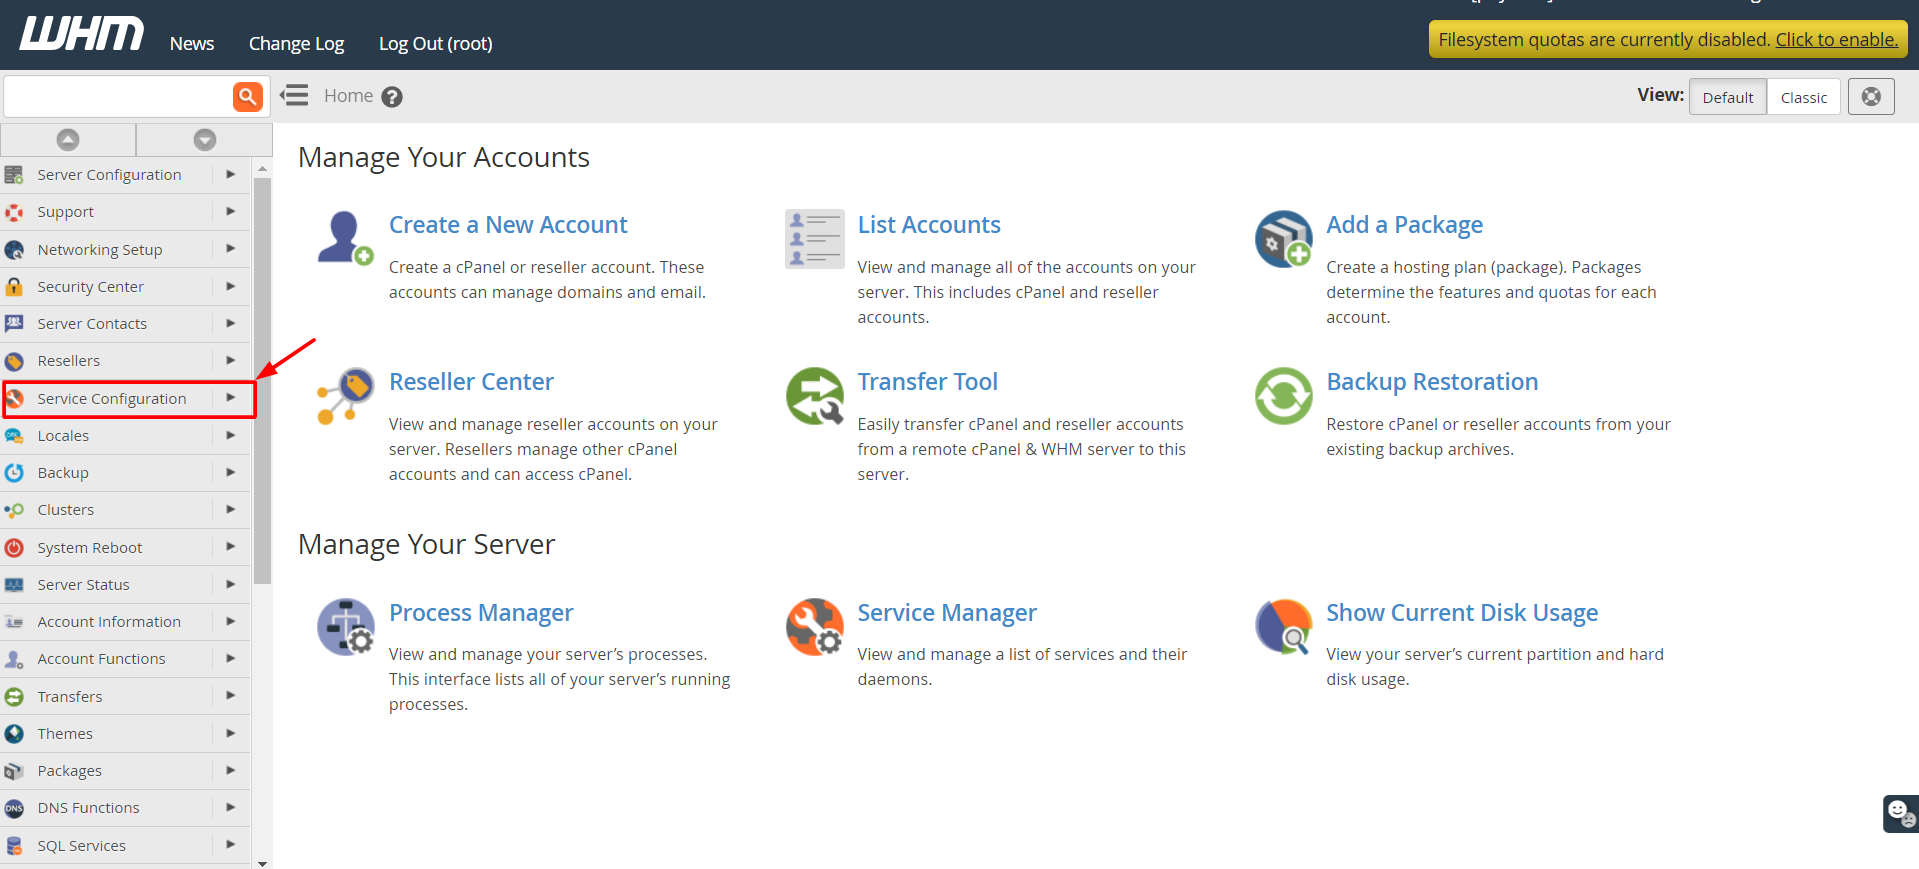
1. Log in to WHM with your root account.
2. Select the Service Configuration option from the navigation menu.
3. Click on Apache Configuration.
A list of configuration options for the Apache server will appear.
4. Click on Global Configuration.
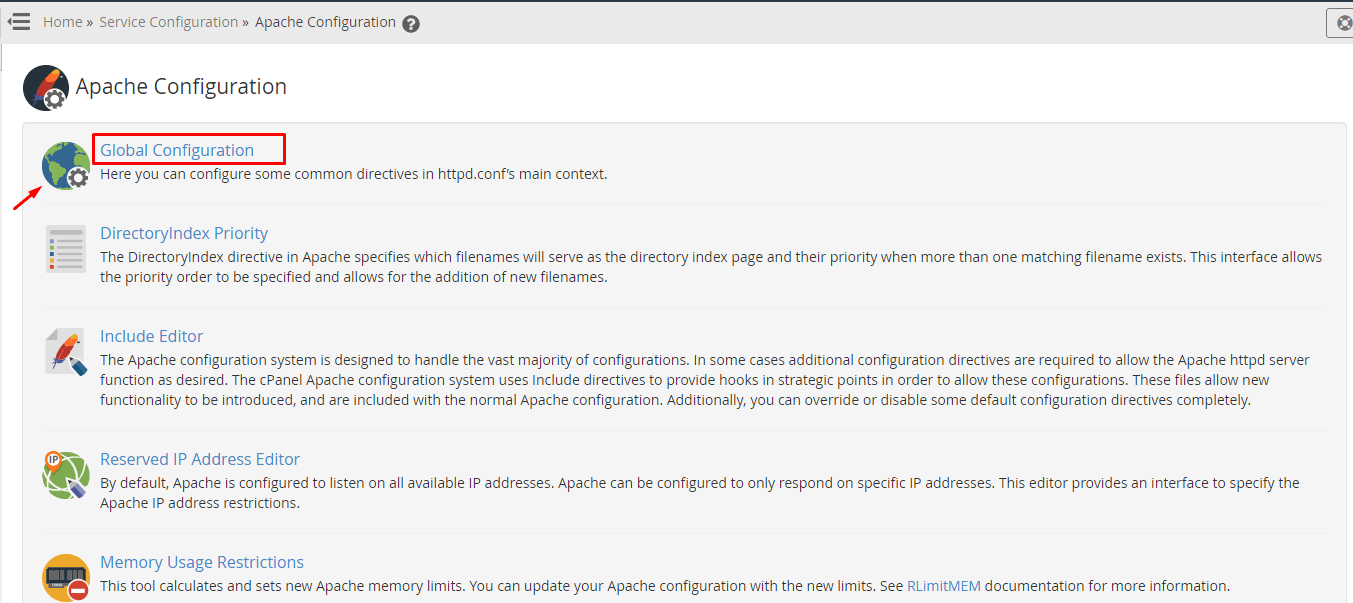
A form-like panel will appear with various fields for Apache configuration.
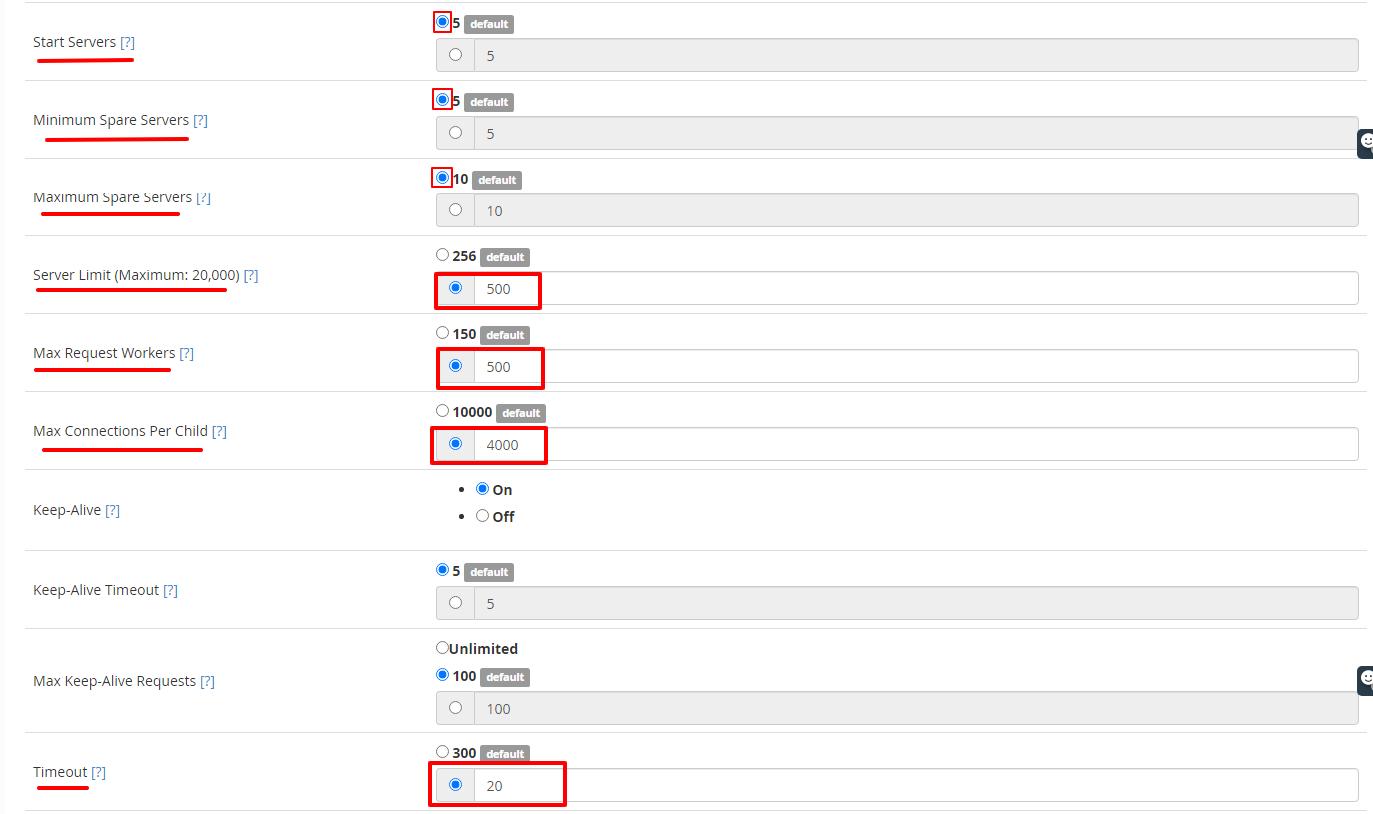
5. Set these values in the respective fields:
Start Servers = 5

Minimum Spare Servers = 5

Maximum Spare Servers = 10

Server Limit (Maximum: 20,000) = 500

Max Request Workers = 500

Max Connections Per Child = 4000

Timeout = 20
6. If the above values are not set as default, you can select the text box to enter them manually.
7. Once you have entered all the values, scroll to the end and click the Save button.
The system will save the settings and display them.
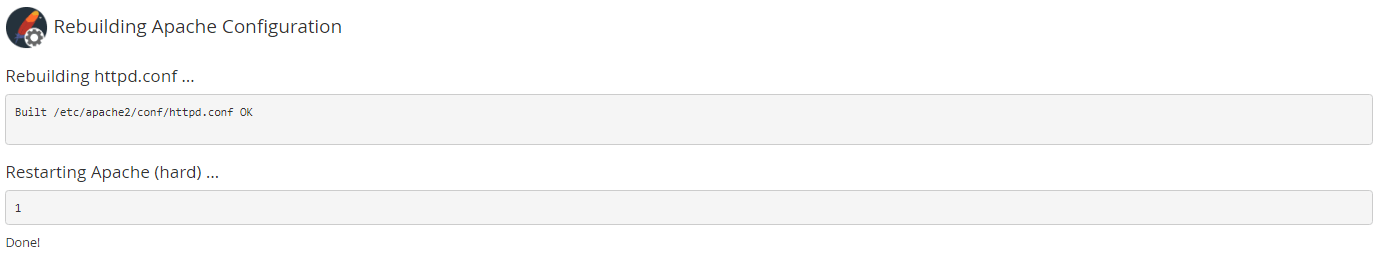
8. Recheck the saved details and after you have confirmed, click the Rebuild Configuration and Restart Apache button.
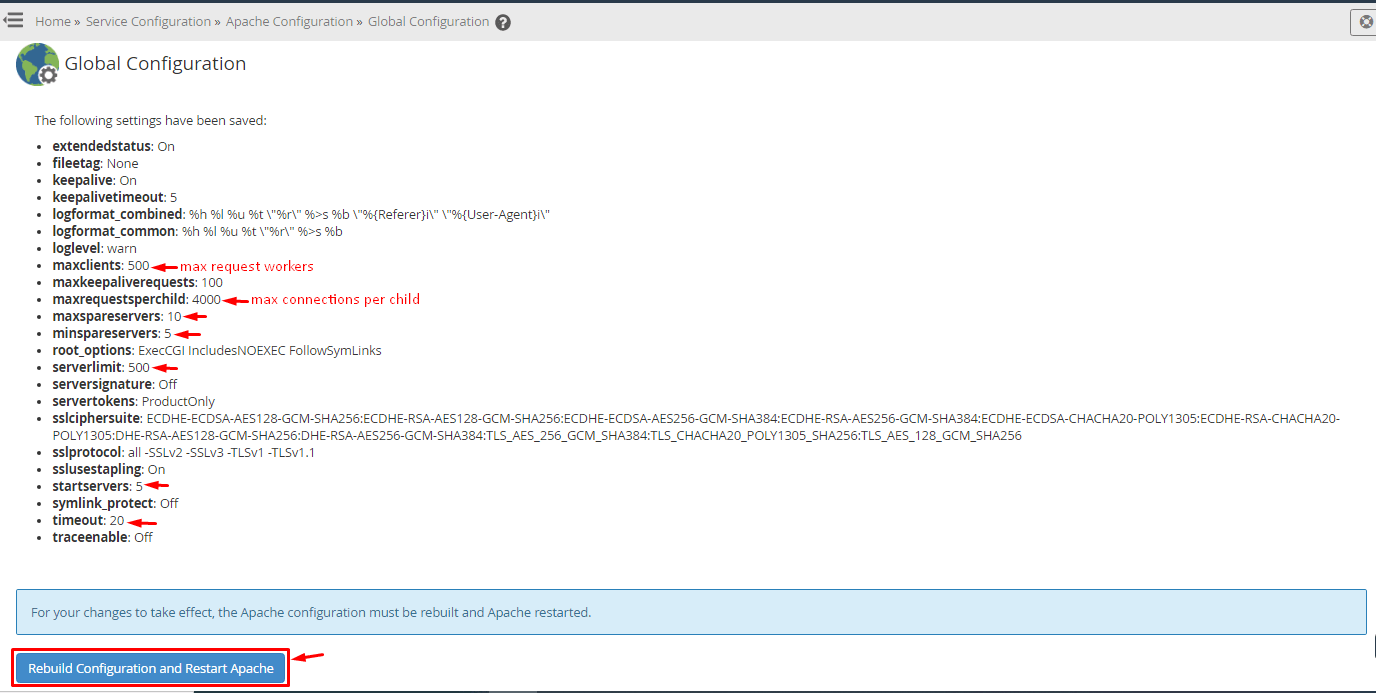
The system will rebuild and restart the Apache server.
With it you will successfully optimize the Apache web server.


