It is easy to install Moodle via the Softaculous application. Refer to this article where you can Learn to Install Moodle on Subdomain. But, if you don’t have the 1-Click Installer, you can follow these steps to install the Moodle application manually with cPanel.
1. Download Moodle Installation File
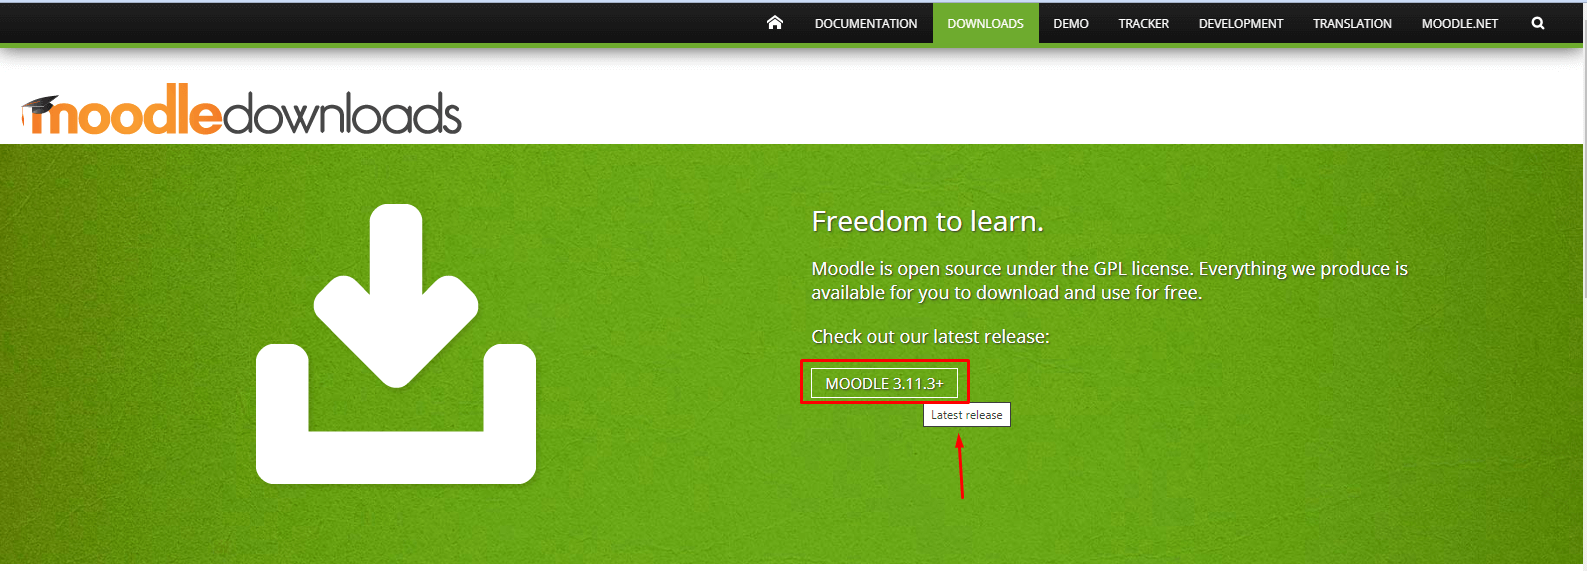
1. Open the official website of Moodle.
2. Click the button under “Check out our latest release:”
3. Download the zip file of the latest version of the Moodle application. You will find it at the top of the list.
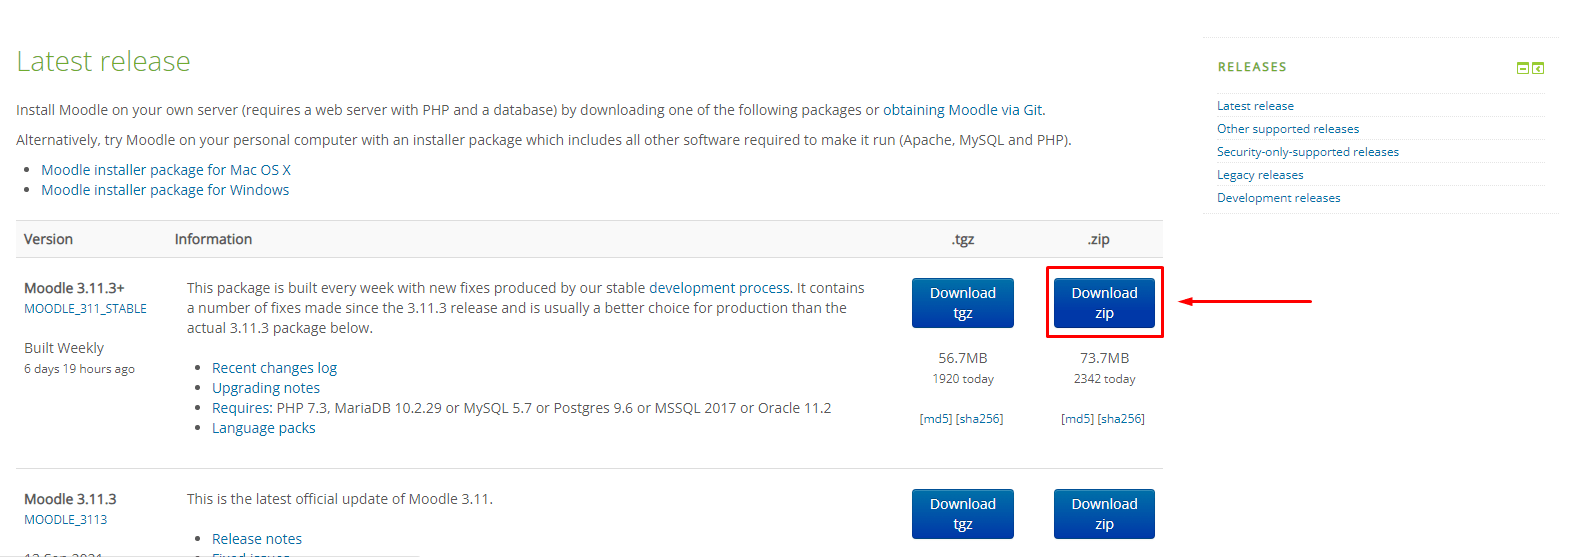
You will now have the zip file of the Moodle software.
2. Create a Subdomain
Yes, you can install Moodle in a folder and access the software application with your web browser at http://yoursite.com/moodle.
However, we recommend you create a subdomain with cPanel for Moodle and access it using the address. It will allow you to access the application from any machine.
3. Upload Moodle Software on the Server
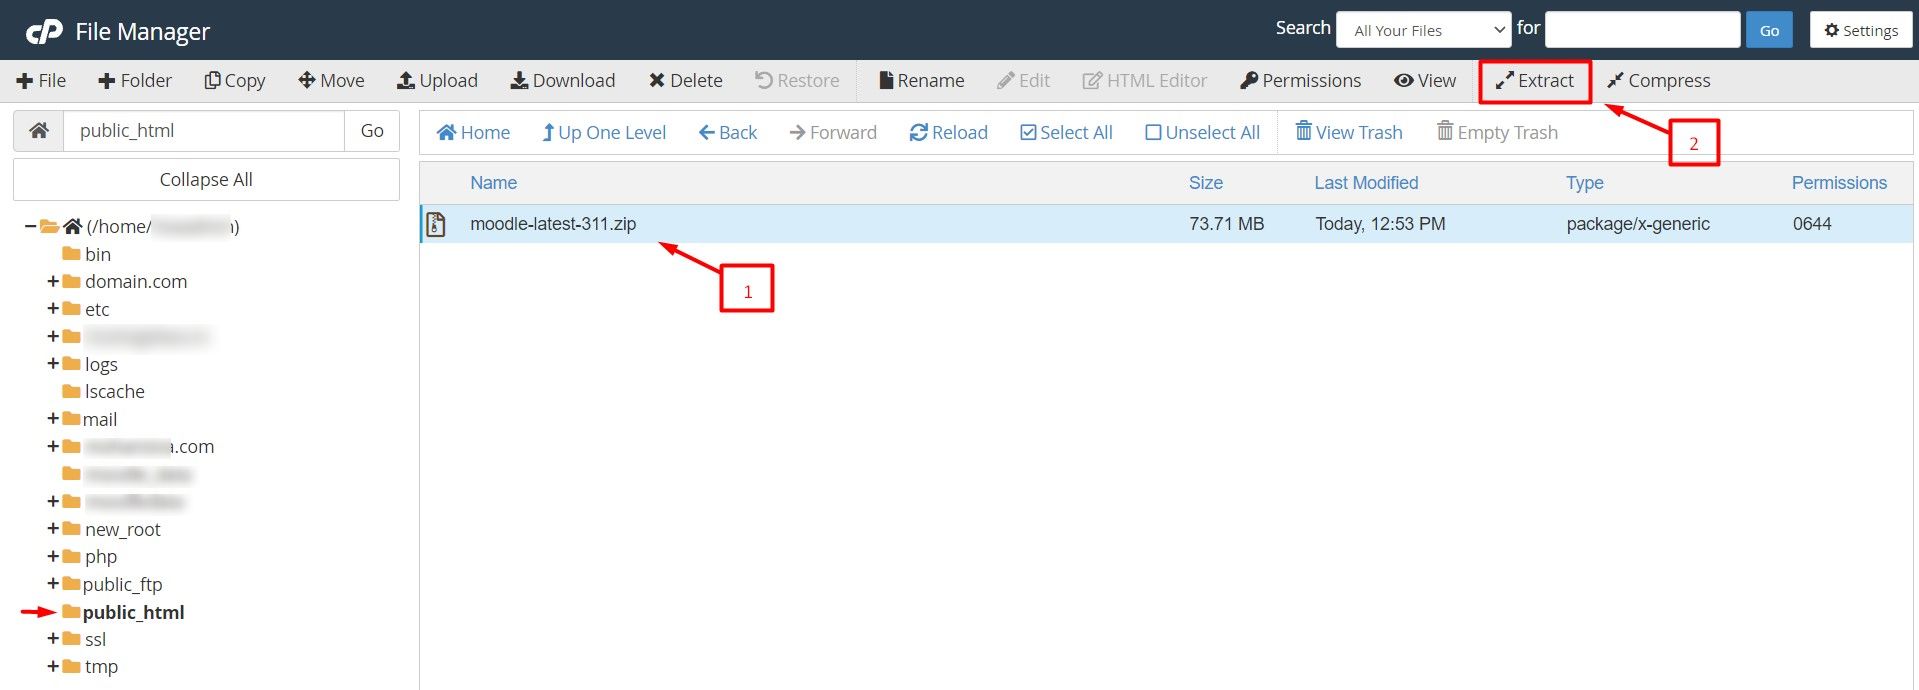
Moving further, you have to upload Moodle on the hosting server via FTP client or cPanel File Manager. You can either upload uncompressed or compressed Moodle files on the server with these applications.
- However, we advise you to upload the zip file(compressed file) on cPanel File Manager.
Make sure you upload it in your public_html folder.
- Then, click the Extract button to unarchive the files.
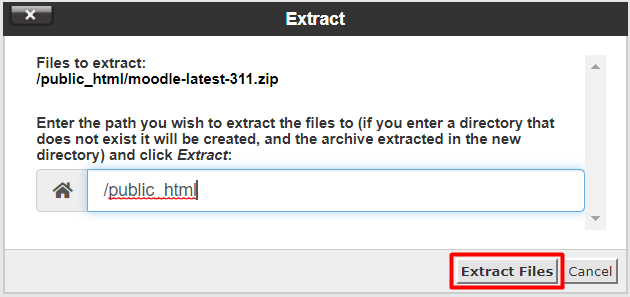
A window will pop up asking for a path for the Moodle folder.
- Click the Extract Files button.
A folder named Moodle that will have all the application files will appear in the list of directories.
Now, set permission for the files so that they are not writeable by any unauthorized user.
- Right-click the Moodle folder and select Change Permissions.
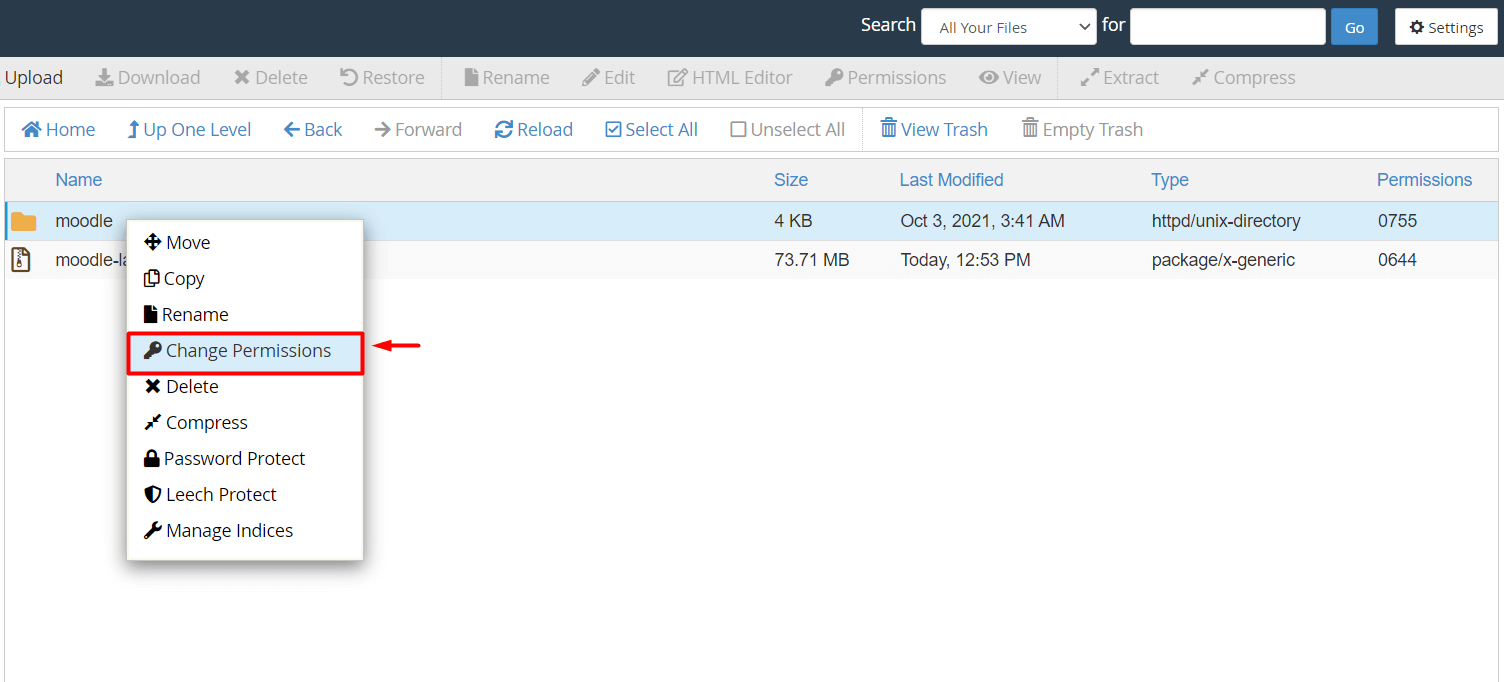
Confirm if the permissions are set to 755.
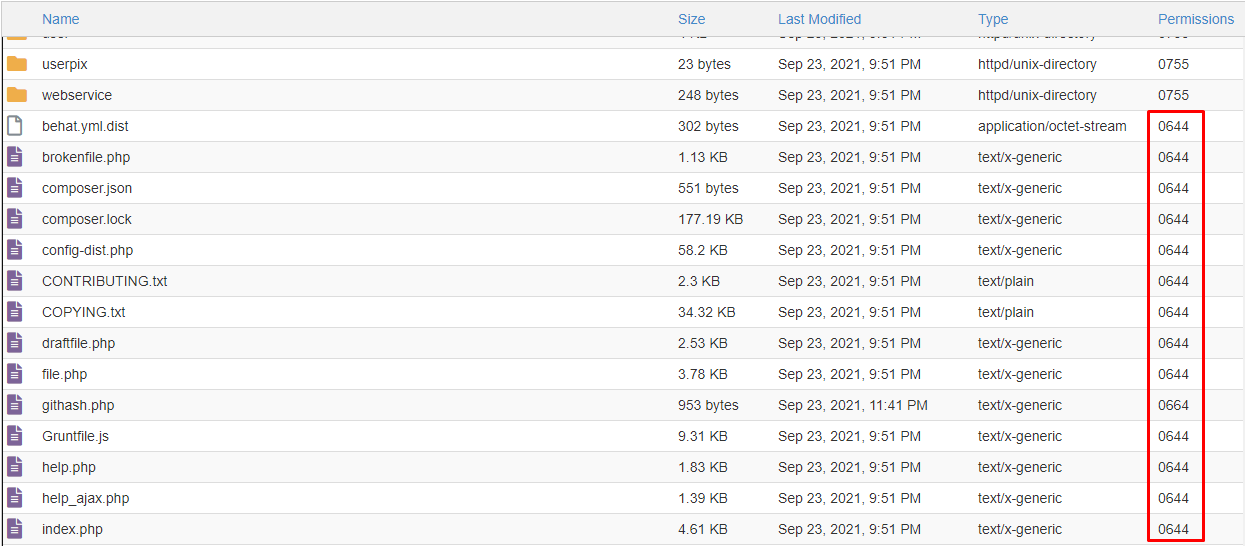
- Open the Moodle folder and check if the regular files have permission set as 644.
4. Create Database for Moodle
1. Log in to your cPanel account.
2. Go to the DATABASES section and click on MySQL® Database Wizard.

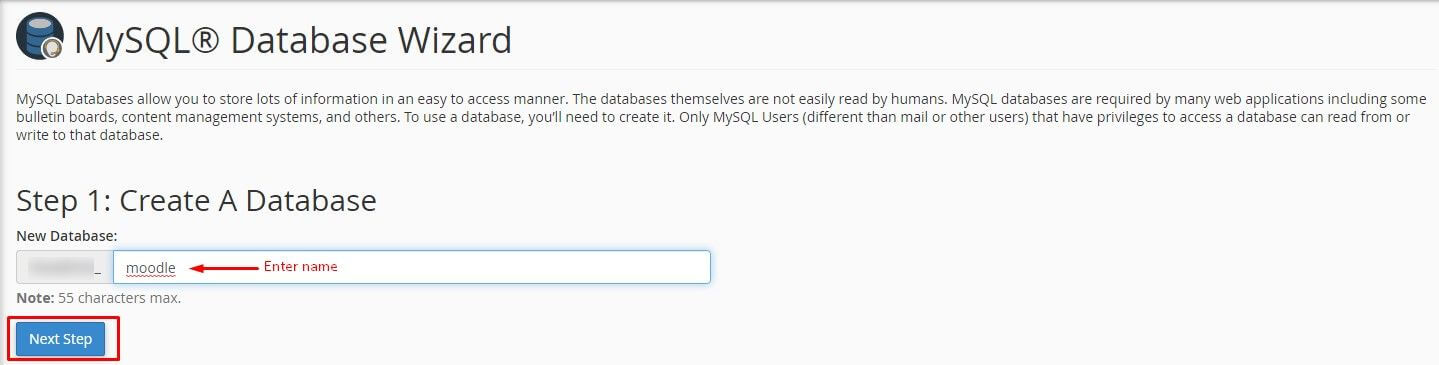
3. Enter a name for the Moodle database and click Next Step.
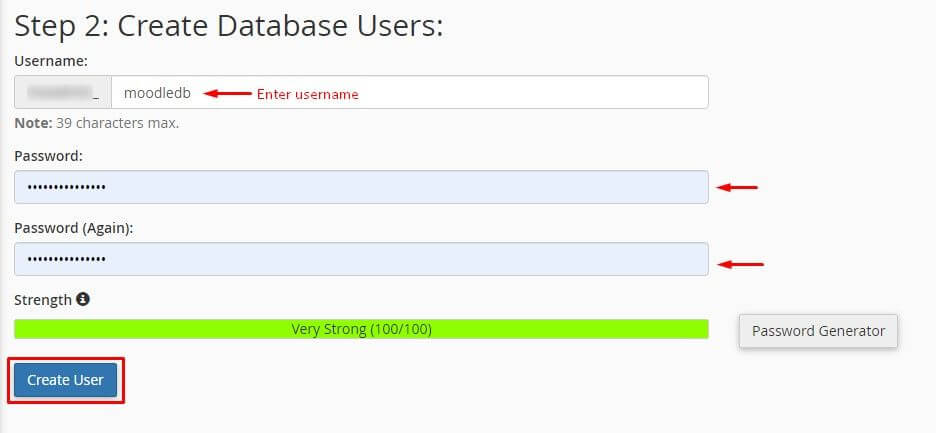
4. Enter the username and password for the new Moodle database and click Create User.
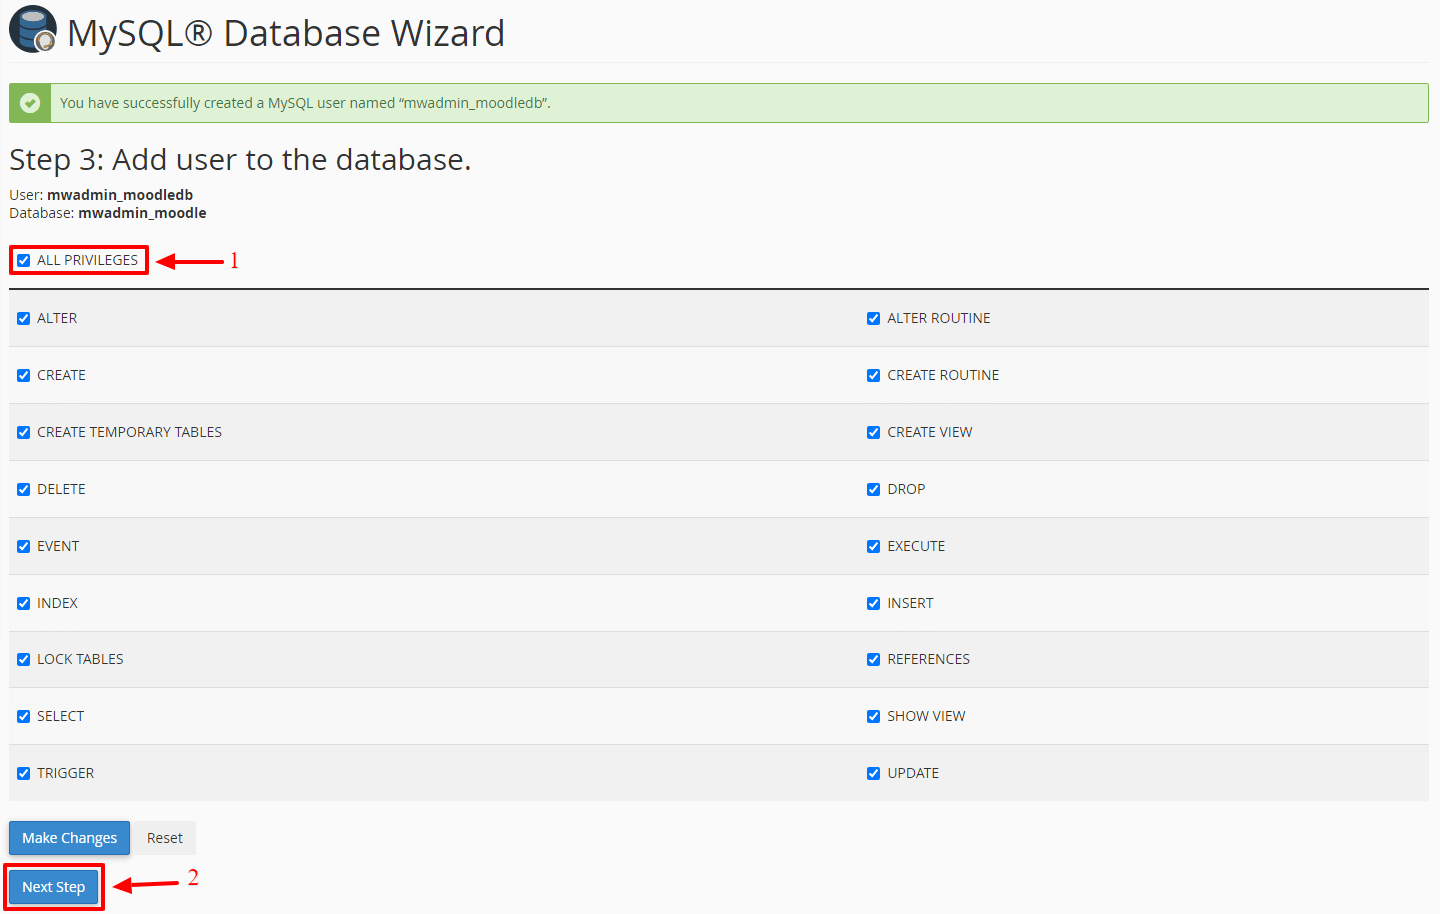
5. Select All Privileges and click the Next Step button.
6. Click Return Home to go back to the main interface.
5. Create a Data Directory
After creating a database, moodle will require a directory in a secure location, preferably your home directory.
- Open the File Manager tab and click on +Folder.

The New Folder pop-up window will appear.
- Enter the name for the folder to store Moodle’s data and click Create New Folder.
6. Install Moodle
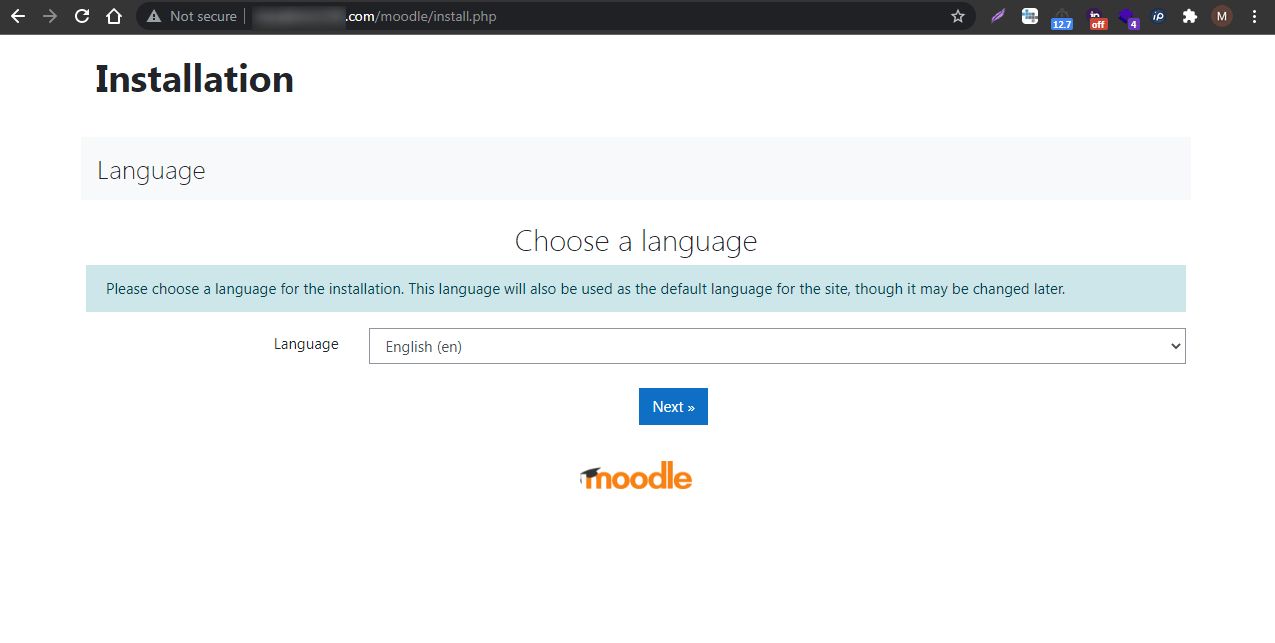
1. Open your Moodle URL with a web browser.
The URL should be like: domainname/moodle/install.php
It will begin the installation process that will have several pages.
2. Choose the Language for the installation and click Next >>.
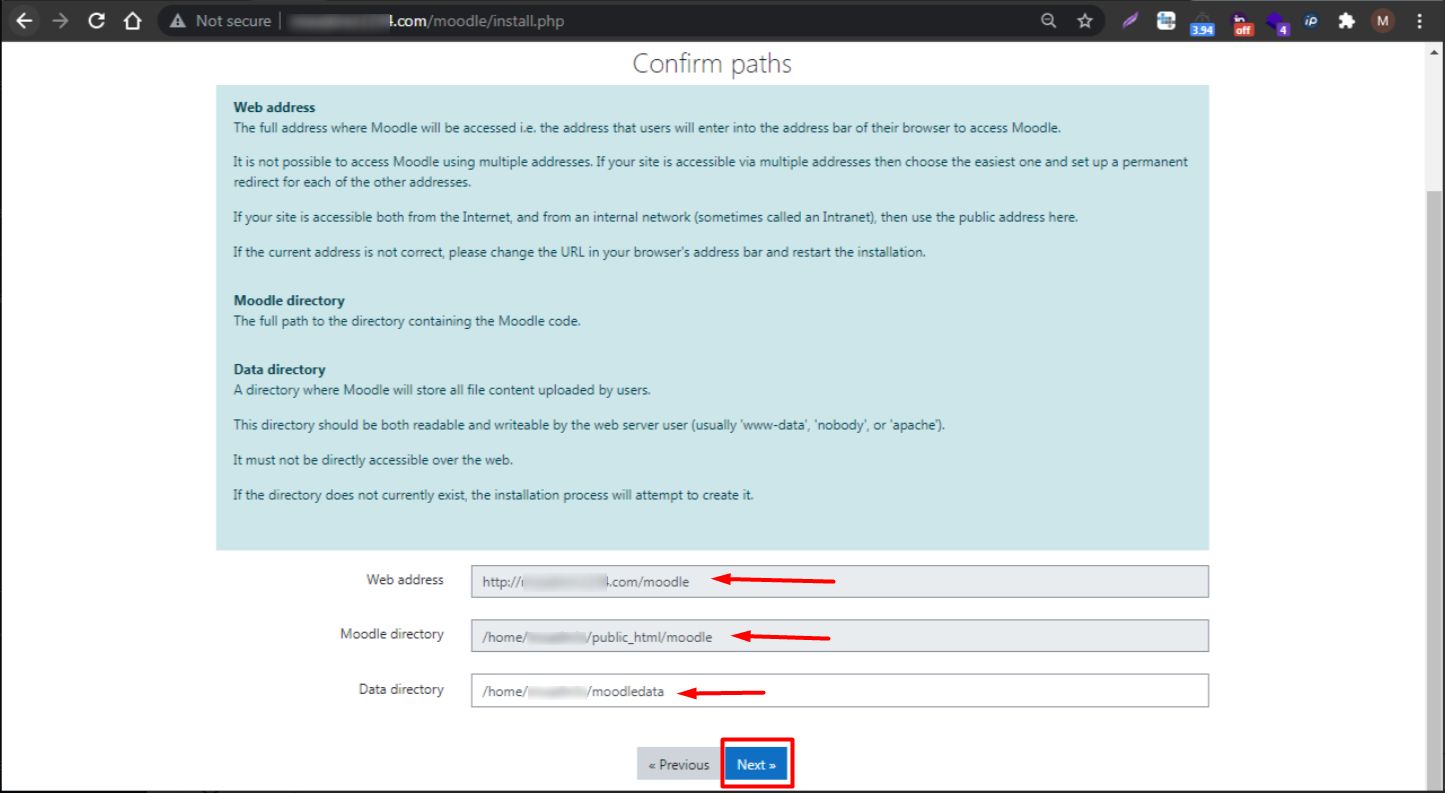
3. Enter the appropriate details in the fields.
- Web address: The address you will enter in the browser to access Moodle.
- Moodle directory: The path to the directory you created for the Moodle code.
- Data directory: The directory in the database you created for Moodle’s file content.
4. After entering all the details, click Next >>.
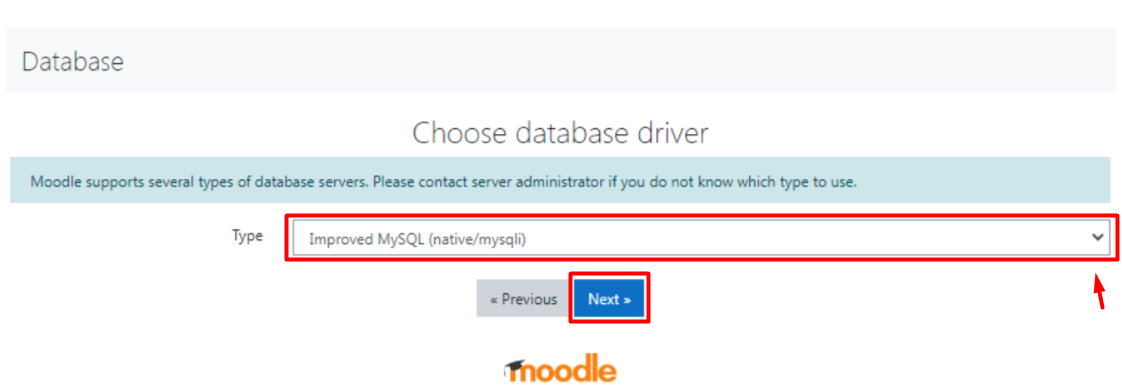
5. Select the Type of the database driver from the drop-down list and click Next >>.
You will have to choose it based on the database directory you created.
You are almost done!
6. Now, for the final step, enter the appropriate details for the Database settings and click Next >>.

And that is how you install Moodle manually with cPanel.


