Overview
LiteSpeed is basically a built-in caching engine that helps to boost the site performance.
This article describes the steps to enable LiteSpeed web cache manager in cPanel.
- First step is, Login to your cPanel account with username and password.
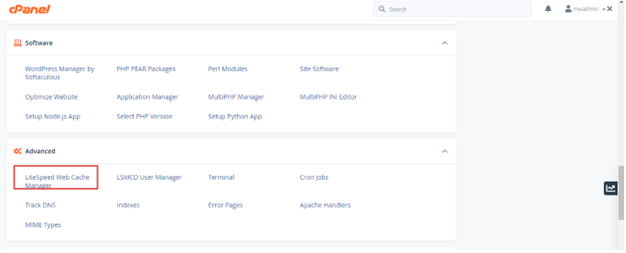
- cPanel dashboard will appear, scroll down and go to the Advanced section > LiteSpeed Web Cache Manager.
3. Once you get inside, click on the WordPress cache icon.
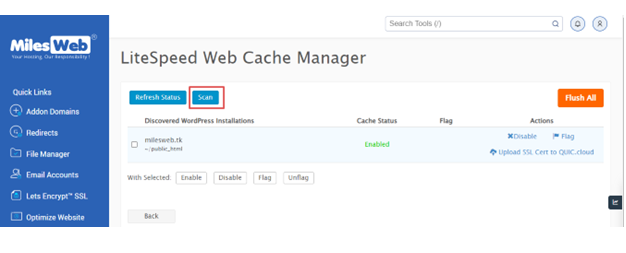
In the next step, click on the Scan button. This will show all the active WordPress installations.
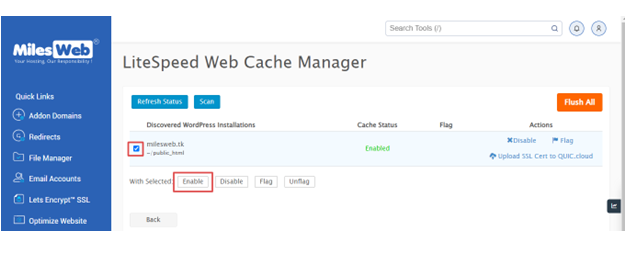
Finally, once all the WordPress installations get discovered, select the ones you want to activate and then click on Enable.
That’s it! This is how you can use LiteSpeed web cache manager for WordPress sites on your cPanel server.


