This guide explains how to manually change a WordPress URL using phpMyAdmin and cPanel that can update your domain or WordPress installation path.
Sometimes, there can be a need to manually change the URL for your WordPress site directly in the database. For example: if your domain name on the cPanel account gets changed to a different domain and you have a WordPress installed, then the domain name gets changed on the cPanel but not in the database. So, in such cases, you can manually change the WordPress URL by performing the following steps.
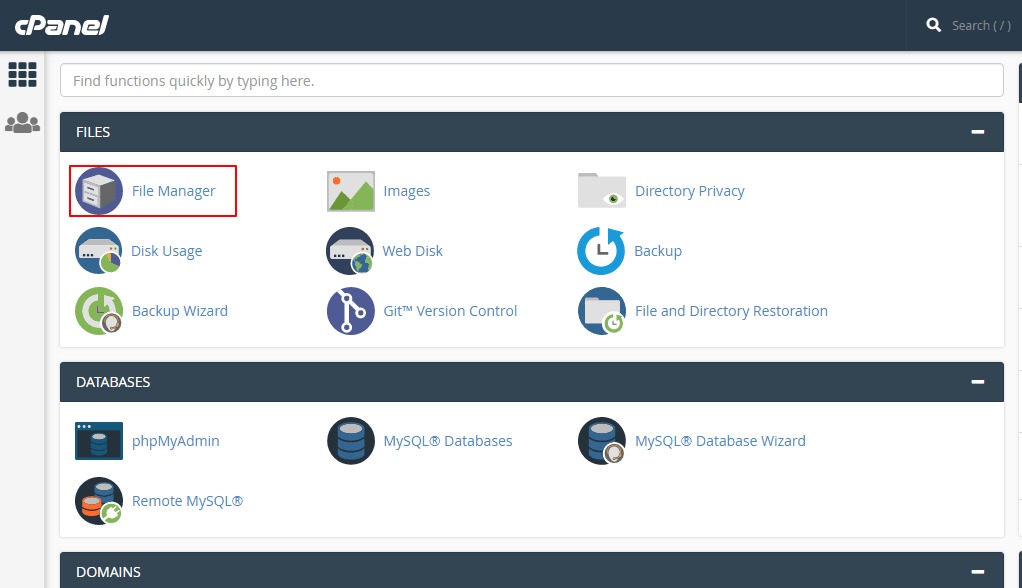
1) First of all, find out the database name that is being used for the WordPress site whose URL needs to be changed. For this, locate the wp-config.php file, and navigate to the File Manager in cPanel.
2) By default, the File Manager opens in the “home” directory. Double-click on it and navigate to the public_html directory. In this directory, your publicly accessible files are located.
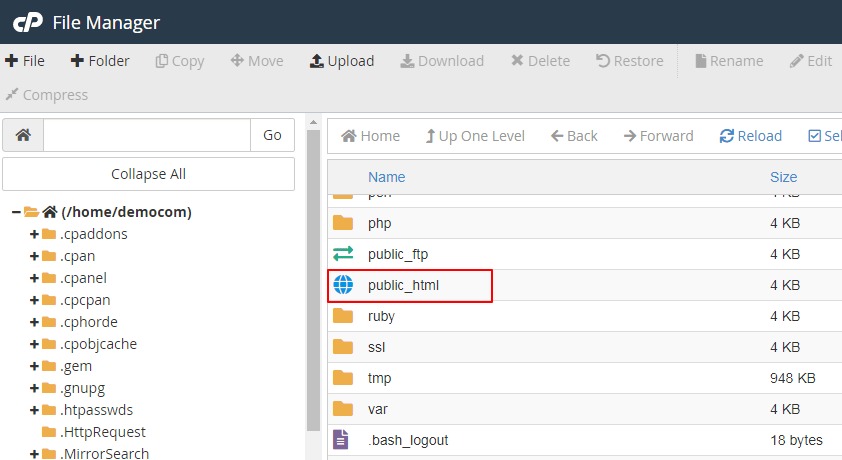
3) After entering into the public_html directory, you will see all your WordPress files. Remember, in case you have installed WordPress in another directory like “wp”, “blog”, etc. you will have to navigate into that folder.
Navigate to “wp-config.php” file and right-click on the file and then click “view”.
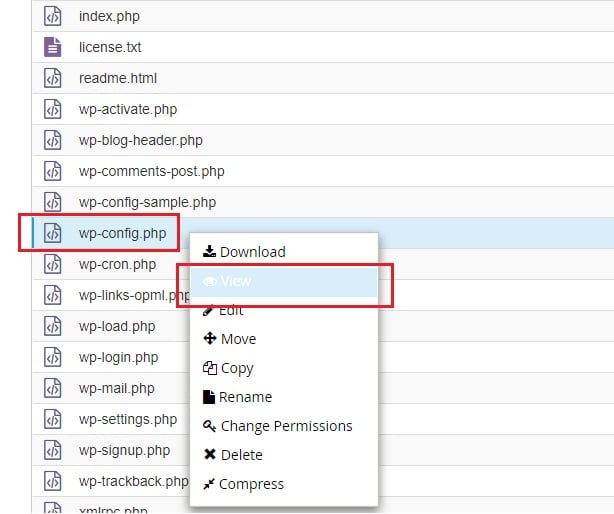
4) Once you click on view, the wp-config.php file should get open in another tab in your browser. Now, scroll down till you find the section named as /* The name of the database for WordPress*\ line.

You can see the database name is “mileswebdemo_w209”. In your case, this entry will be different from the same format.
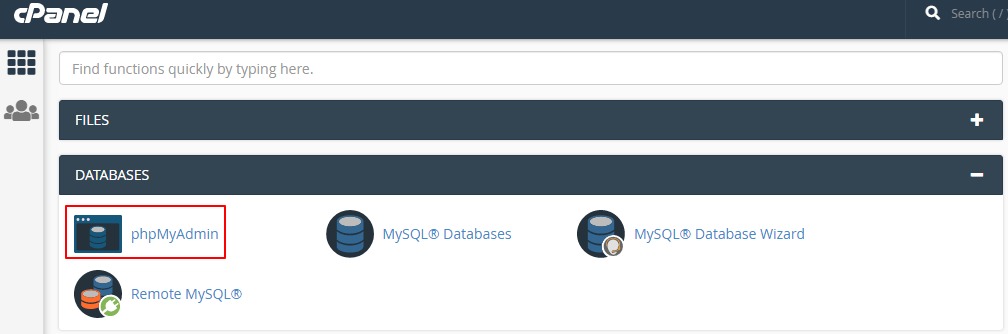
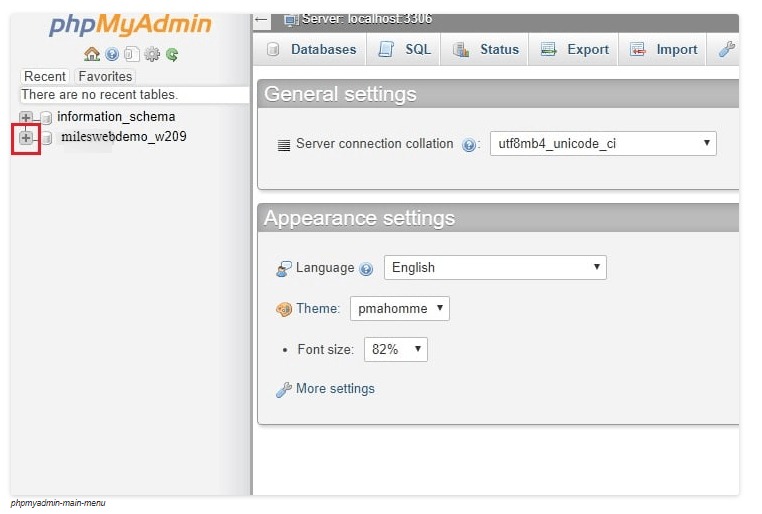
5) Now, you will have to locate a database in phpMyAdmin via cPanel. So, go back to cPanel and click on phpMyAdmin.
6) You can see, phpMyAdmin will be opened in another tab on your browser. Now, you will have to locate the database name that has been previously identified from viewing the wp-config.php file. In case you have multiple databases, make sure that you are choosing the one that is specifically noted in the wp-config.php file in the previous step. Now click on + sign to expand the tables.
7) Once tables get expanded, locate the wp_options table. Remember, the prefix of your database doesn’t need to be wp_ so just look for the second of the prefix which would be _options.
After locating the _options table, click on the table to display the entries. Identify 2 entries that you want to modify:
– option_name: siteurl
– option_name: home
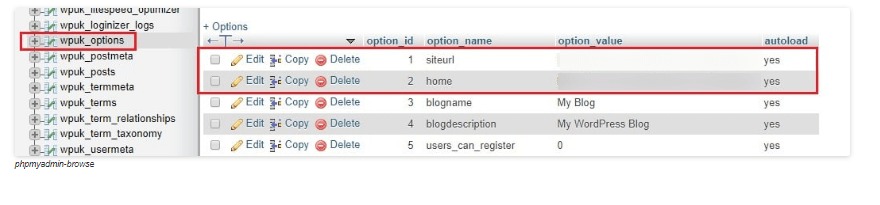
In option value section we can see our URL as :
https://www.mileswebdemo.com/wordpress
https://www.mileswebdemo.com/wordpress
Similarly, you should see your site’s URL.
Once the URL entries are located, click on the edit option on the left side of each entry to enter a new domain. While entering your new URL in this file, remember to include the http://or https:// portion of your domain. After entering the new domain in a proper format, click on the Go button.

8) After clicking on Go, you will be redirected back to the previous page where you can perform the same activities for the 2nd entry, the home URL. Make sure that both entries listed to match. For example for MilesWeb the entries should be :
https://www.mileswebdemo.com/wordpress
https://www.mileswebdemo.com/wordpress
If these two don’t match, the site will not get load properly.
9) After changing both URLs to the new URL your site will load properly. You will have to clear some caching plugins or browser caches as well. In case you have any issues reach out to our support helpline.
That’s it!
Also Read :
Learn to stage a WordPress website using Softaculous in cPanel


