A Symlink Protection software automatically reduces the vulnerabilities of a Linux kernel. WHM users can enable Symlink Protection for their server via the panel’s interface.
To Enable Symlink Protection
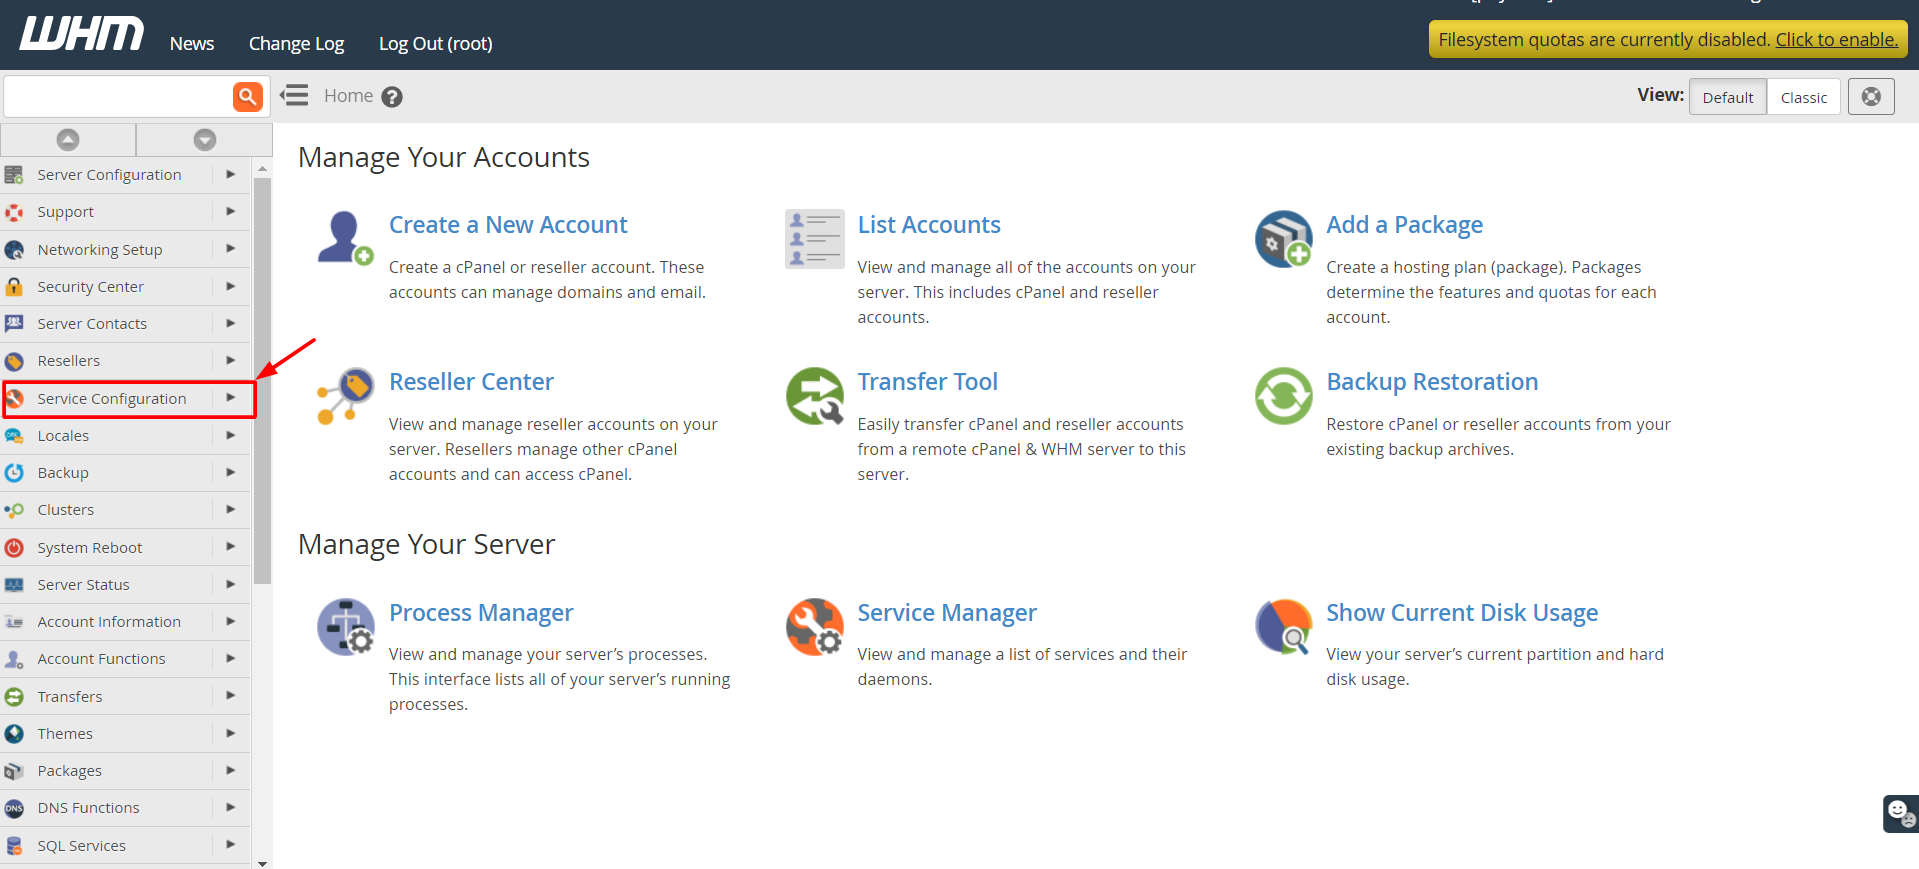
1. Log in to your WHM root account.
2. Select the Service Configuration option from the navigation menu.
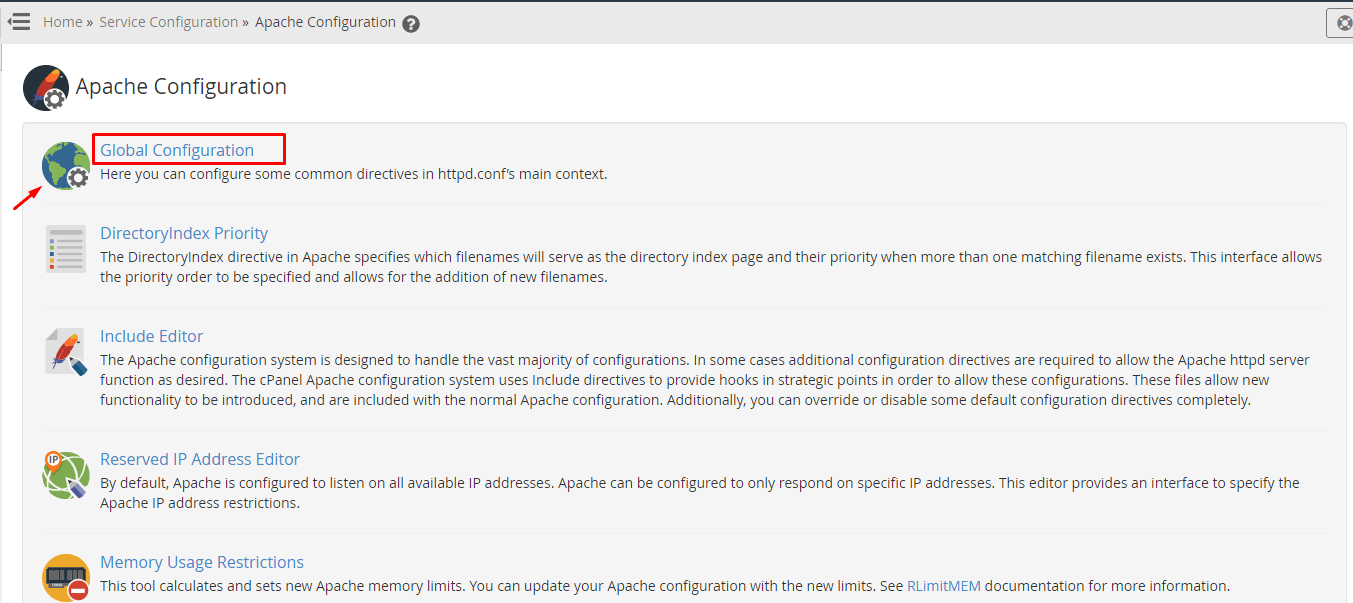
3. Click on Apache Configuration.

The list of configuration options for Apache will open.
4. Click on Global Configuration.
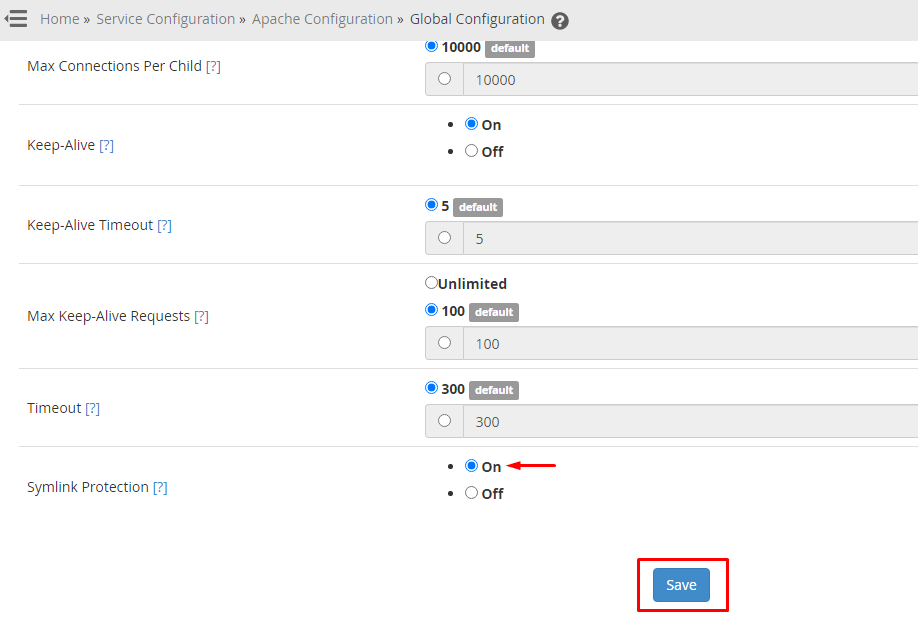
The Global Configuration interface will appear.
5. Scroll down to the Symlink Protection option and click the radio button for On.
6. Click Save to confirm the configuration.
The system will process the configurations.
7. Click the Rebuild Configuration and Restart Apache button.
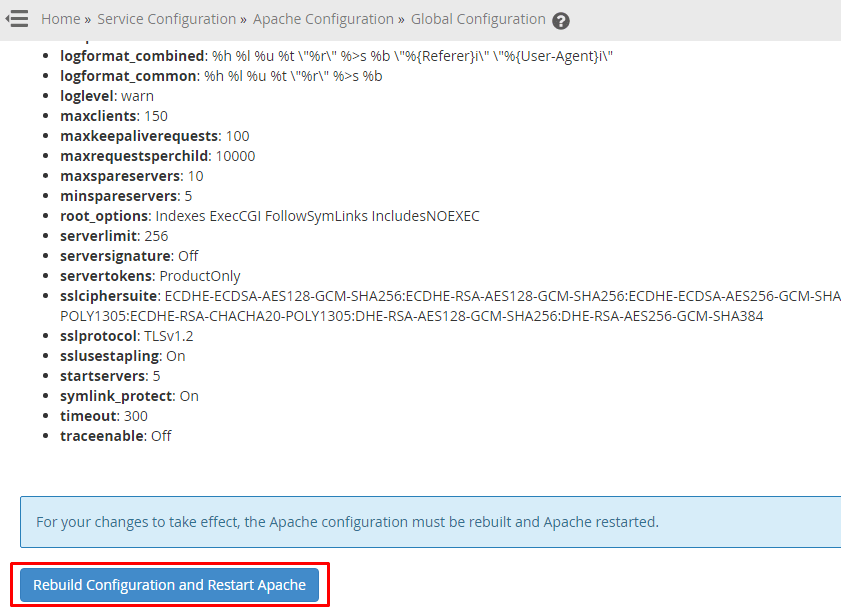
WHM will apply the changes and enable the Symlink Protection for the server.


