What’s a CNAME record?
CNAME stands for Canonical Name. CNAME records are used to map one domain name to another.
For example, suppose you have both example.com and www.example.com that point to the same application and are hosted by the same server. Then to avoid the hassle maintaining two different records, it’s common to create:
- An A record for example.com pointing to the server IP address.
- A CNAME record for www.example.com pointing to example.com.
This helps the example.com to point to the server IP address and www.example.com to point to the address via example.com. If the IP address changes, you just need to update it at the A record for example.com while for www.example.com, it will get changed automatically.
So, let’s now check how to add and delete the CNAME records.
Steps to Add a CNAME Record in cPanel:
Step 1: Login to your cPanel account.
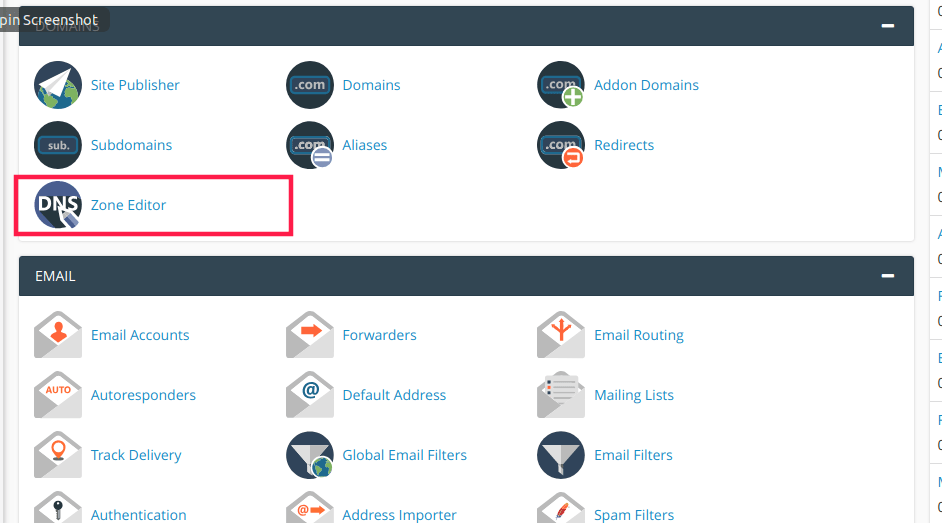
Step 2: Click on the Zone Editor button under the Domains section.
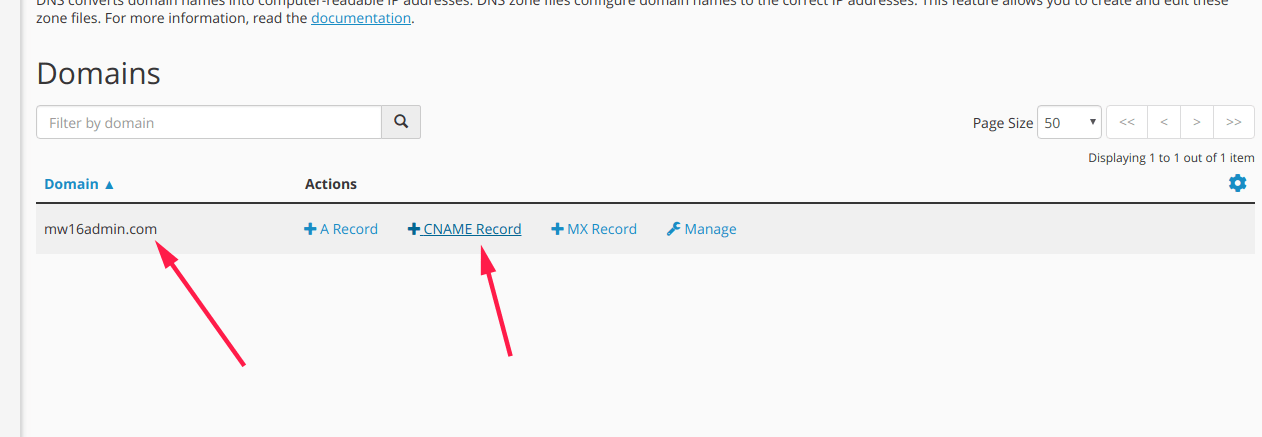
Step 3: Go to the domain for which you want to add a new CNAME record and click on the + CNAME Record option just besides the domain.
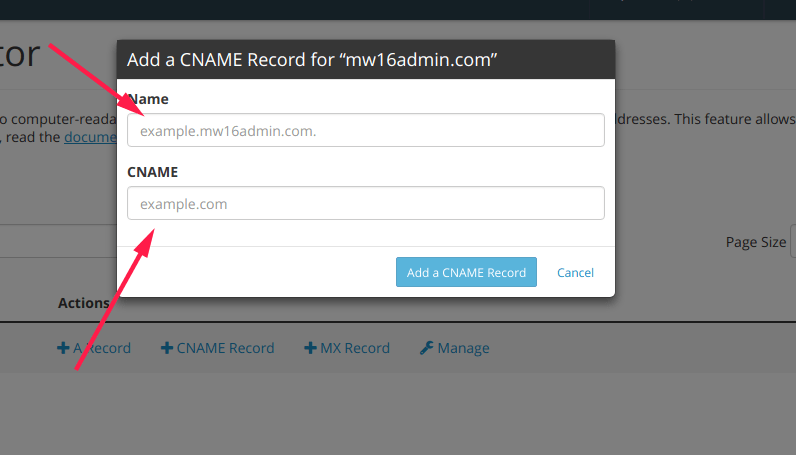
Step 4: A new window for Add a CNAME Record for “domain name” will appear. Here enter the name of the domain and CNAME of it. Then click on Add a CNAME Record button.
This way you can add a new CNAME record for a particular domain.
Steps to Add a CNAME Record in WHM:
Step 1: Login to your WHM account.
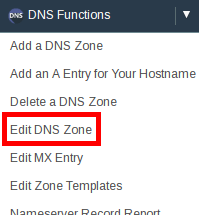
Step 2: Click on the Edit DNS Zone under the DNS Functions section.
Step 3: Click the domain for which you want to create the CNAME and then click the Edit button.

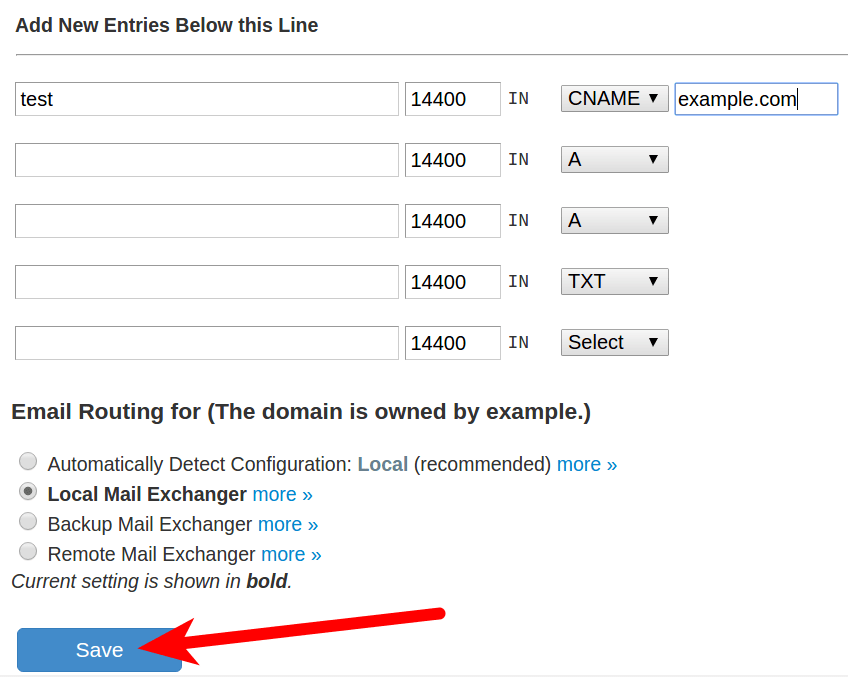
Step 4: Go to the bottom and find the section Add New Entries Below this Line. Click the Select drop-down menu and select CNAME.
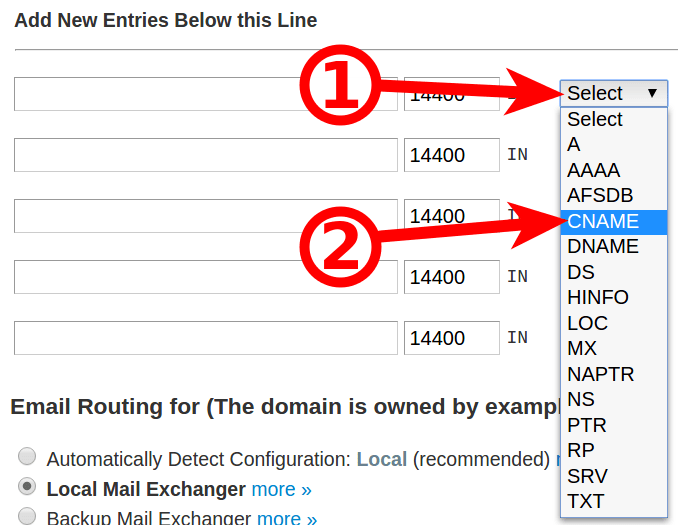
Step 5: Enter your CNAME in the first field. In the image below, we are using test.
Step 6: Next, enter your Hostname in the field besides the dropdown menu and then click the Save button. Here, we are using the host name as example.com. The TTL section will be automatically filled.

This way you can add a CNAME record in WHM.
Steps to Delete a CNAME Record in cPanel:
Step 1: Login to your cPanel account.
Step 2: Click on the Zone Editor button under the Domains section.
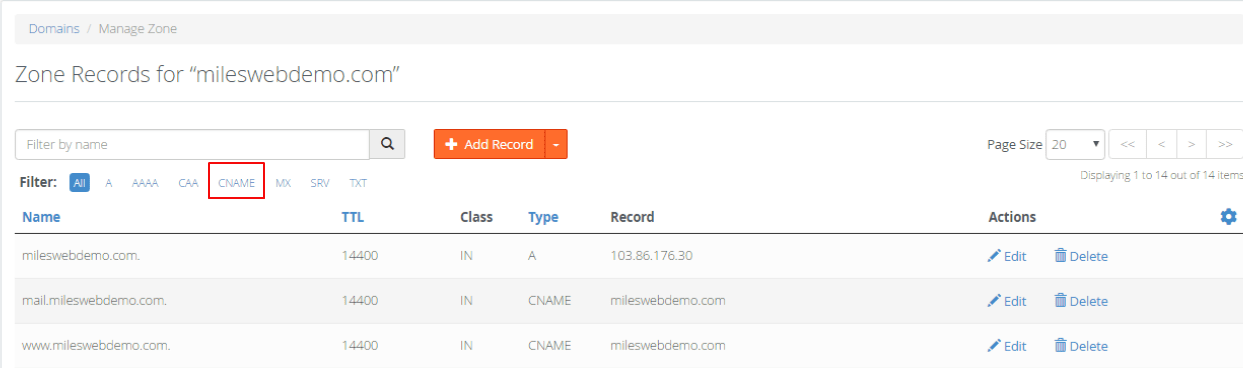
Step 3: Go to the domain for which you want to delete the CNAME record and click on the Manage option.

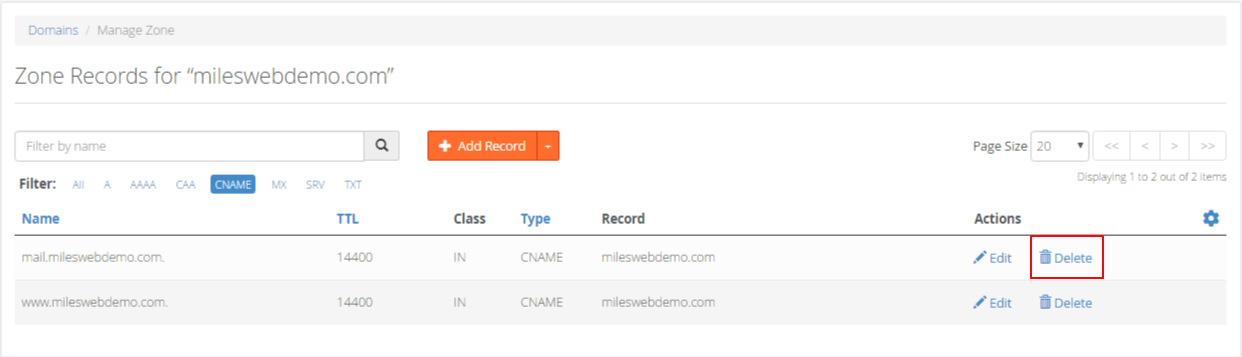
Step 4: This will take you to the Manage Zone where a list of all records will be displayed for each domain. Here click on CNAME to view the list of CNAME records.
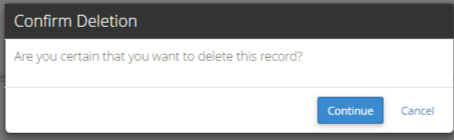
Step 5: Click on the Delete option. You will be asked for confirmation prior to deleting the record. Click on Continue and that’s it.
This way you can delete a CNAME record in cPanel.
Steps to Delete a CNAME Record in WHM:
Step 1: Login to your WHM account.
Step 2: Click on the Edit DNS Zone under the DNS Functions section.
Step 3: Click the domain for which you want to create the CNAME and then click the Edit button.
Step 4: Find the CNAME record you want to delete. You will need to delete the text records for that particular domain.
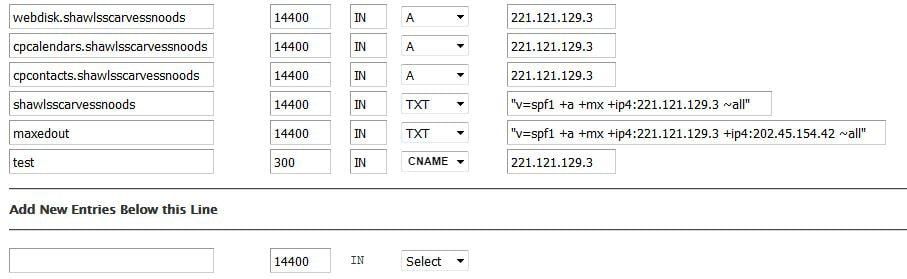
Step 5: Go to the record selector dropdown menu change the record type from CNAME to Select for the domain you have deleted the text records.
![]()
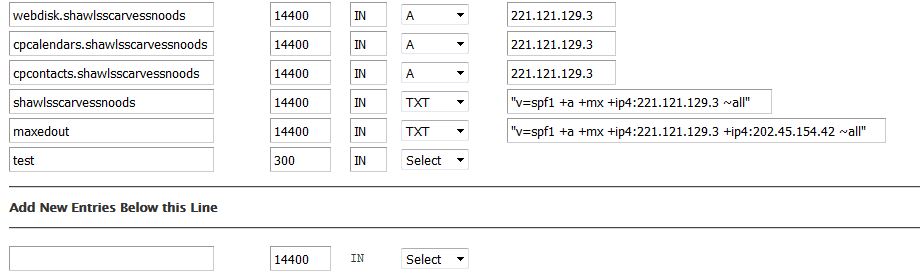
Step 6: This will remove the record type from the screen as below:
Step 7: Click on Save button and that’s it.
This way you can delete the CNAME records in WHM.
Hope, this article on adding or deleting CNAME records has been helpful.


