Overview
The Contact Form 7 plugin is a renowned tool that helps in creating and managing forms without the need for any programming skills. It’s among the easiest ways to use a contact form for your website using WordPress.
This tutorial will help you install and configure Contact Form 7, giving you a basic contact form to start with, as well as providing pointers on how to sidestep some common mistakes.
Why Use Contact Form 7?
As with many plugins, Contact Form 7 has its advantages and disadvantages. In this section, we will talk about the pros that might make website admins lean towards it.
For starters, it is free and offers great flexibility in form design. It can have fields at different levels of complexity, ranging from simple text boxes to dropdown lists and checkboxes. Forms can easily be added via shortcodes, and most importantly, they work with spam protection mechanisms such as reCAPTCHA.
Step-by-Step: How to Use Contact Form 7 to Create a WordPress Form
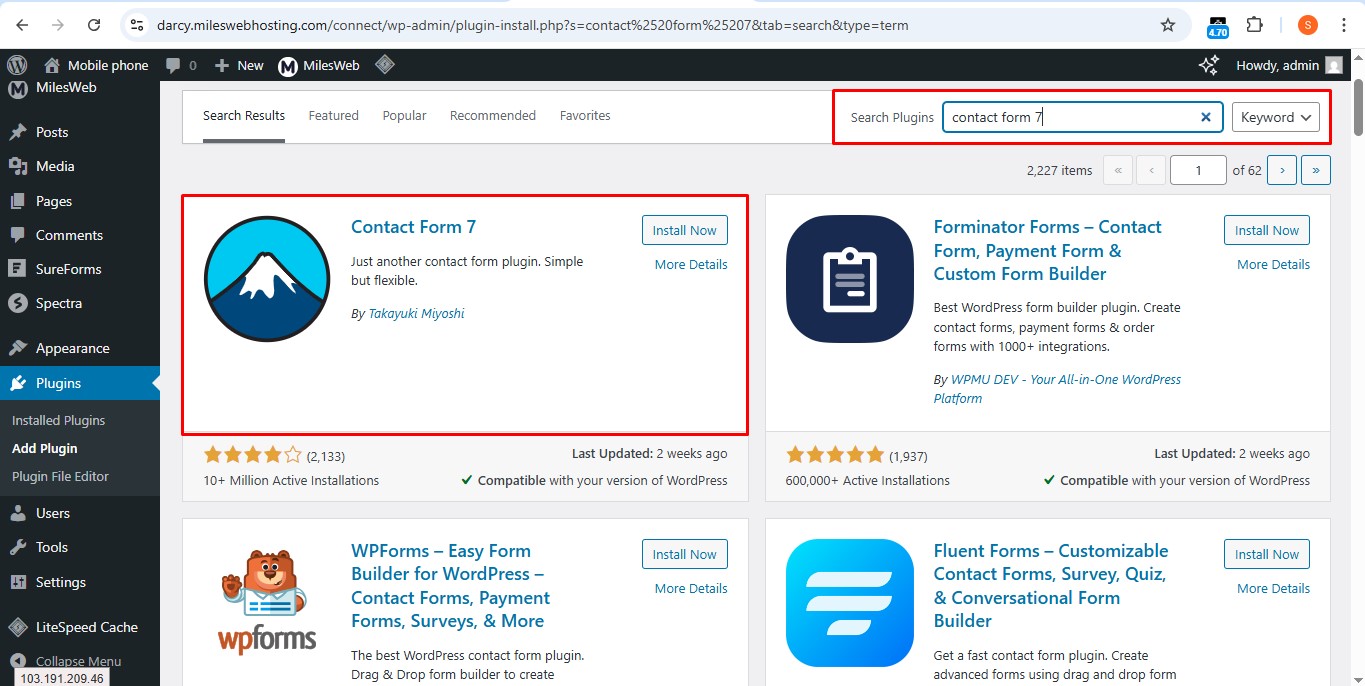
Step 1: Install the Plugin
- You should be able to log in to the WordPress admin panel normally.
- Access the dashboard, and navigate to Plugins, followed by New.
- Type Contact Form 7 in the search bar.
- Press Install Now and then activate it.
- Once it is done activating, you will see “Contact” appear as a new section in the dashboard menu.
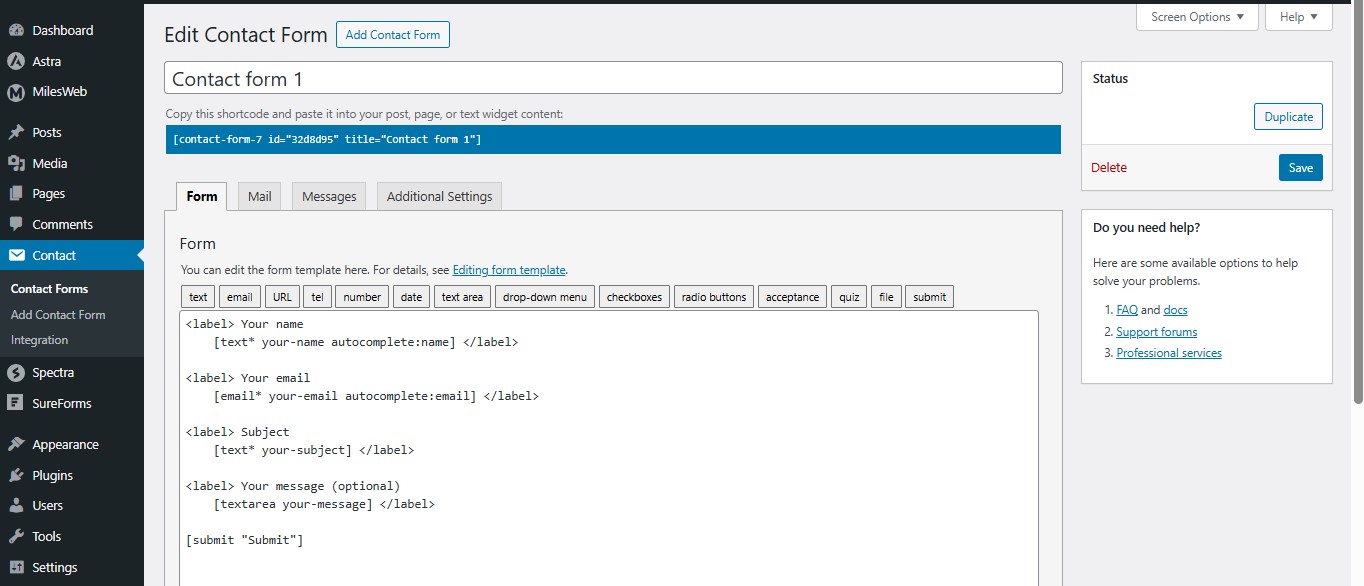
Step 2: Create a New Form
- Choose Contact → Contact Forms.
- You will have a default form, which you can either rename or add to.
- Type a name for your form, like “Contact Us Form,” and you are done with the first basic step.
- Using the form builder, you can adjust field types as follows:
- text—for name fields
- email—for email addresses
- textarea—for messages
- submit—for submit buttons
Step 3: Configure Mail Settings
- Click the Mail tab while editing your form.
- Set the To email (your business inbox).
- Set From to use your domain (e.g., [email protected]).
- Optionally customize the Subject and Message Body.
Tip: Use domain-matching email addresses to improve deliverability.
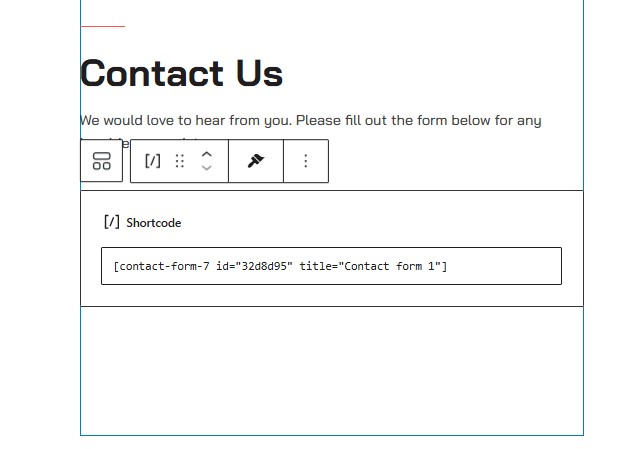
Step 4: Add the Form to Your Website
- After saving the form, copy the generated shortcode.
- Paste the shortcode into:
- Any WordPress post/page using the Shortcode block
- A Text Widget in the sidebar or footer
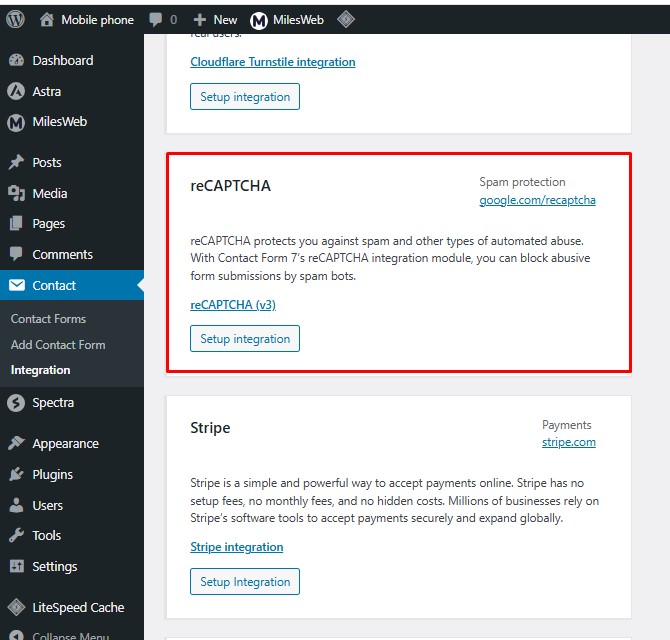
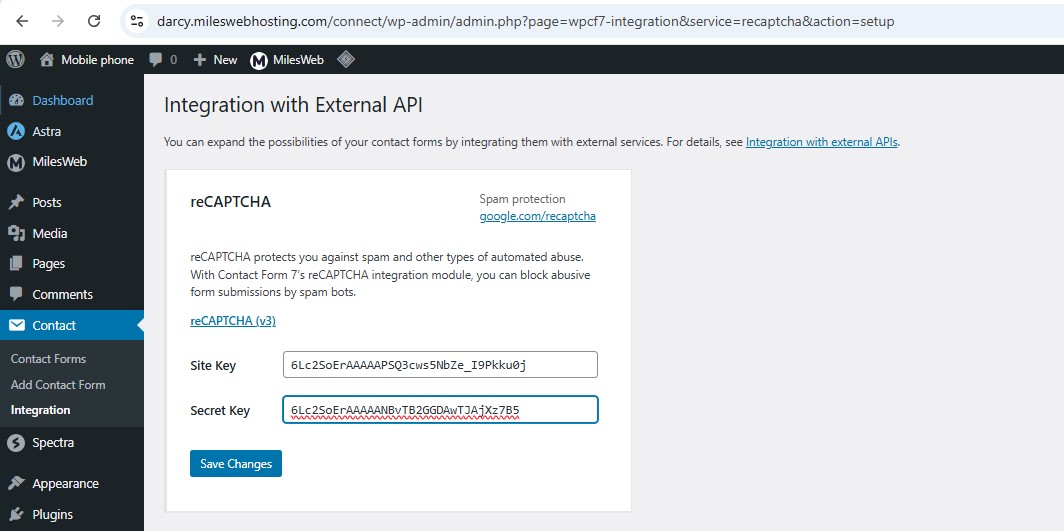
Step 5: Add Spam Protection with reCAPTCHA
To reduce spam, enable reCAPTCHA integration.
- Navigate to Contact > Integration.
- Click Setup Integration under the reCAPTCHA section.
Go to Google reCAPTCHA and generate a Site Key and Secret Key.
Paste the keys into your WordPress Contact Form 7 integration page and click Save Changes.
More reCAPTCHA Help:
Visit the official Turnstile Integration URL: https://contactform7.com/turnstile-integration/ to configure alternative spam protections if needed.
Step 6: Redirect Users After Submission
- You can redirect users to a thank-you page after they submit a form:
- Go to the Additional Settings tab.
- Paste the following script:
<script>

document.addEventListener( 'wpcf7mailsent', function( event ) {

  location = 'https://yourdomain.com/thank-you/';

}, false );

</script>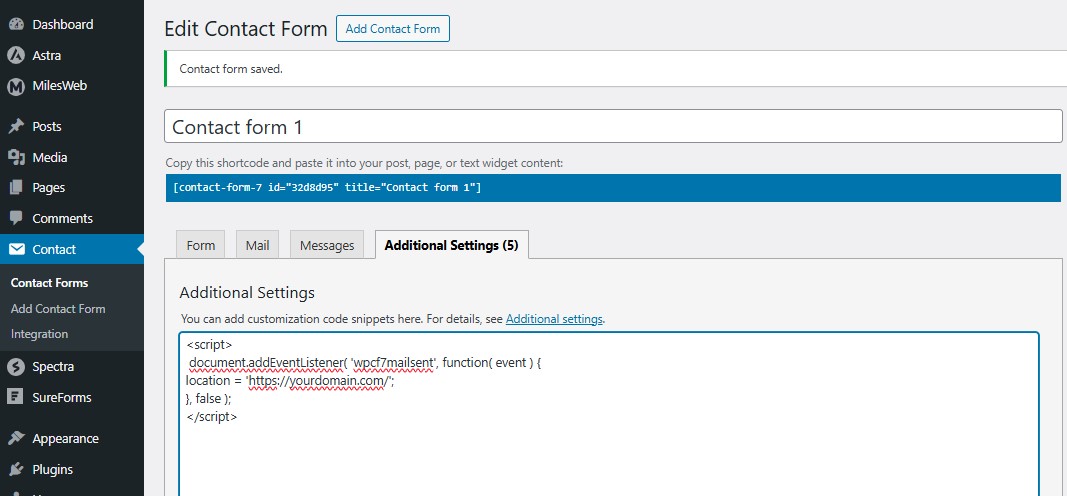
Tips & Warnings
- To block spam, enable reCAPTCHA (set up via Contact → Integration).
- Post-embed test: Ensure message delivery.
- Domain-based sender addresses help reduce mail delivery issues.
- If you are a novice form customizer, complex HTML should be avoided.
- Maintain relevance in form fields to minimize user frustration.
Need Help from MilesWeb?
MilesWeb offers fully managed WordPress hosting that is completely optimized for speed, safety measures, and plugins. Whether you’re setting up a basic contact page or an advanced feedback form on WordPress hosting servers, our specialists are at your service round the clock on chat, tickets, or calls to help with plugins, email sending issues, and other related problems.


