
Configuring a Node.js application behind OpenLiteSpeed combines Node’s high-performance event loop with OpenLiteSpeed’s ultra-fast HTTP handling, built-in caching, and low memory footprint. OpenLiteSpeed acts as a reverse proxy through its built-in App Server context, managing the Node process directly while handling SSL termination and static file delivery.
1. Create a Virtual Host
Log in to the OpenLiteSpeed WebAdmin Panel using your username and password.
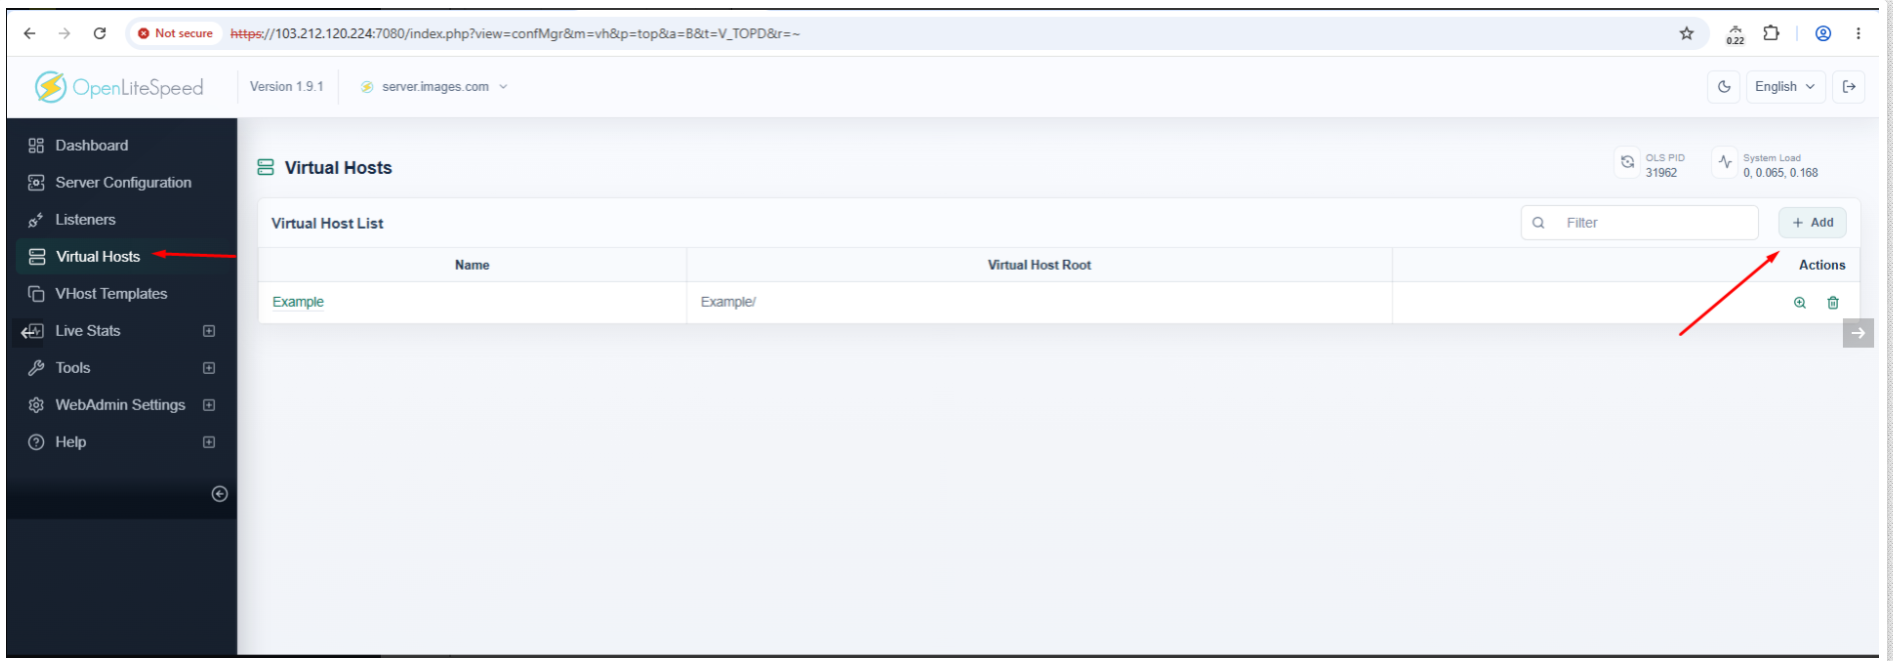
Go to Virtual Hosts → Add and enter the required details as shown in the screenshots. You can set the Virtual Host name as per your requirement.
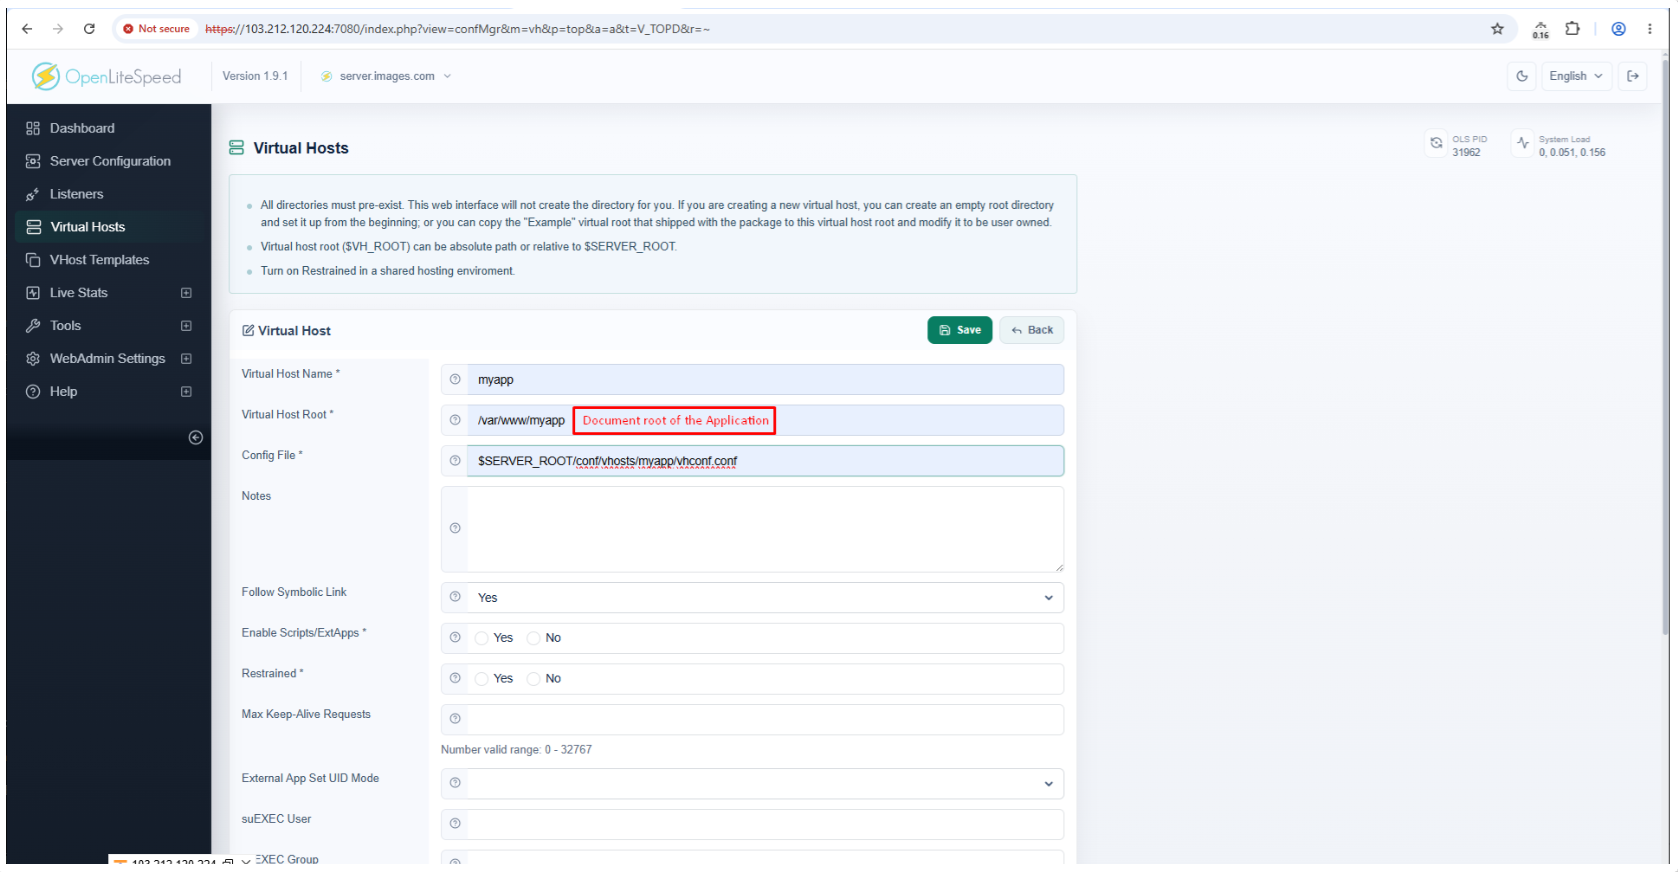
In the Config File section, enter:
$SERVER_ROOT/conf/vhosts/myapp/vhconf.confReplace myapp with your Virtual Host name.
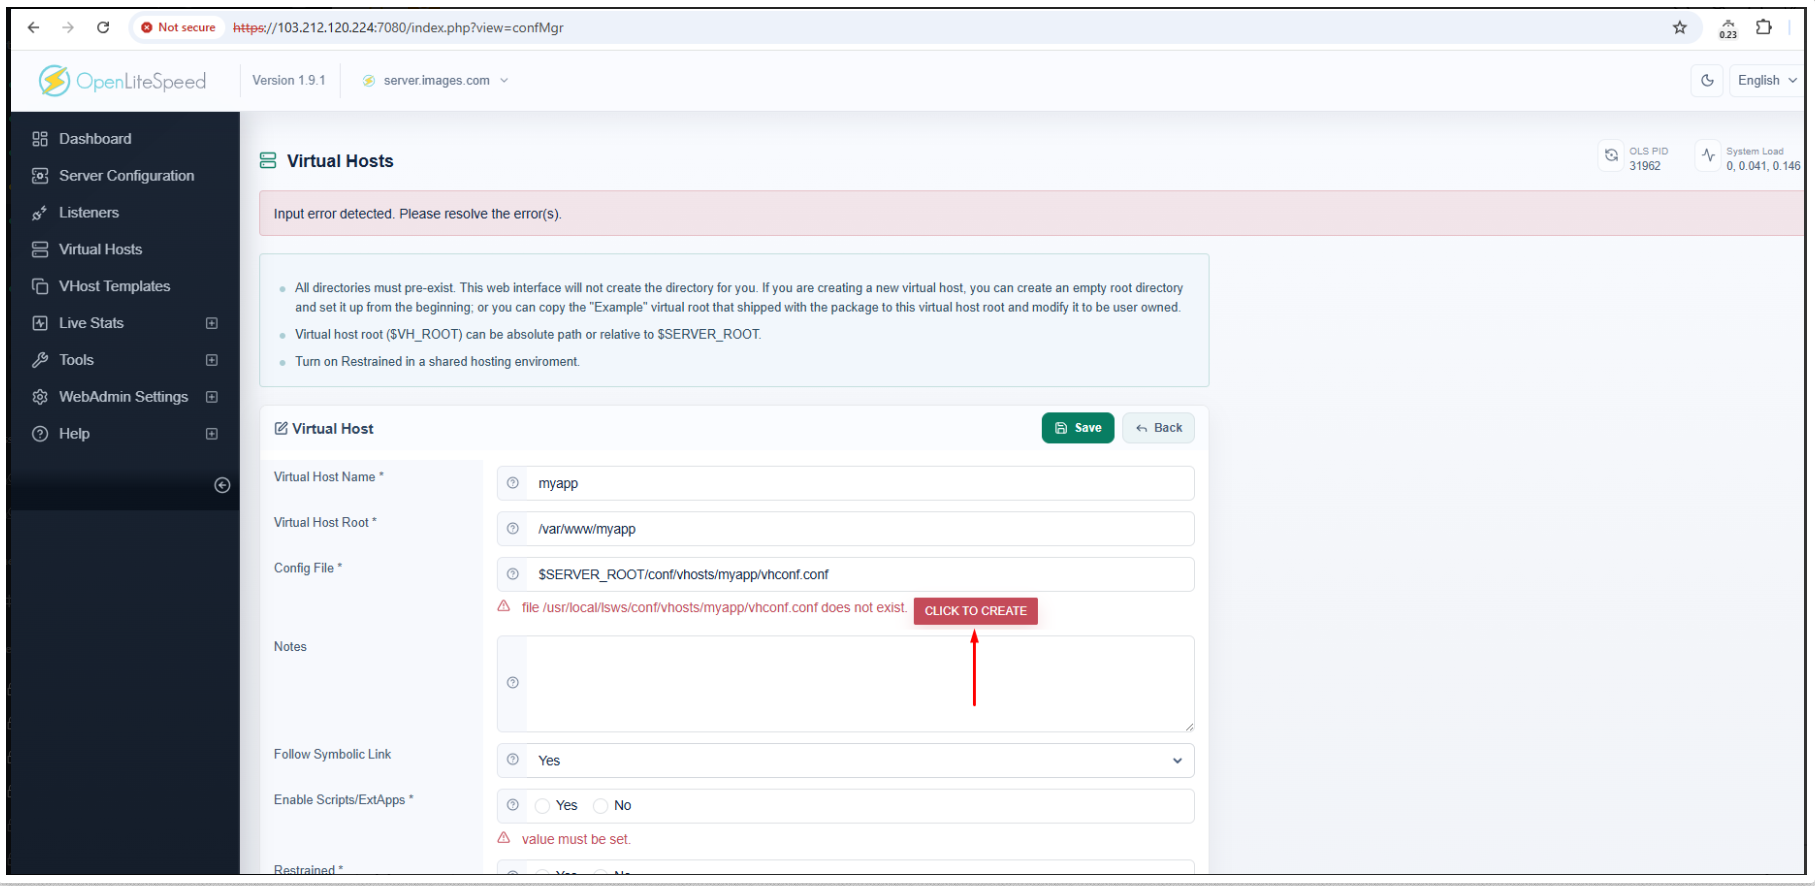
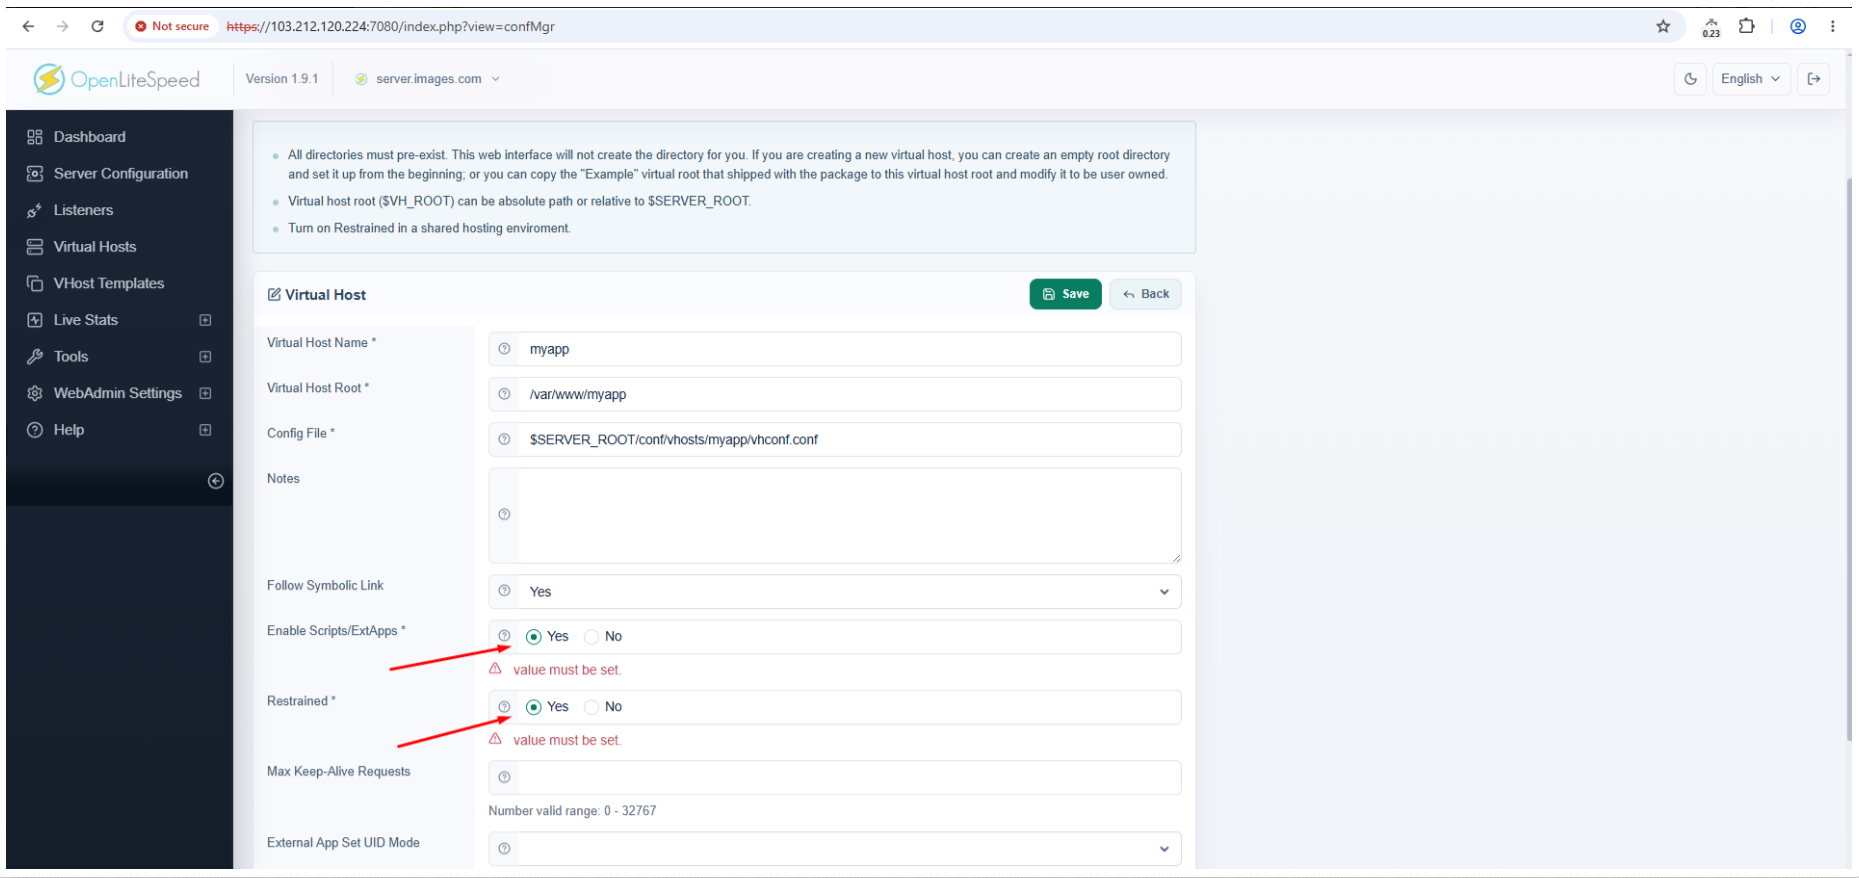
Click Save after entering the required details.
2. Configure the Virtual Host Document Root
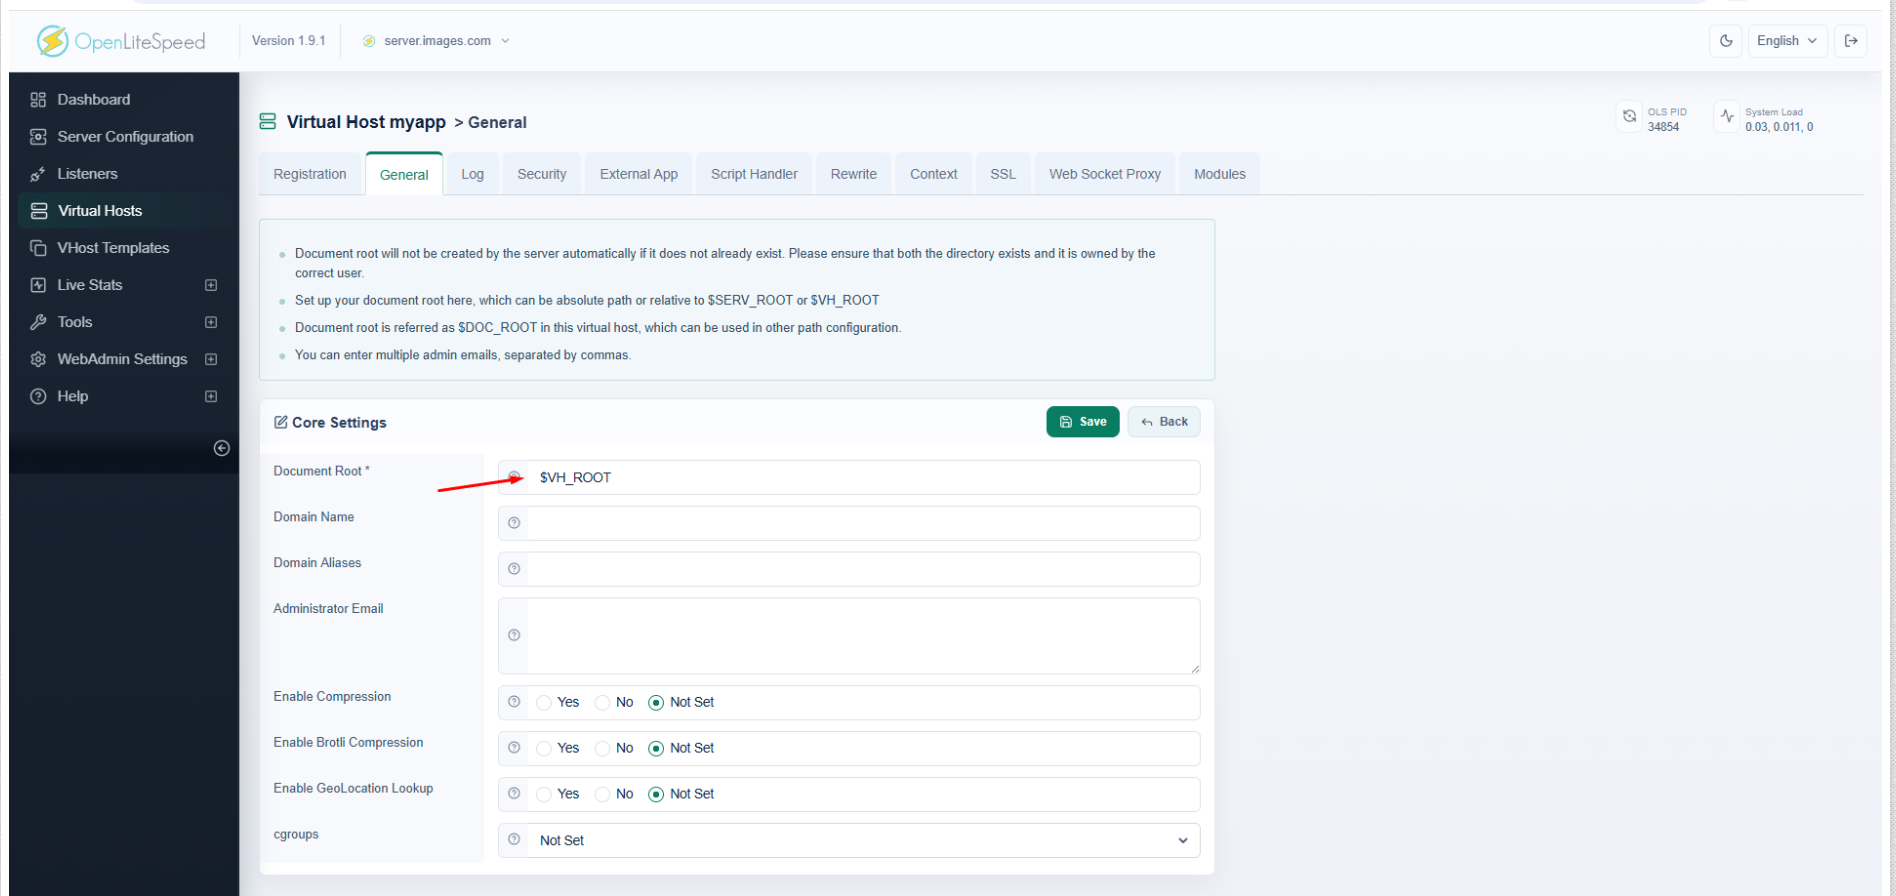
Go to Virtual Hosts → myapp → General → Edit.
In the Document Root section, enter:
$VH_ROOTClick Save.
3. Configure the External Application
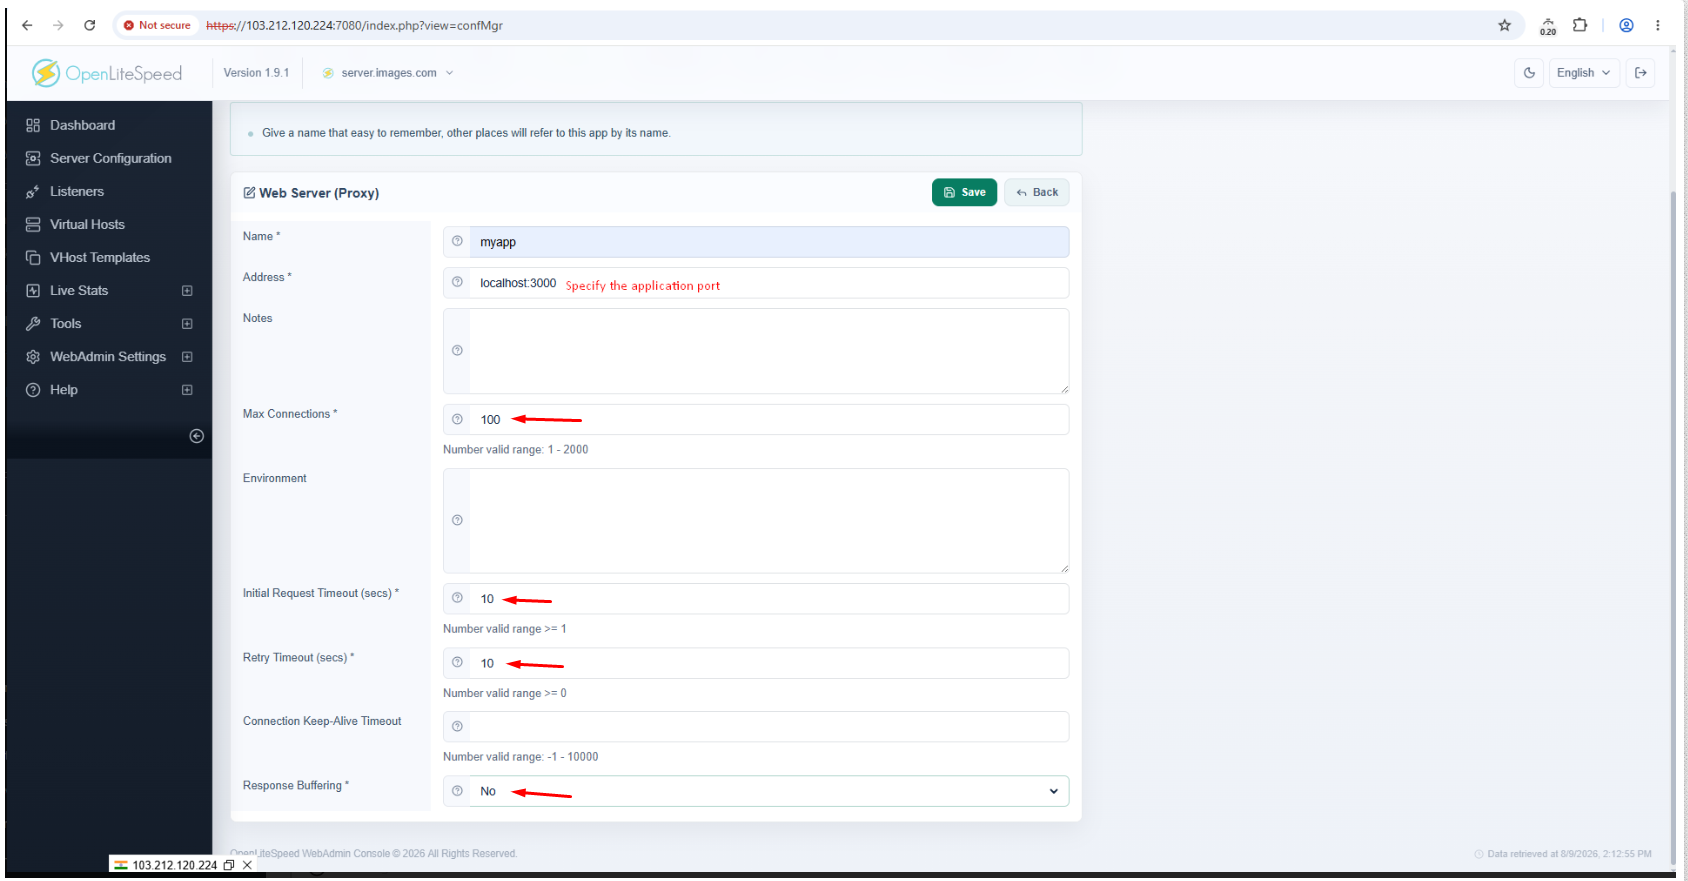
Go to Virtual Hosts → myapp → External App → Add.
Select Web Server (Proxy) and click Next.
Enter the required details as shown in the screenshot and click Save.
4. Configure the Proxy Context
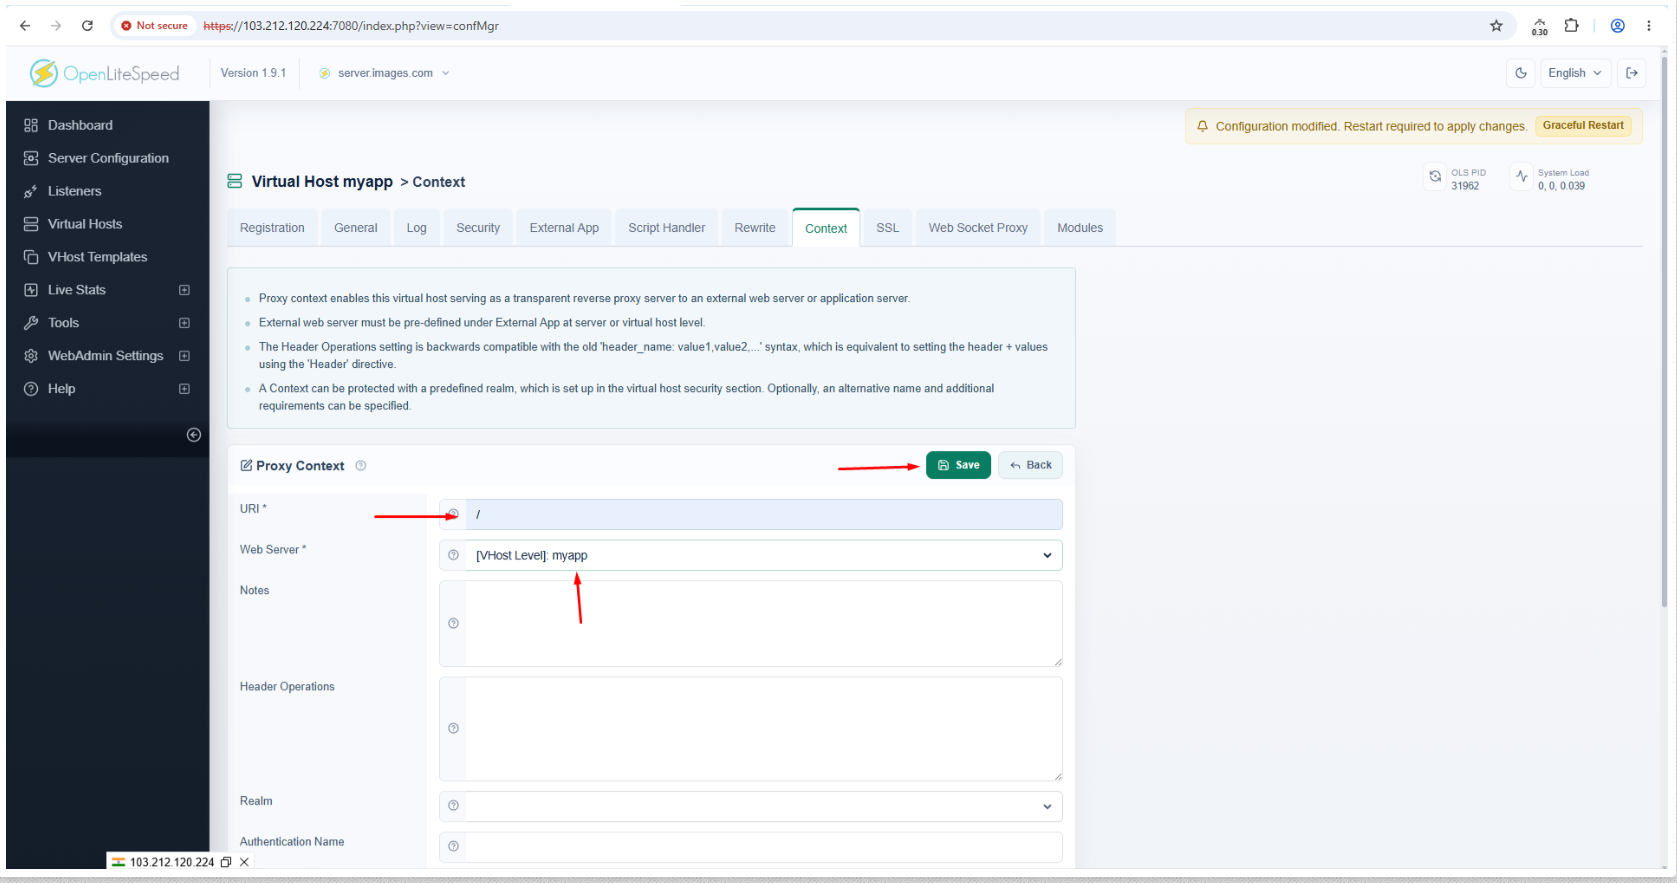
Go to Virtual Hosts → myapp → Context → Add.
Select Proxy and click Next.
Enter the required details as shown in the screenshot and click Save.
5. Configure the HTTP Listener
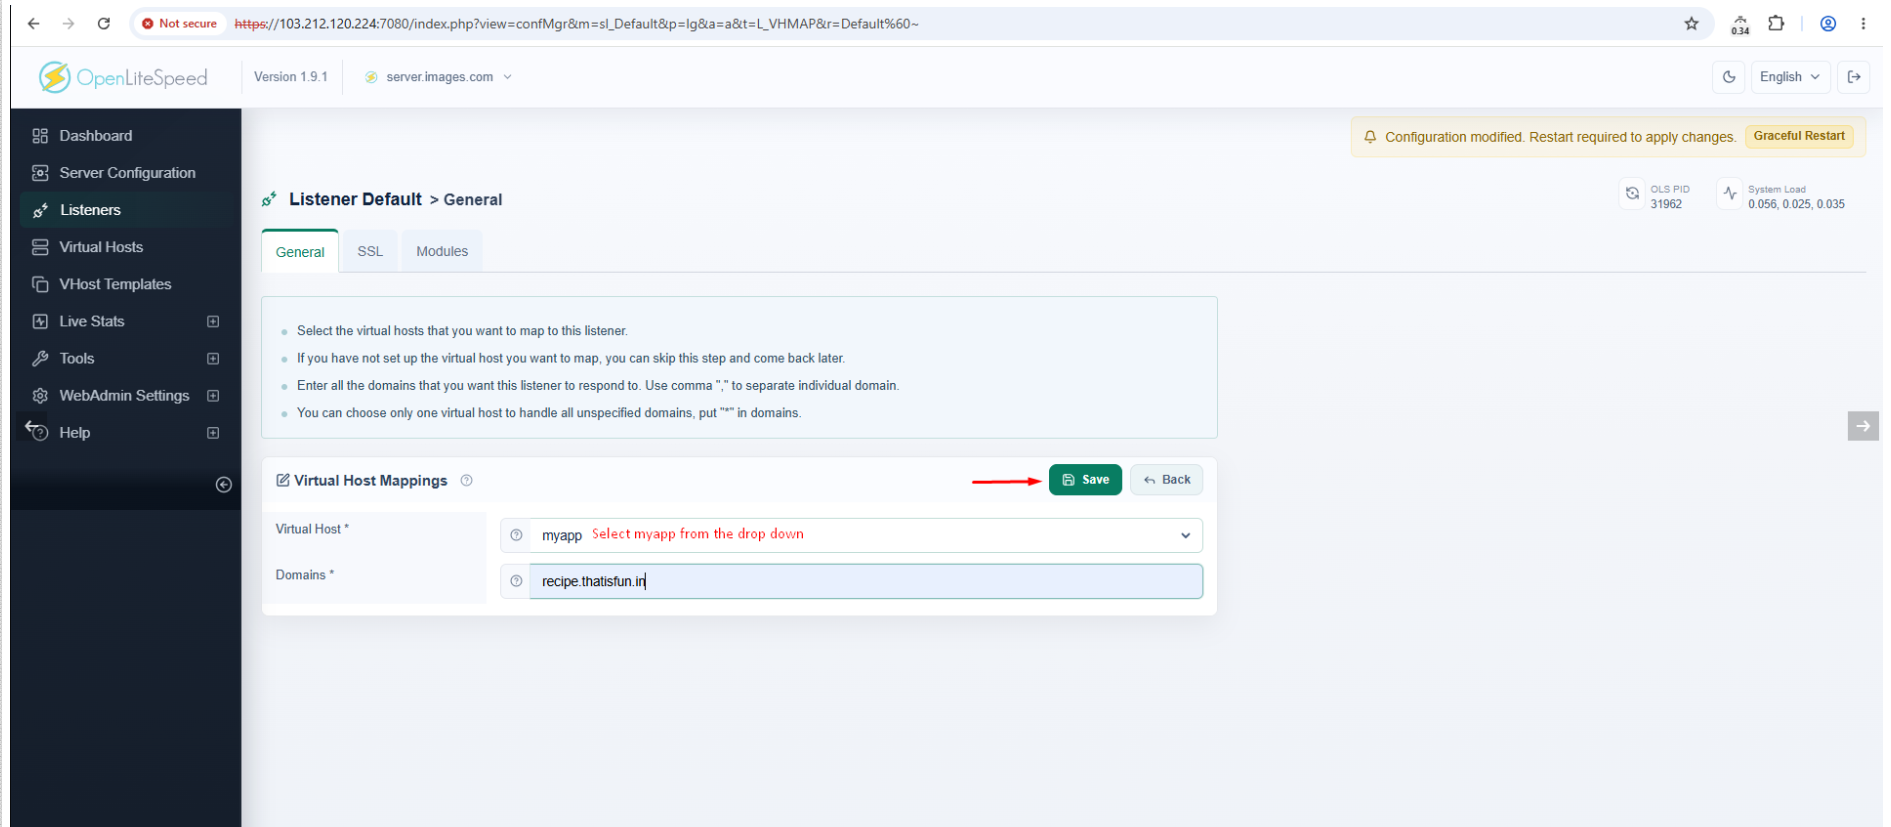
Go to Listeners → Default → Edit → General → Virtual Hosts Mappings → Add.
Enter the required details as shown in the screenshot and click Save.
6. Configure the HTTPS Listener
Repeat the same Virtual Host Mapping configuration for the HTTPS listener.
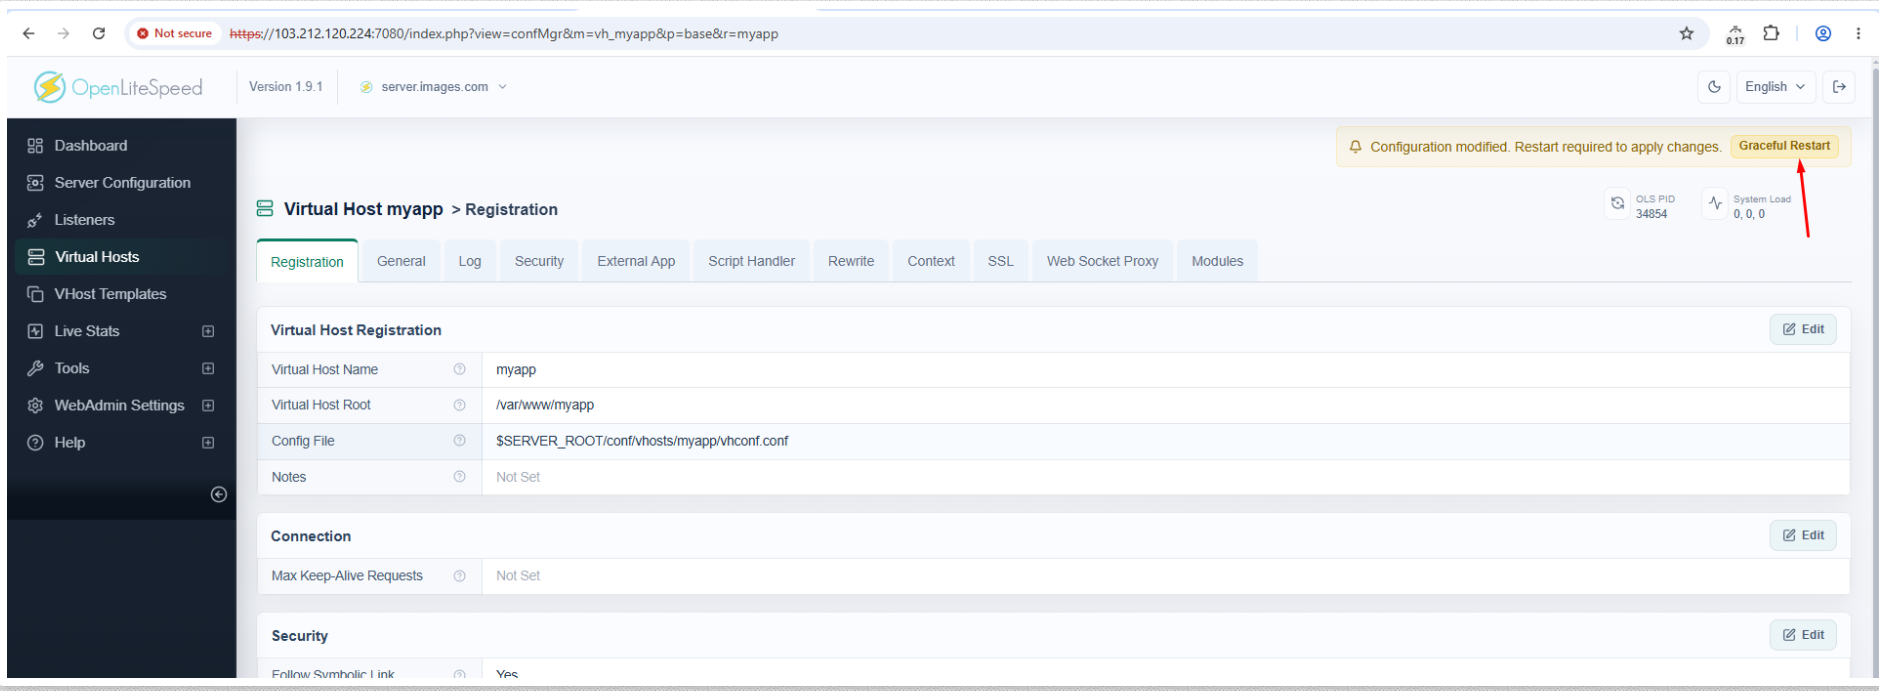
Once the configuration is completed, click Graceful Restart.
7. Install SSL on the Domain
Run the following command and replace yourdomain.com with your actual domain:
certbot certonly --standalone -d yourdomain.com --pre-hook "systemctl stop lsws" --post-hook "systemctl start lsws"Example:
certbot certonly --standalone -d recipe.thatisfun.in --pre-hook "systemctl stop lsws" --post-hook "systemctl start lsws"Once the SSL certificate is installed, Certbot will display the paths of the SSL certificate and private key.
8. Configure SSL in OpenLiteSpeed
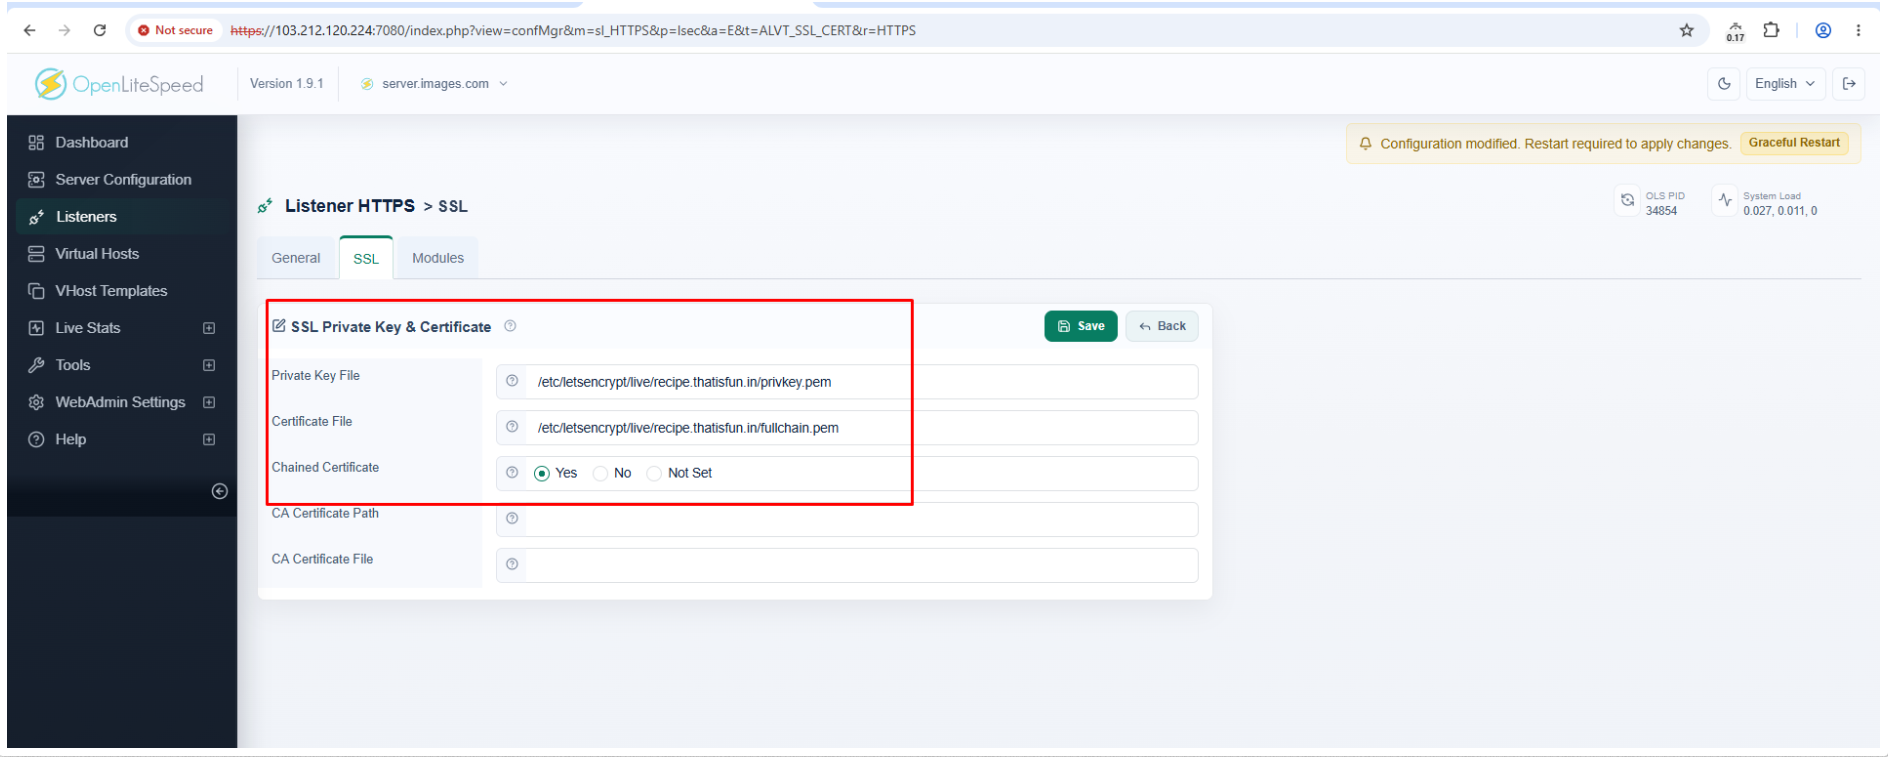
Go to Listeners → HTTPS → SSL → Edit.
Enter the SSL certificate and private key paths provided by Certbot in the respective fields and click Save.
9. Restart OpenLiteSpeed
Click Graceful Restart in the OpenLiteSpeed WebAdmin Panel.
Alternatively, restart the service using:
systemctl restart lswsYour Node.js application is now ready to use with OpenLiteSpeed.
By leveraging OpenLiteSpeed as a frontend server for Node.js, your application benefits from reduced resource consumption, automatic SSL handling, and integrated page caching without complex external process managers like PM2. This setup provides a reliable, enterprise-ready environment capable of handling high-traffic Node applications efficiently.