Manually uploading website files after every code update can quickly become repetitive and time-consuming. If you use Git for version control, you can simplify this process by automating deployments directly to your cPanel account.
With cPanel’s built-in Git Version Control feature and a .cpanel.yml deployment file, you can automatically publish the latest changes to your website whenever new code is deployed. This approach reduces manual effort, minimizes deployment errors, and helps maintain a consistent workflow.
In this guide, you’ll learn how to configure automatic Git deployment in cPanel using GitHub or a local Git repository.
Step 1: Create the .cpanel.yml Deployment File
The deployment process is controlled by a special configuration file named .cpanel.yml. This file tells cPanel which commands to execute whenever a deployment is triggered.
Create a file named .cpanel.yml in the root directory of your Git repository and add the following configuration:
—
deployment:

  tasks:

    - export DEPLOYPATH=/home/username/public_html/

    - /bin/cp -R * $DEPLOYPATH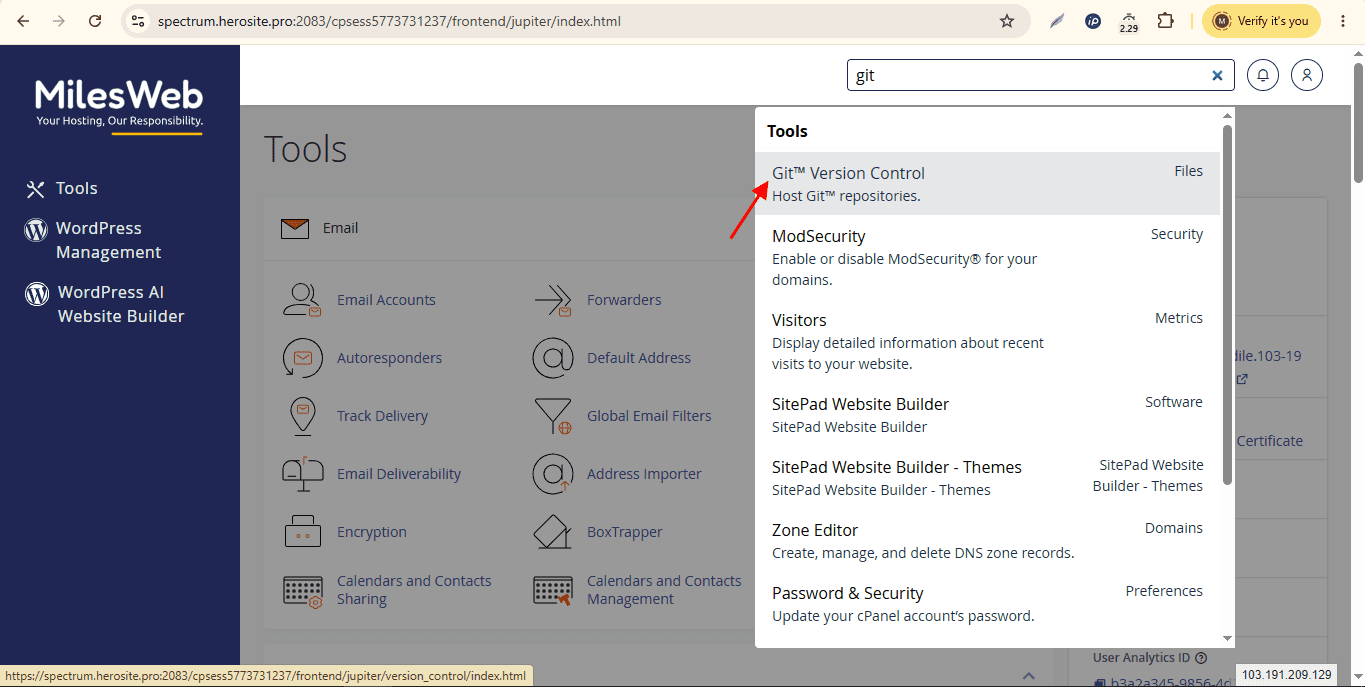
Note: Replace /home/username/public_html/ with the absolute path of your website’s document root on the server.
When deployment starts, cPanel copies the repository contents to the directory specified in the DEPLOYPATH variable.
Customize Deployment Tasks
The deployment file can execute multiple commands, allowing you to automate additional tasks during deployment.
For example, you can:
- Install Composer dependencies
- Run npm install
- Build frontend assets
- Deploy only selected directories instead of the complete repository
- Execute custom shell scripts before or after deployment
Simply add the required commands under the tasks section in the .cpanel.yml file.
Step 2: Configure Git Version Control in cPanel
Once the deployment file is ready, the next step is to connect your Git repository with cPanel.
Log in to cPanel
Access your cPanel account using your hosting credentials.
Open Git Version Control
Navigate to the Files section and click Git Version Control.
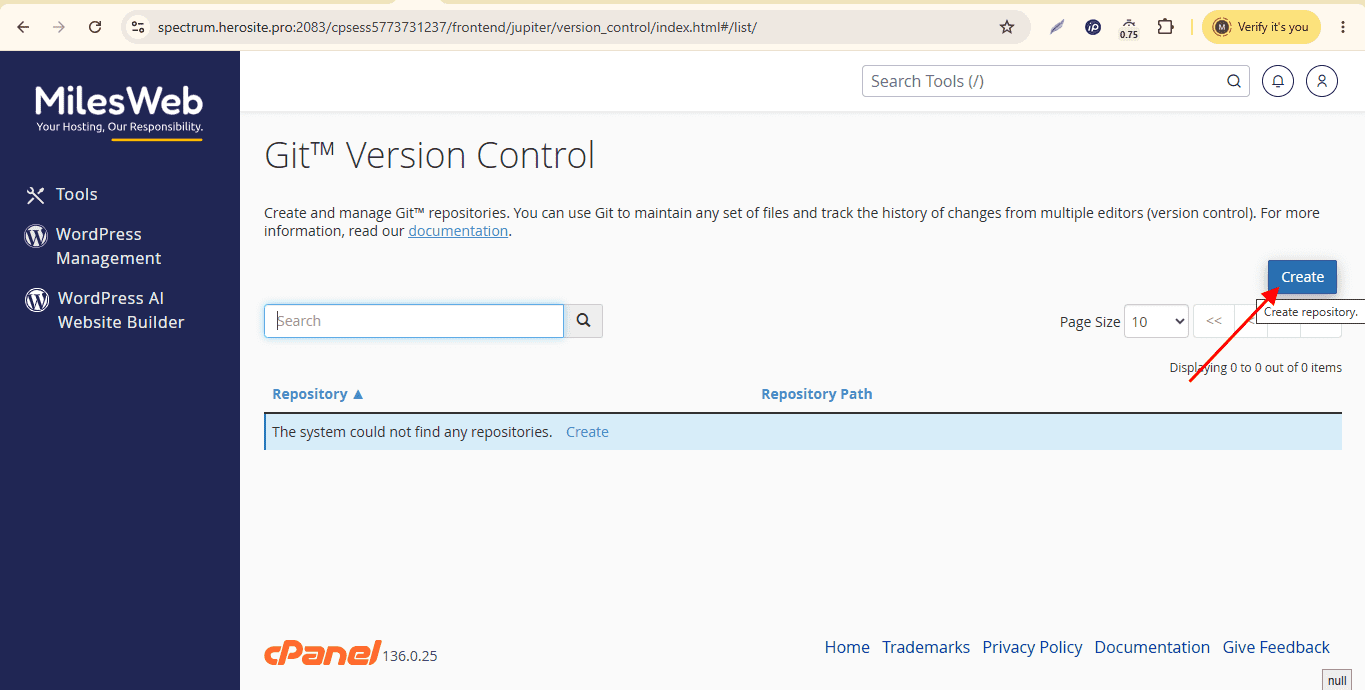
Create a Repository
Click Create to configure a new Git repository.
You’ll have two options:
Option 1: Clone an Existing Repository
Choose this option if your project is already hosted on GitHub or GitLab.
Enter the repository’s SSH clone URL.
Important: Before cloning, add your cPanel server’s SSH public key to your GitHub or GitLab account. This authorizes cPanel to access the private repository.
Option 2: Create a New Repository
If your project isn’t hosted remotely, you can create a new Git repository directly in cPanel and push your local code to it later.
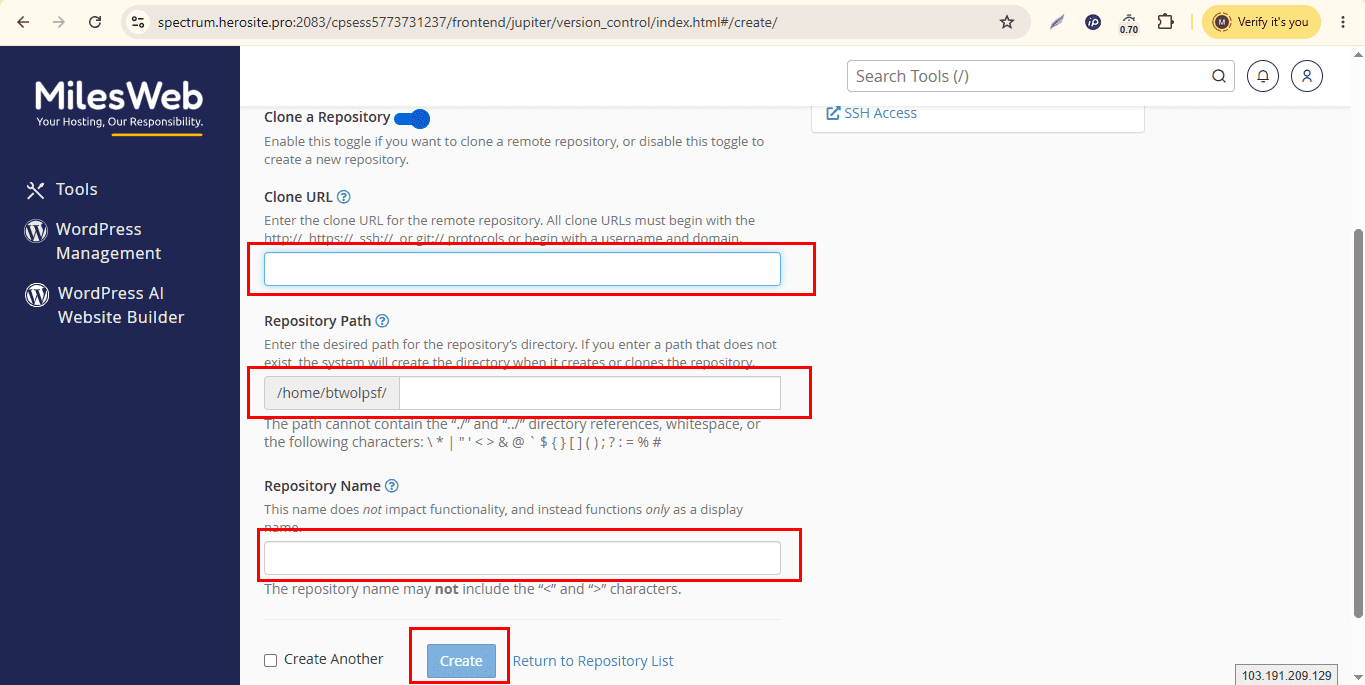
Configure the Repository Path
Specify the directory where the Git repository will be stored.
For security reasons, keep the repository outside your public_html directory. This prevents visitors from accessing Git metadata through the web.
Provide a repository name and click Create to complete the setup.
Step 3: Deploy Your Code Automatically
The deployment workflow depends on how your Git repository is configured.
Method 1: Deploy by Pushing Directly to cPanel
If your local machine pushes code directly to the Git repository created in cPanel, deployment becomes straightforward.
After adding the cPanel repository as a remote, push your code using Git:
git push cpanel masterAs soon as the push completes, cPanel reads the .cpanel.yml file and executes every deployment task automatically. The updated files are then copied to your specified deployment directory.
Method 2: Deploy Through GitHub or GitLab
If cPanel is connected to a GitHub or GitLab repository, pushing code to GitHub does not automatically update your website.
Instead, you have two deployment options.
Option A: Manual Deployment
- Open Git Version Control inside cPanel.
- Select Manage beside your repository.
- Open the Pull or Deploy section.
- Click Update from Remote to fetch the latest commits.
Finally, click Deploy HEAD to publish the latest version of your application.
Option B: Automatic Deployment with Webhooks
For a fully automated deployment workflow, configure a webhook in GitHub or GitLab.
Whenever new commits are pushed, the webhook sends a request to your VPS, where a custom deployment script triggers cPanel’s deployment process.
The deployment can be initiated using the following command:
uapi VersionControl deployment create repository_root=/home/username/repositories/your_repoThis setup creates a continuous deployment workflow where updates made to your Git repository are automatically deployed without requiring manual intervention from cPanel.
Common Deployment Issues and Their Solutions
Even a correctly configured deployment can fail due to small configuration mistakes. Here are some common issues to check before troubleshooting further.
Verify File Permissions
Ensure that deployment directories and executable scripts have the correct ownership and permissions. Incorrect permissions can prevent deployment tasks from running successfully.
Validate the .cpanel.yml File
YAML formatting is highly sensitive to indentation.
Always use spaces instead of tabs, and maintain consistent spacing throughout the file. Even a single indentation error can cause deployment to fail.
Confirm the Active Branch
By default, cPanel deploys the branch selected during repository creation, typically main or master.
If you push updates to another branch, they won’t be deployed unless you change the tracked branch in the Git Version Control settings.
Automating Git deployment in cPanel helps eliminate repetitive file uploads while making your deployment workflow faster and more reliable. By configuring a .cpanel.yml deployment file and using cPanel’s Git Version Control feature, you can seamlessly publish code updates from your local machine or a GitHub repository.
Whether you prefer manual deployments or a fully automated workflow using webhooks, Git deployment in cPanel enables a more efficient development process and reduces the chances of deployment errors.


