
Managing your Virtual Private Server (VPS) from MilesWeb Client Area is the easiest way to control your hosting environment without needing deep technical knowledge. Here’s how you can do it:
Log In to Your Client Area
To start managing your VPS, log in to your MilesWeb client area using your registered email address and password.
Access Your VPS Hosting Service
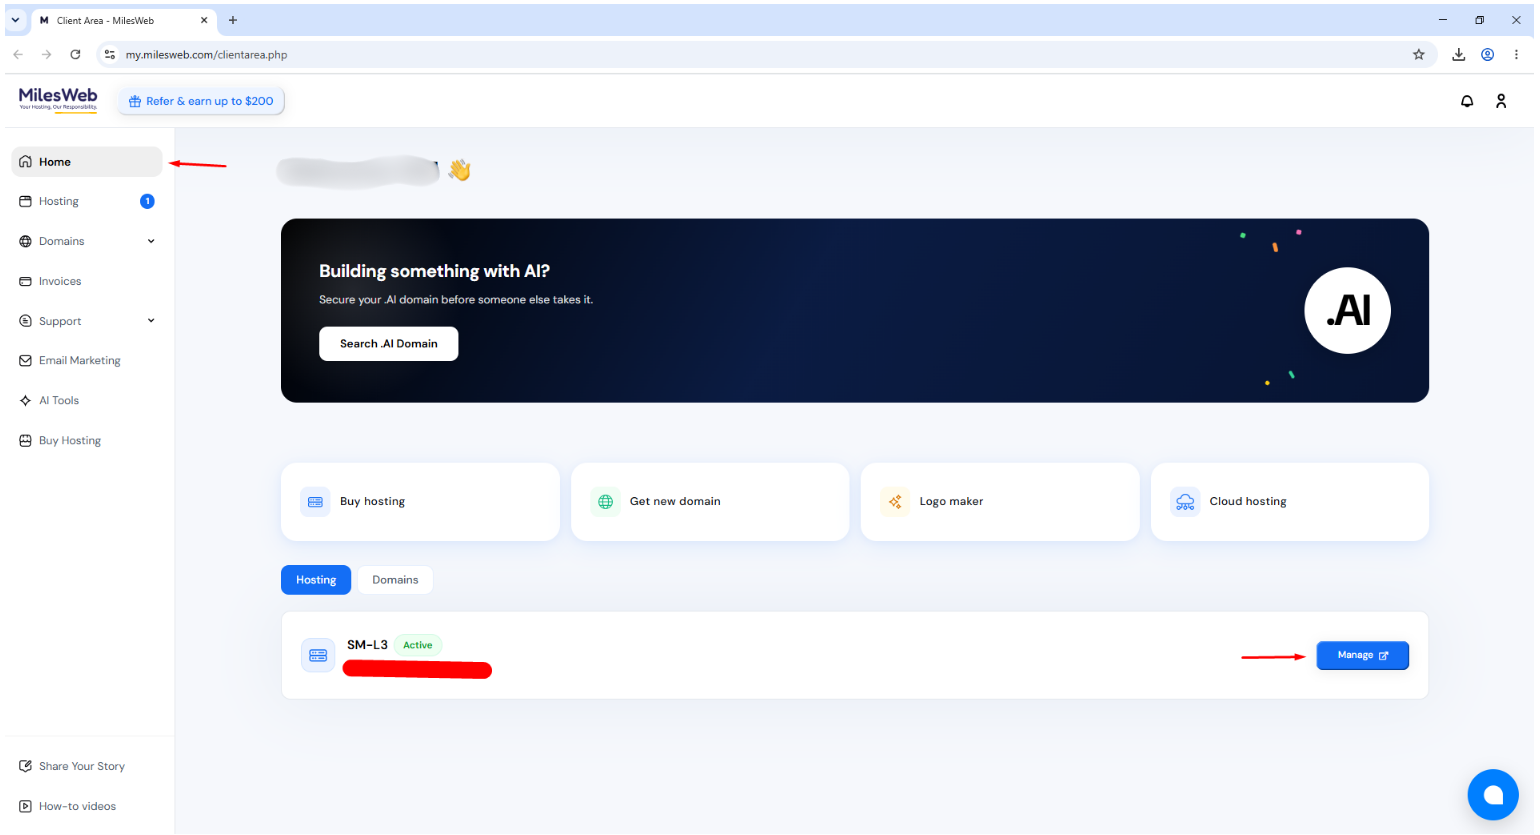
After logging in, you will be redirected to the Home page, where all your active hosting services are listed.
Locate the required VPS Hosting service and click the Manage button to open the MilesWeb VPS Panel.
Select the VPS Instance
Once you are inside the MilesWeb VPS Panel, you will see a list of all your VPS instances. Select the required VPS instance to access its management options and perform the necessary actions.
Navigate to the List VPS
Once the VPS interface opens:
- Navigate to the List VPS menu.
- Here, you will see all the VPS instances added under your account.
- Select the hostname/IP of the VPS you want to manage.
Use VPS Control Options
Next to each hostname, you’ll find multiple action icons that allow you to control the VPS:
- Stop VPS – Gracefully stops the server.
- Restart VPS – Reboots the VPS.
- Power Off VPS – Immediately powers off the server.
- VNC (Virtual Console) – Access the VPS console directly.
- Manage – Opens advanced VPS management options.

Manage VPS Settings
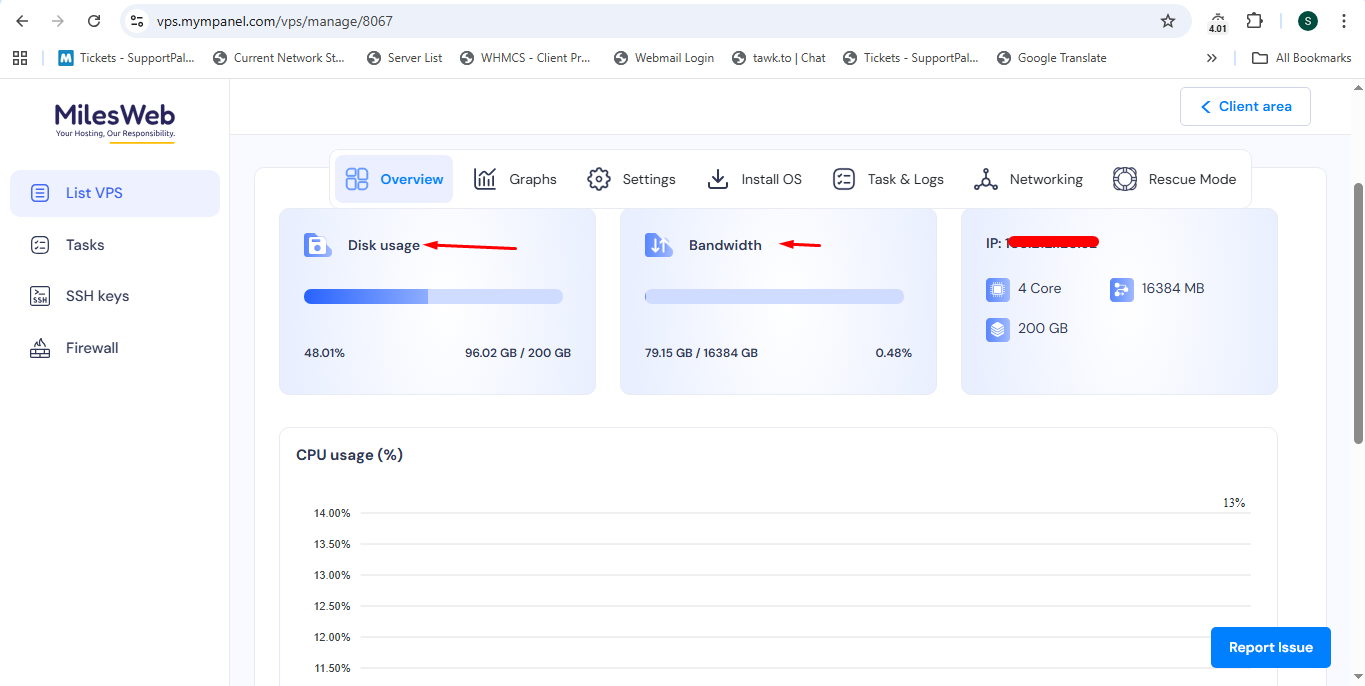
Click on the Manage option to access detailed controls. Inside this interface:
- Overview Tab
- Monitor disk usage, bandwidth consumption, and CPU usage.
- Monitor disk usage, bandwidth consumption, and CPU usage.
- Install OS Tab
- Perform operating system installation or reinstallation.
- For step-by-step guidance, refer to the OS installation article.
- Perform operating system installation or reinstallation.
Navigate to the Task Menu
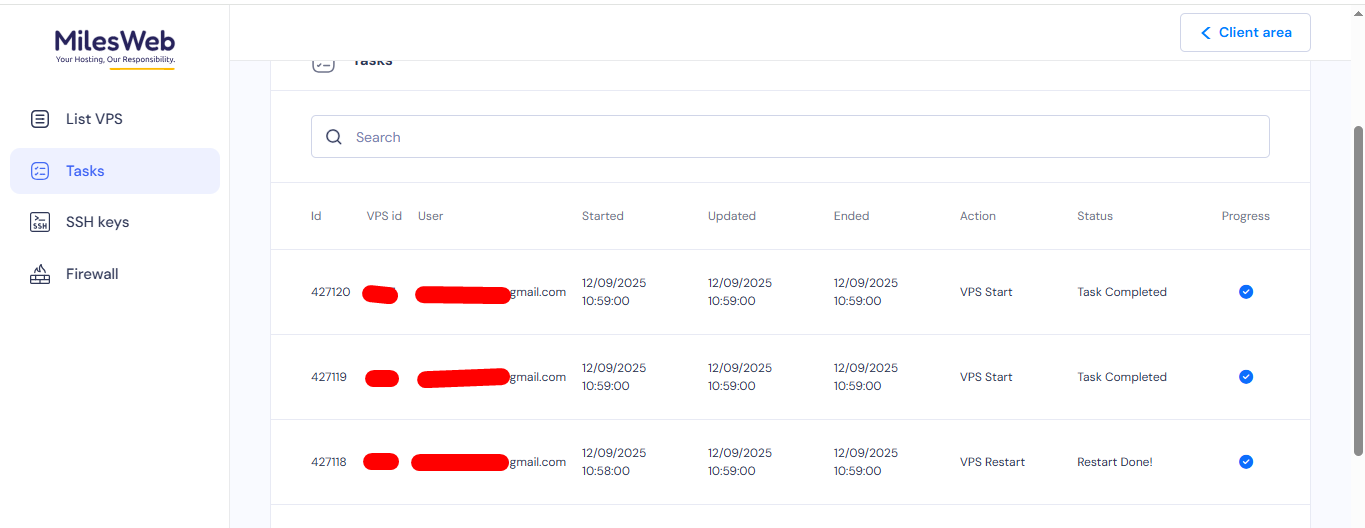
In the Task section:
- View logs of all server-related actions such as start, stop, restart, and power off.
- This helps you track VPS activity and troubleshoot issues if needed.
Navigate to the SSH Keys Menu
To manage SSH access:
- Open the SSH Keys menu.
- Click on Add SSH Key.
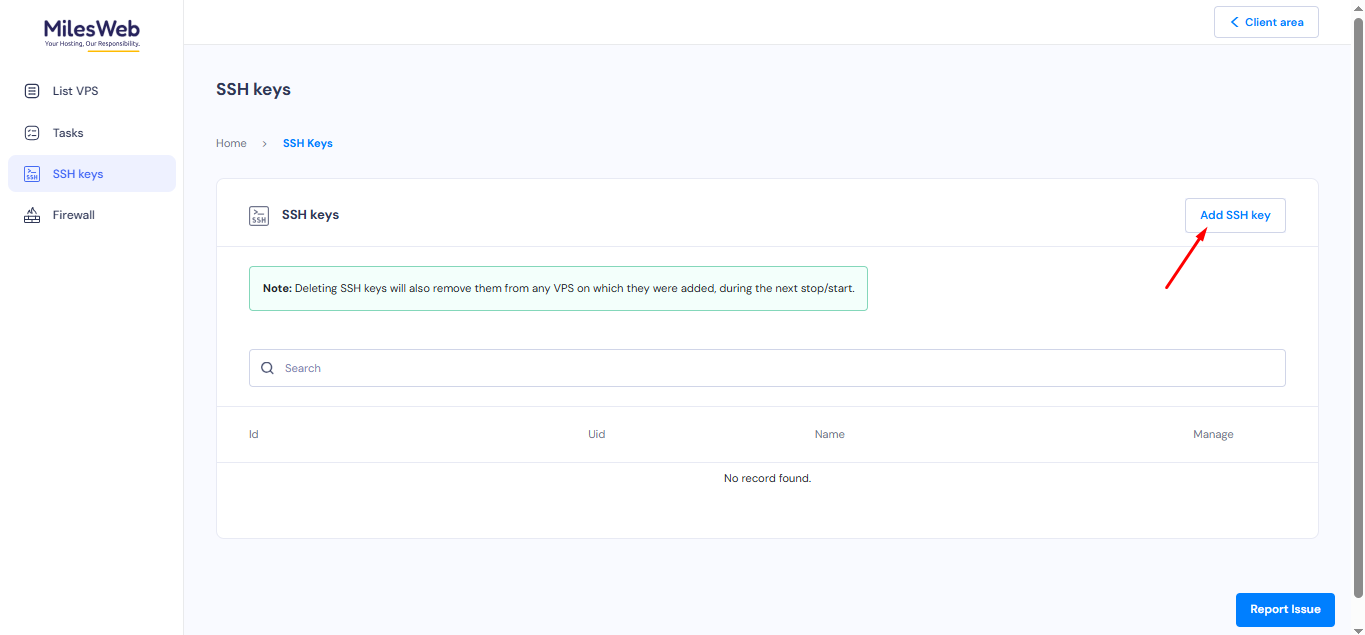
- Enter the SSH key name and public key.
- Click Save to securely store the SSH key details.

Navigate to the Firewalls Menu
To configure firewall rules:
- Go to the Firewalls menu.
- Click on Add Firewall Plan.
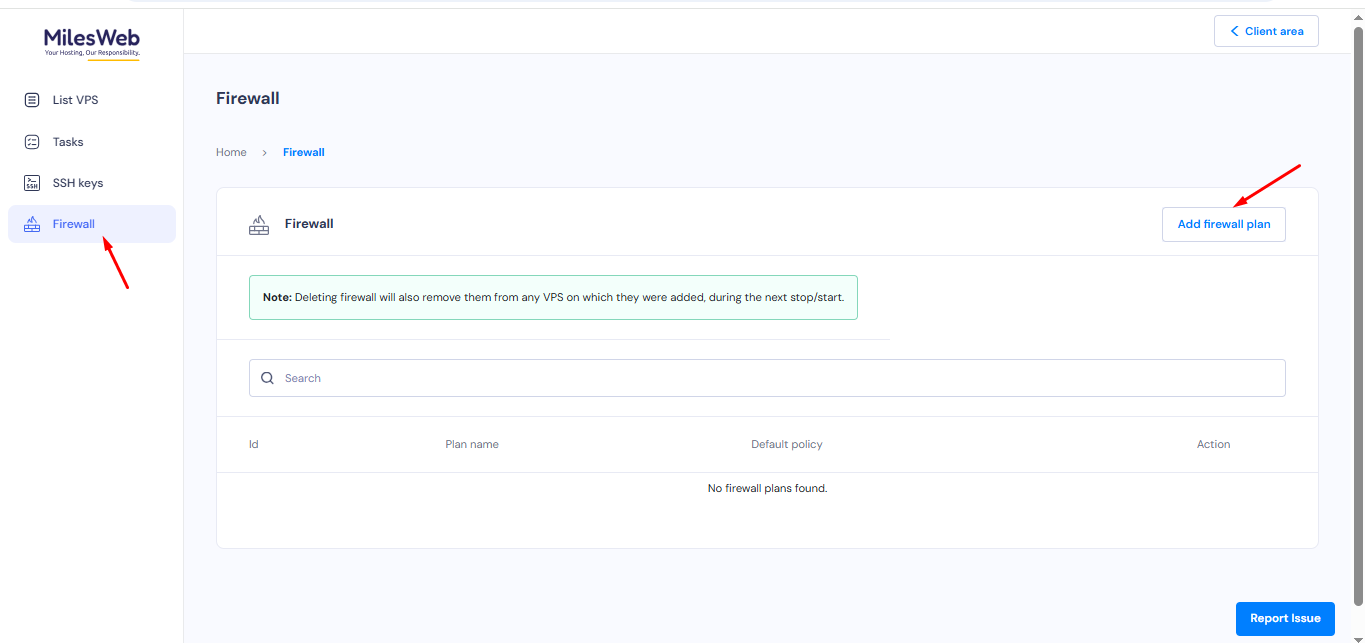
- Enter the plan name and other required details.
- Click Add to save and apply the firewall configuration.

Note: Whenever you add SSH keys and firewall rules, ensure that you restart the server from the control panel.