In case you are expanding your website and need more facilities, then upgrading your plan using our system is a very easy, straightforward process that can be done at the tap of few clicks right in your mPanel. There will not be any downtime and the upgrade will also automatically be made when it is completed.
This tutorial will offer a step by step procedure of shifting to a more robust plan that will facilitate the further success of your web site.
Prerequisite
Log in to mPanel: You need to go to your client area, and in the menu of your hosting services, log in to the mPanel interface.
Step-by-Step Guide
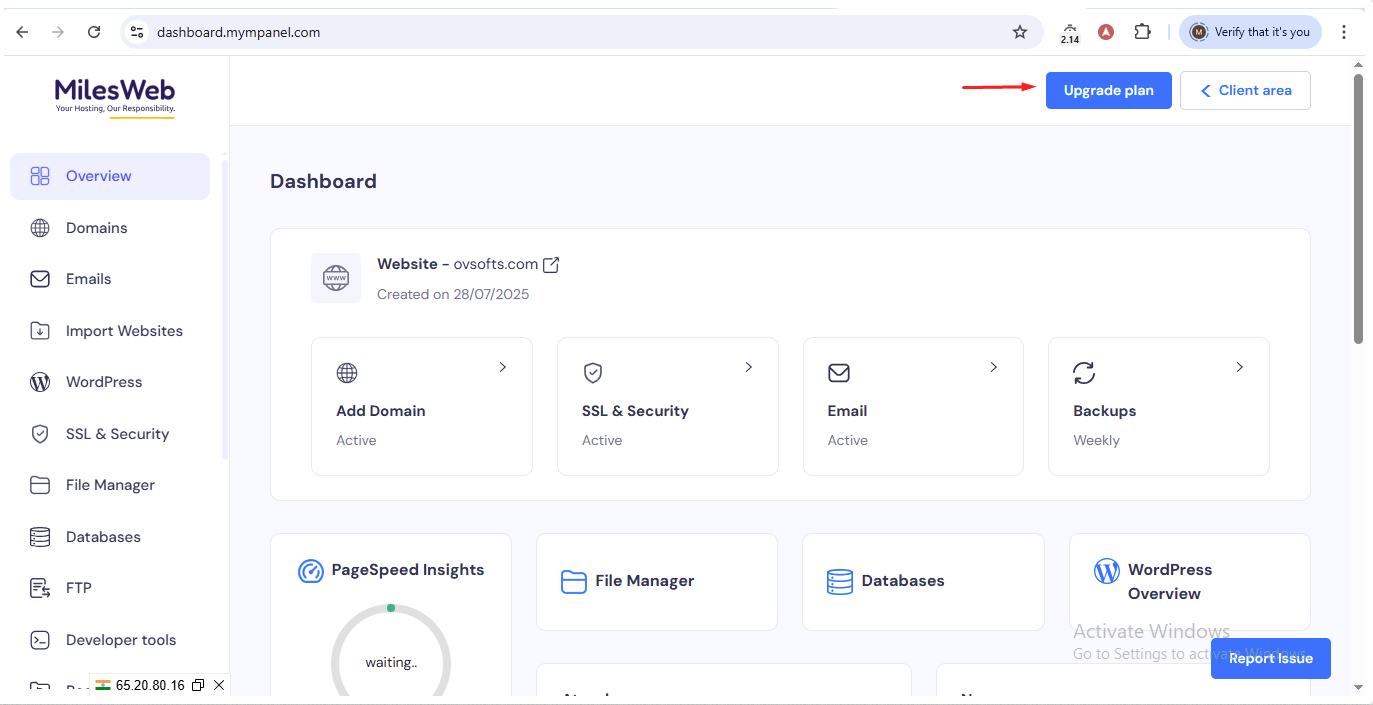
Step 1: Find the Upgrade Button
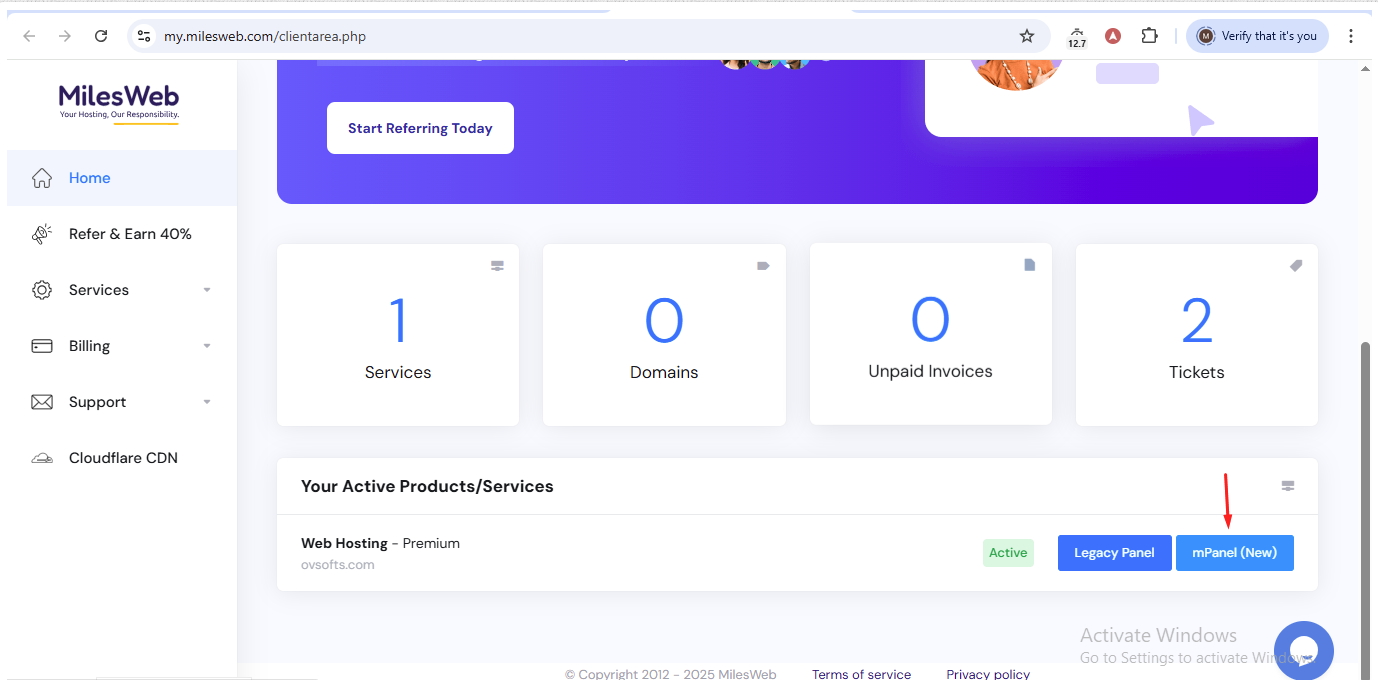
After signing in to mPanel regarding the particular hosting service, find the button marked Upgrade or a similar one. This choice is usually placed on the dashboard or in the service management section.
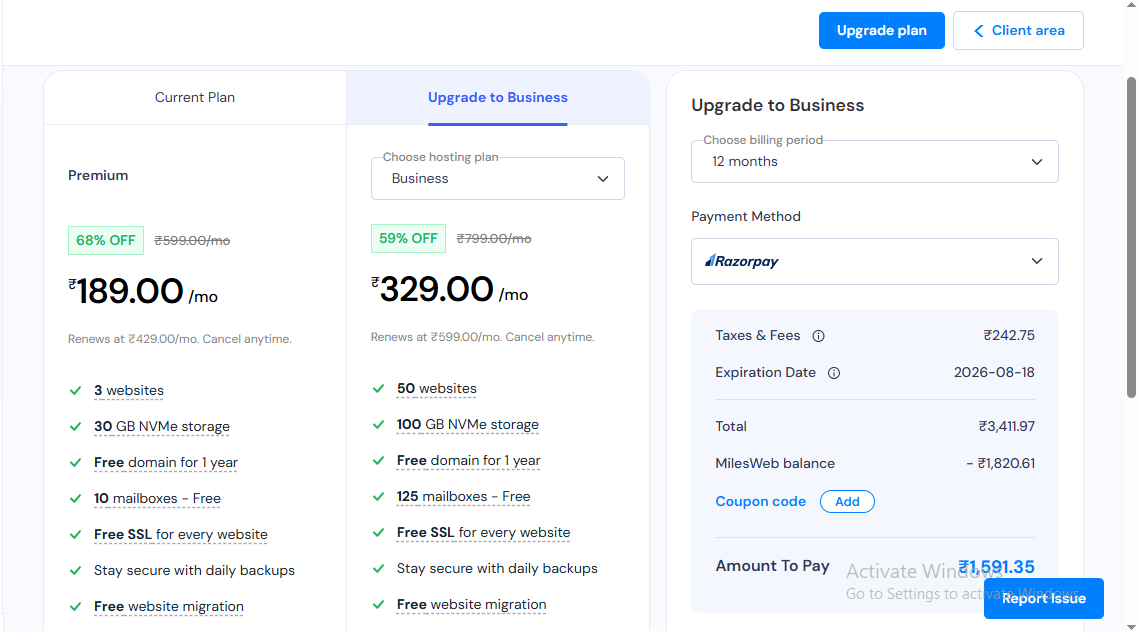
Step 2: Choose Your New Plan and Billing Cycle
After the choice of Upgrade, the list of hosting plans will be offered. Choose the plan that you want to upgrade to.
After that, choose your preferred billing cycle. The system will automatically be able to compute the prorated amount due considering the amount of time you have left in your current plan and the price of the new plan.
Step 3: Revise and Finalize the Payment
Examine the differential in the table. This amount is the pro rata amount that is indicated to pay the upgrade to the rest of your bill. Checkout and complete the payment with your choice of technique.
After the payment confirmation, the upgrade will automatically be done by our system. Your site will then run on the new and more powerful plan and no further effort on your part will be needed.
In case of any questions or any difficulties in the process of upgrading, our support department is always ready to help you.


